
Since Apple released macOS Catalina earlier this week, there are certain features that everyone has been talking about. There’s Side Car, which lets you use an iPad as a second screen, and Find My, which helps you find a lost iPhone without a WiFi signal. However, there are lots of cool new features that no one has been talking about. These easy-to-use features give you more ways to be productive while doing every-day tasks. Here are the best new features in macOS Catalina that no one is talking about.
Split View
If you spend all day dragging apps around and resizing windows, you’ll love Split View. This highly-anticipated feature allows you to quickly fill your screen with two apps without resizing any windows. With Split View, you can check out a web page about Bangkok on the left side of your screen while searching for map locations on the right.
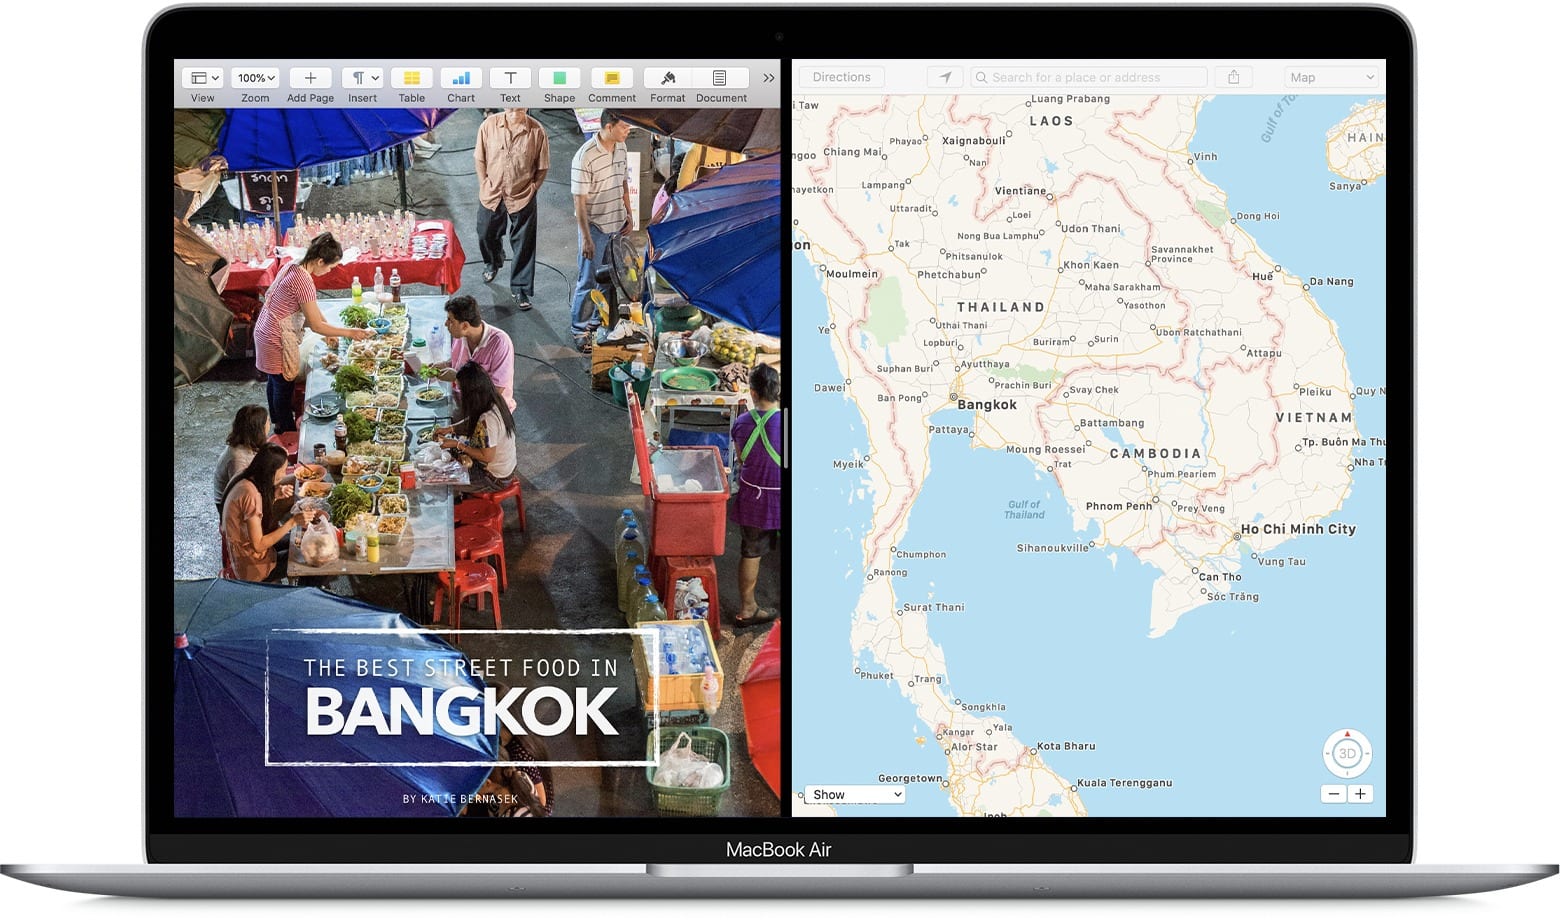
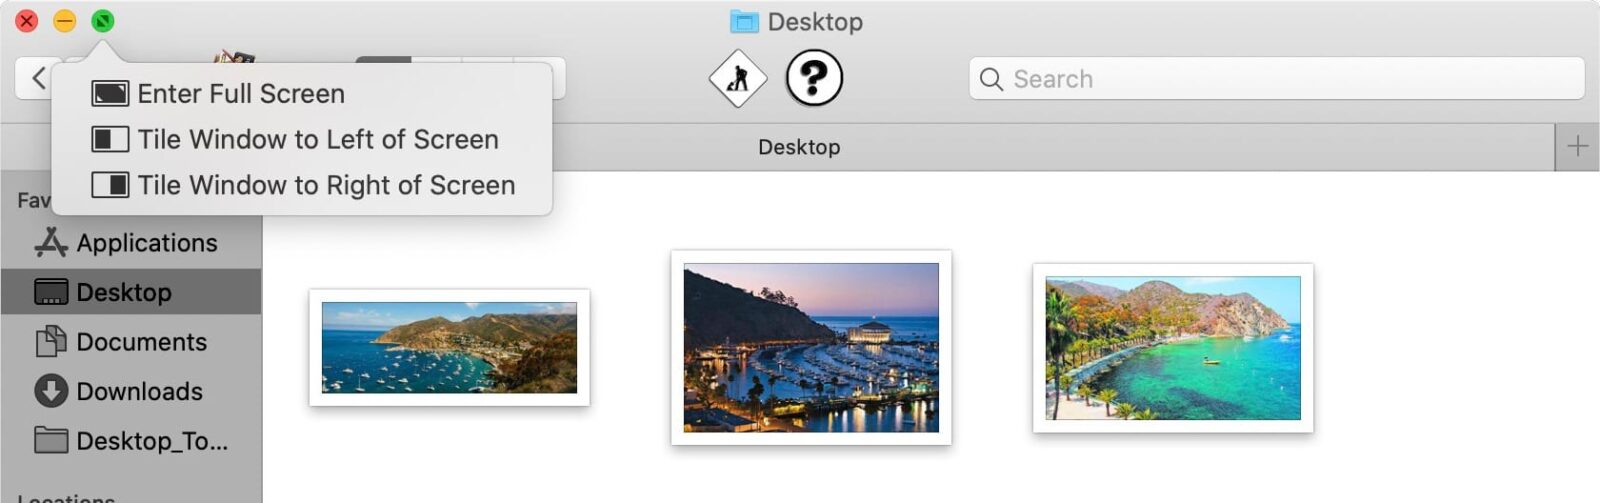
You can enable Split View by clicking and holding the green maximize button at the top of a window. When you see a drop-down menu appear, you can either choose to enter full-screen mode or make the app fill the left or right side of the screen. Then you can choose another app to fill the other side of the screen.
Once you have your windows positioned on either side of the screen, you can resize them by dragging the black bar in the center.
Window Snapping
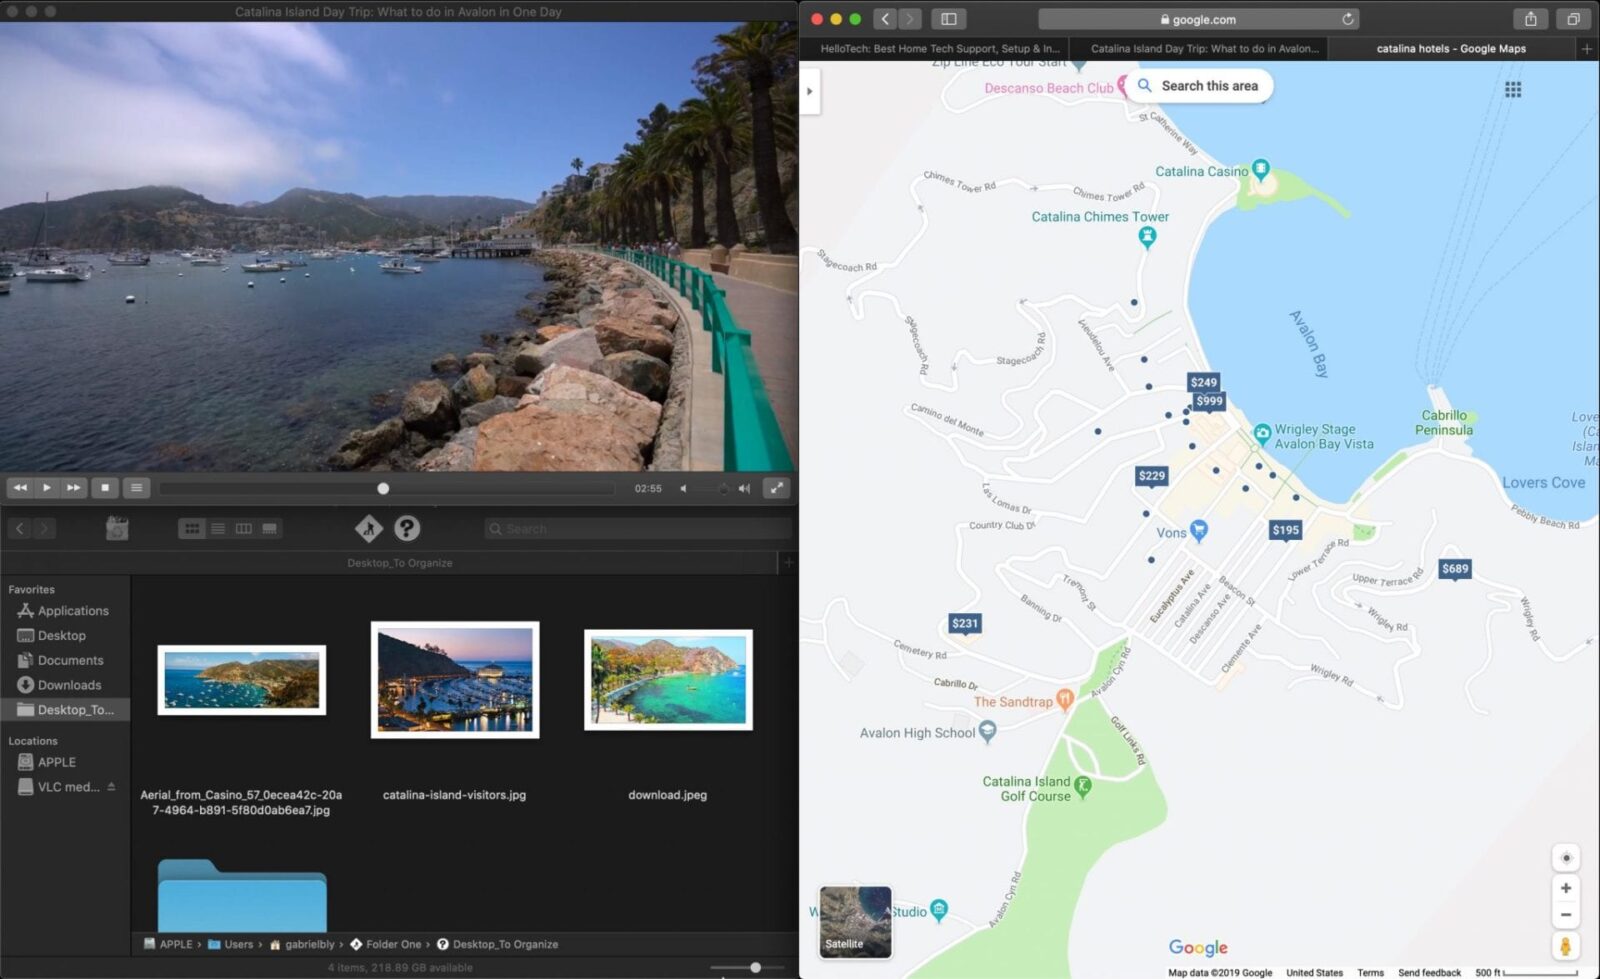
Apple took Split View a step further with Window Snapping, which allows you to split your screen into four sections. This feature helps you work with several windows in a clean layout that maximizes your screen space.
All you have to do is drag an app to one side of the screen. When you see a transparent box fill that side of the screen, release the mouse, and the window will resize itself. If you push the app against the right or left side of your screen, the window will fill up that half of the screen.
You can also drag an app to any corner to make the window fill a quarter of the screen. Or you can drag an app against the top of your screen to fill the screen with that window. Finally, you can drag a window to the bottom of your screen to make the window fill the center of your screen.
Hover Text
As computers get smaller and smaller, it’s becoming more difficult to read the shrinking text. With Hover Text, you no longer have to squint. With this feature, you can magnify any text with the push of a button.
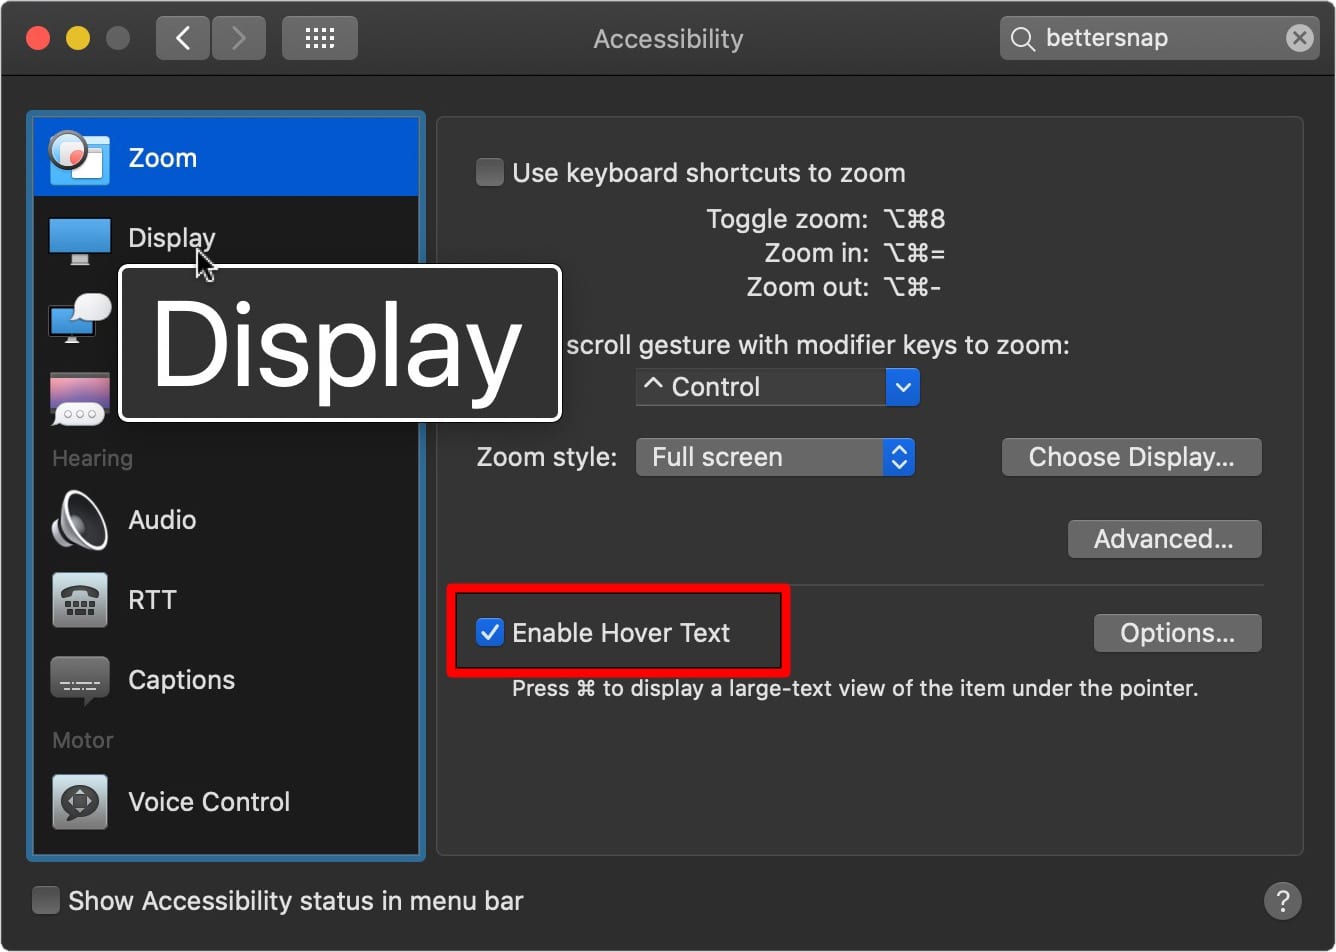
In order to enable the Hover Over feature, click on the Apple logo in the top left corner of your screen and select System Preferences. Then select Accessibility and click on Zoom in the left sidebar. Finally, click the box next to Enable Hover Text.
Then, all you have to do is hold the Command button while hovering over text in order to magnify any text in any app. You can also change the button that turns on Hover Text in the same System Preferences window by clicking Options. Then choose a new button from the drop-down menu under Activation Modifier.
Voice Control
Move over Siri, there’s a new way to talk to your computer. Voice Control is designed for those who are unable to use a mouse or a trackpad, but it can be used by anyone. With Voice Control, you can tell your computer to open apps, perform searches, scroll down a page, and, of course, dictate and edit text.
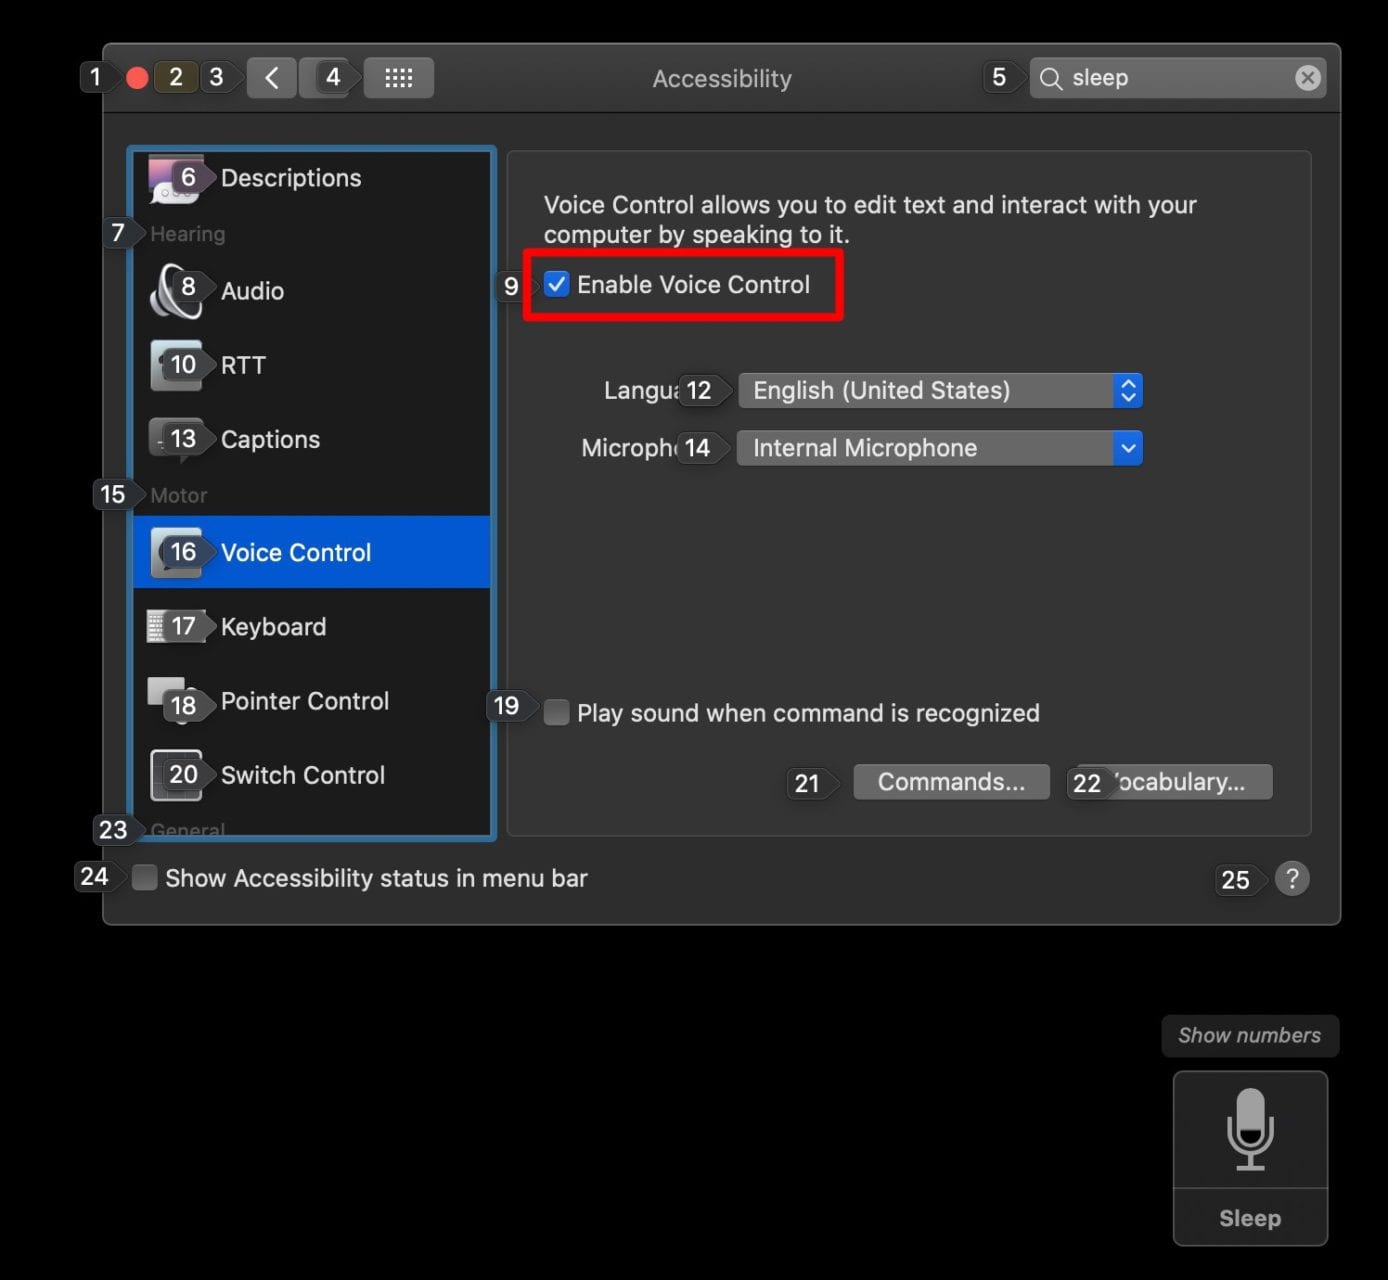
To enable this new macOS feature in Catalina, go into System Preferences, click on Accessibility, and select Voice Control from the left sidebar. Then click the box next to Enable Voice Control. This will cause a floating microphone icon to appear in the bottom-right corner of your screen.
One of the best commands for navigation is “show numbers.” When you say this, your screen will be filled with lots of little numbers next to any clickable buttons. If you say one of these numbers, that button will be activated.
You can also use commands like “open Safari,” and “search for Brown Betty recipe,” and “scroll down.” This makes Voice Control a perfect feature for hands-free navigating while you’re cooking.
To see a full list of available commands, click the commands button at the bottom of the same System Preferences window.
Auto Dark Mode
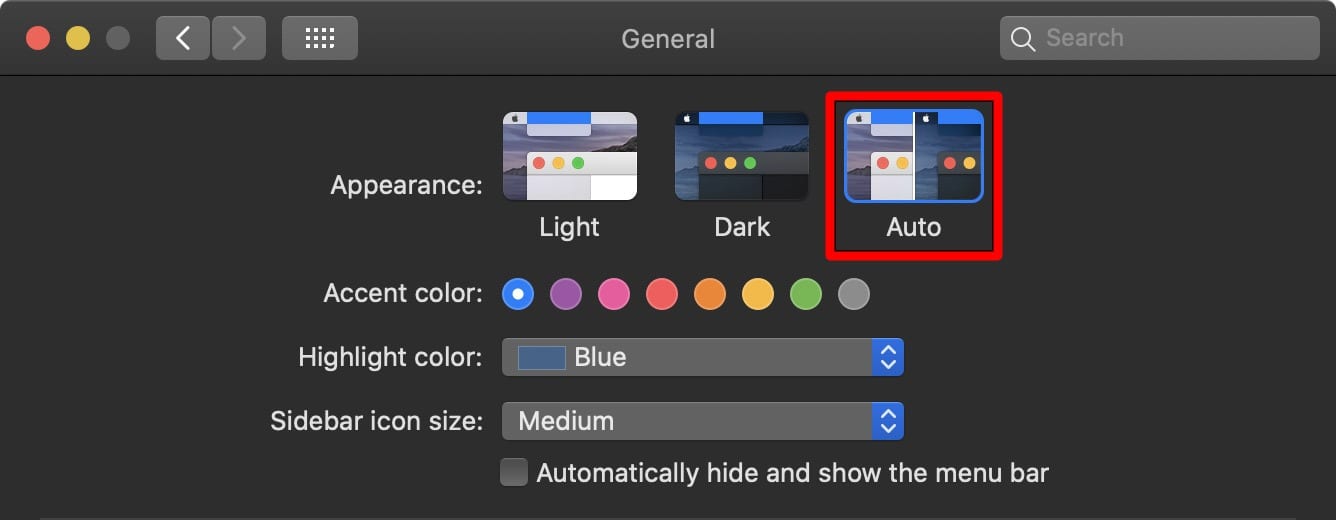
Last year, everyone was excited about getting Dark Mode in Apple’s last operating system upgrade. But not everyone wants a dark screen all the time. Now you don’t have to turn Dark Mode on and off every day. With Auto Mode, your Mac will automatically turn Dark Mode off during the day and turn it back on at night.
To enable this macOS feature in Catalina, go in System Preferences, select General, and select Auto.
Drag and Drop to Sync iPhone

One of the biggest changes Apple made in Catalina was getting rid of iTunes and replacing it with three new apps. Now, all your music will be stored in the Apple Music app, while your movies and TV shows will be in the Apple TV app, and podcasts will have their own app as well.
Since iTunes is gone, you will now back up, restore, and sync your iPhones and other devices with the Finder app instead. Once you plug in your iPhone or any other iOS device, it will show up in the left sidebar of your Finder window.
If you don’t see your iPhone in the sidebar, click Finder in the top menu bar and select Preferences from the drop-down menu. Then select the Sidebar tab and check the box next to CDs, DVDs, and iOS devices.
Now that your devices act more like external hard drives, you can add music and other media by simply dragging and dropping the files into your device’s window. To add media to your iOS device, select it in the sidebar and drag a compatible media file into the window. Then click Sync, and it will be added.
If you want to know more about how to sync music and media to your iPhone in Catalina, check out our blog here.
How to Install macOS Catalina
Before you decide to update your Mac, make sure to back up any important data. The upgrade won’t wipe your computer, but you can lose data if something goes wrong.
- Go to the App Store and search for macOS Catalina.
- Then click View.
- Click the Get button to download.
- When you see a Software Update window open, click Upgrade Now. Wait for the upgrade to download. If you don’t see the Software Update Window, find the installer in your Applications folder and double click it.
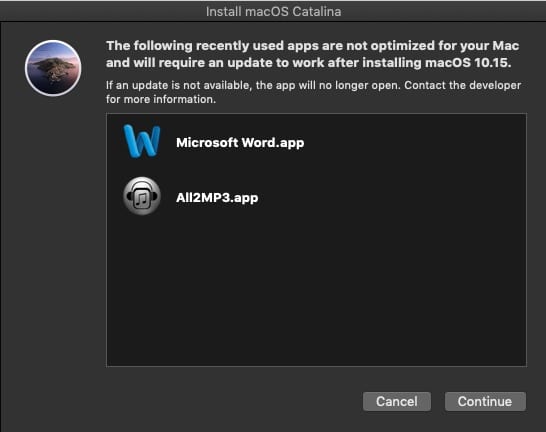
- Follow the on-screen instruction in the downloader. Depending on what applications you have installed, you might get a warning screen that lets you know they won’t work in Catalina. You will need to reinstall these apps if you upgrade, which might require that you buy them again. Other apps might not be compatible with Catalina at all.
- When the installer finishes, click Restart. When your computer restarts, macOS Catalina will replace your old operating system.
The Catalina upgrade is free to download, and it will work with most Mac computers that were released in 2012 or later. To see if your computer is compatible with macOS Catalina, check Apple’s website here. You can find out what model you have by clicking the Apple icon in the top left corner and clicking About This Mac.

