Whether you got a computer from work, bought it second-hand, or you just entered the wrong name while setting up your PC, the administrator’s name can always be changed later on your Windows computer.
If the administrator account you want to change is linked to a Microsoft account, you can change an admin’s name by going to settings > Accounts > Your Info, and then clicking on the Manage my Microsoft Account option. This will take you to Microsoft’s website, where you can edit your profile. Make sure to restart your device after you’re done. Here’s how to change an administrator name on Windows 10:
Once you restart, you will see your new username on the sign-in screen.
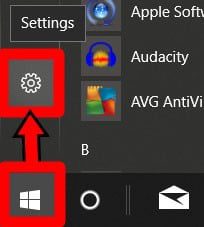
- Open the Windows Start menu. You can do this by clicking the button in the lower-left corner of your screen shaped like the Windows logo.
- Then select Settings. This is the gear-shaped icon just above the power button.
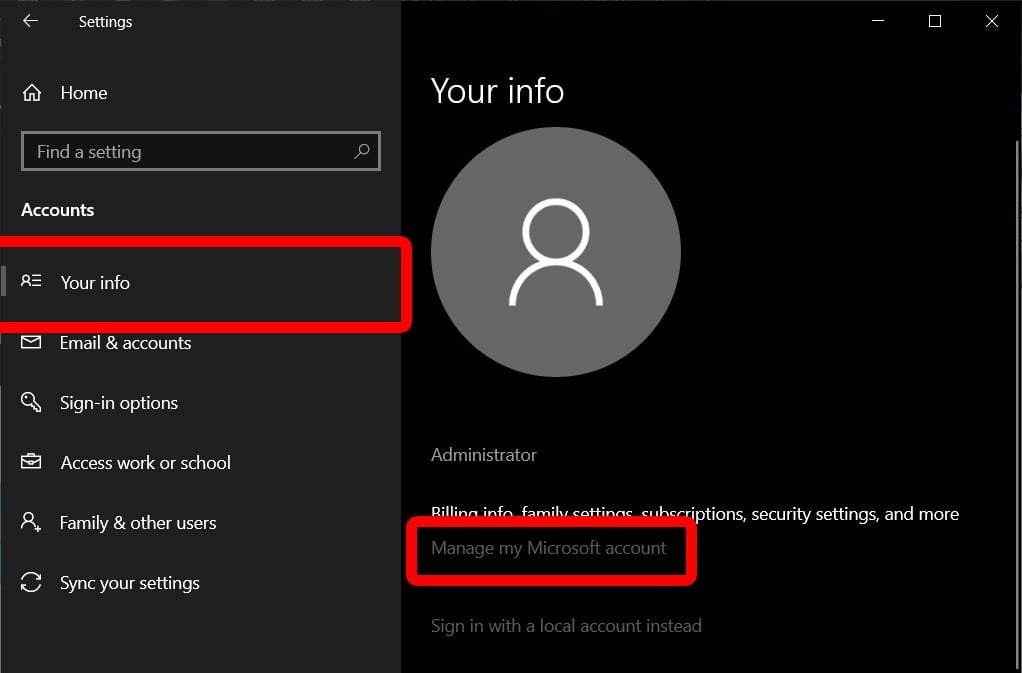
- Then click on Accounts.
- Next, click on Your info. You can find this option in the left sidebar.
- Click on Manage my Microsoft Account. This will take you to your Microsoft account webpage.
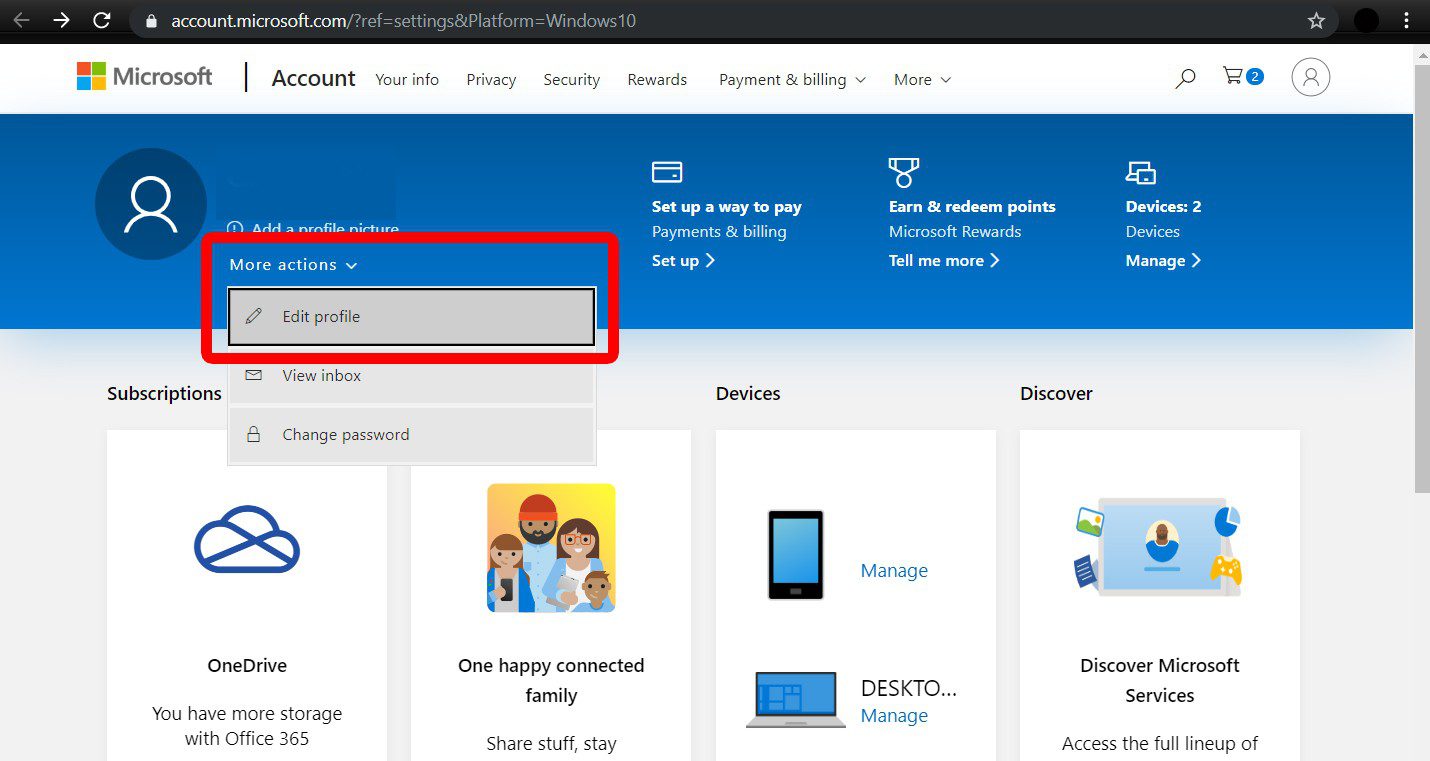
- Then click More actions. You can find this drop-down menu next to your user account name in the top left corner.
- Next, click Edit profile from the drop-down menu.
- Then click Edit name under your current account name.
- Enter the new first and last name that you want.
- Enter the Captcha code.
- Then click Save.
- Restart your computer for the changes to go into effect.
How to Change Administrator Name via Advanced Control Panel
You can also change a user’s account name with Advanced Control Panel, which can be accessed by certain commands. The option appears when you click on Properties of the chosen user.
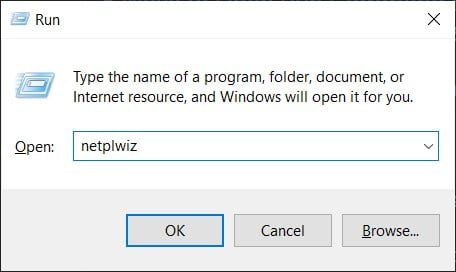
- Press the Windows key and R simultaneously on your keyboard. This will open the Run command tool.
- Type netplwiz in the Run command tool.
- Choose the account you would like to rename.
- Then click Properties.
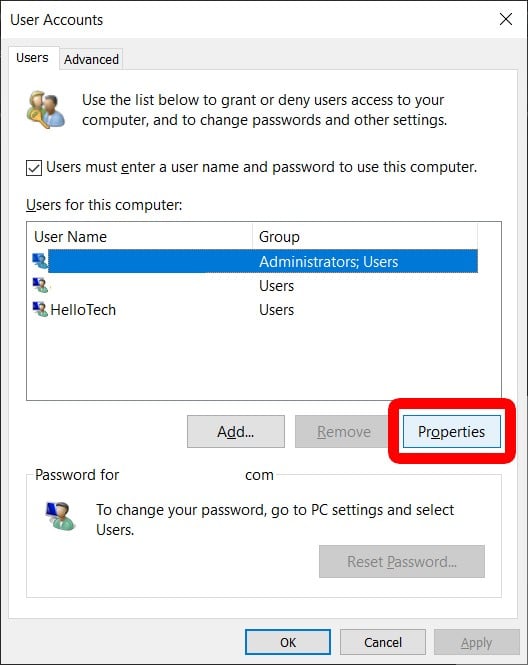
- Type a new username in the box under the General tab.
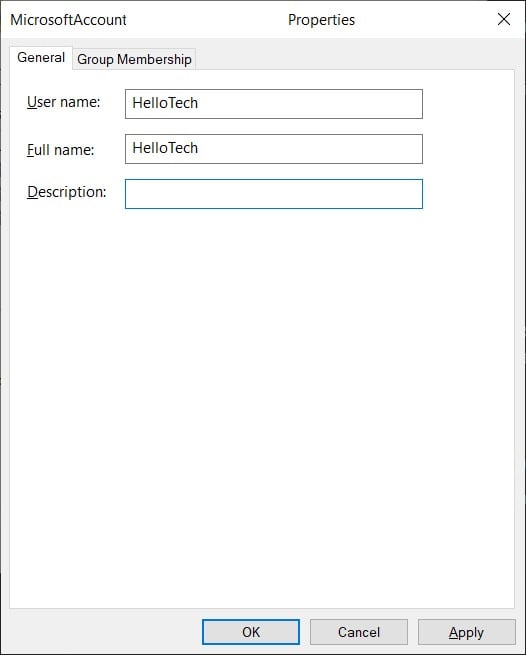
- Click OK.
- Click OK again on the User Accounts Panel.
If you are want to change the name of a local account, you will have to do so through Control Panel. Here’s how:
How to Change Administrator Name on Windows 10 via Control Panel
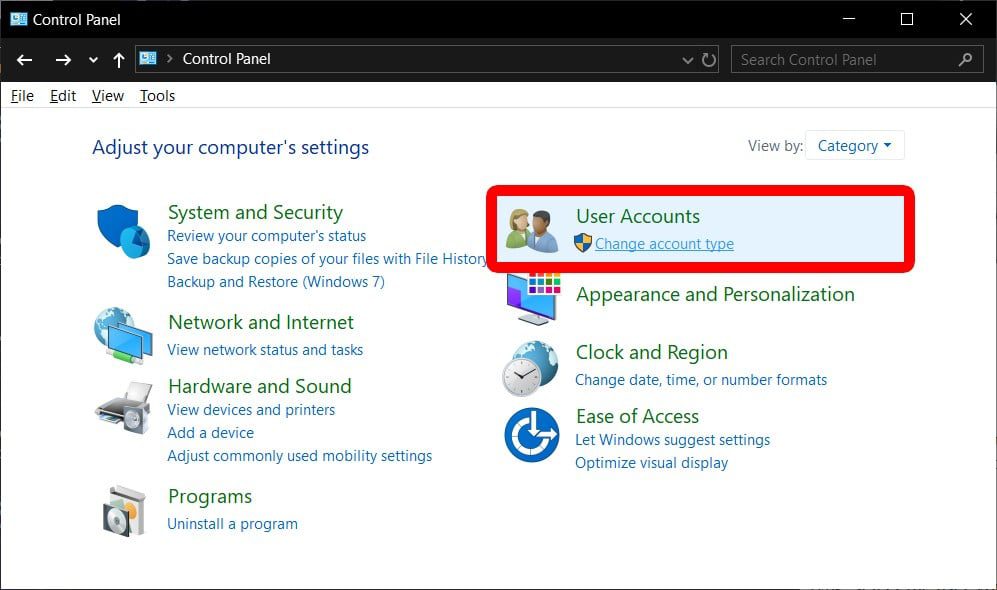
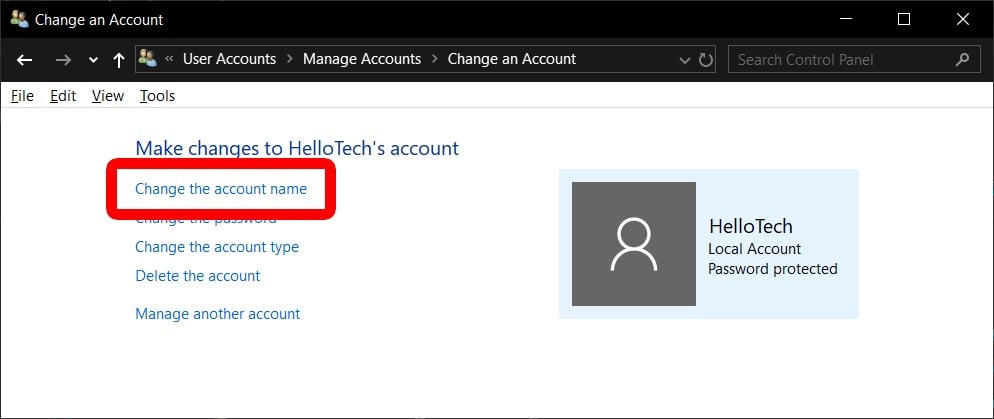
If you want to change an Administrator name that is not linked to a Microsoft Account, you can open the Control Panel and click Change account type.
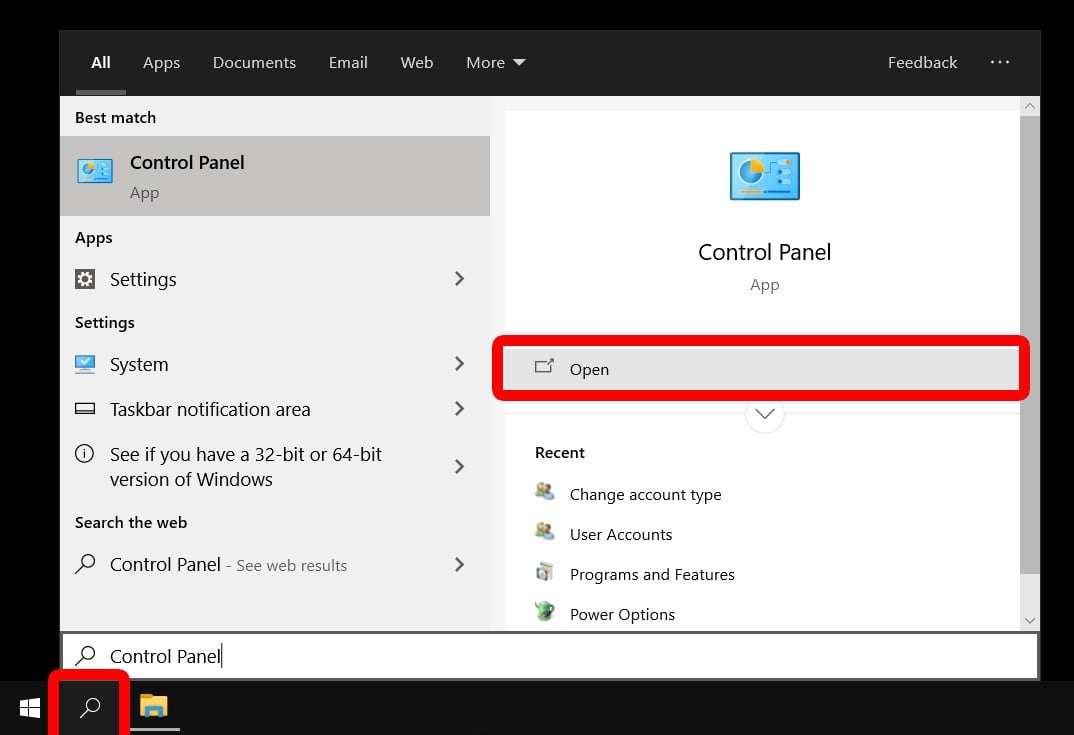
- Type Control Panel into the Windows Search Bar. You will find this by clicking the magnifying glass icon in the lower-left corner of your screen.
- Then click Open.
- Click on Change account type under Use Accounts.
- Select a user account you would like to rename.
- Click on Change the account name.
- Type the new user account name in the box.

- Finally, click on Change Name. Your changes will appear when you go back to the previous screen.
Now that you know how to change an administrator name on Windows 10, check out our guide on how to change an administrator account on Windows 10 here.
