By now, you probably know that your Alexa smart speakers are listening to you and that Amazon keeps a record of everything that your device hears. According to Amazon, your voice recordings are saved to “improve the accuracy of your interactions with Alexa.” If you care about your privacy, here’s how to delete all your Alexa history and stop Alexa from saving your voice recordings in the future.
Does Alexa Really Listen to Everything You Say?
All Amazon Echo devices will start recording your voice after you say “Alexa” (or something that sounds similar). Then your voice recording is sent to Amazon, where it is analyzed by speech recognition software. Then a command is sent back to your device, telling Alexa how to respond in a matter of milliseconds.
In a letter to a US Senator, Amazon claims that it saves Alexa voice recordings “until the customer chooses to delete them.” The company adds that when you delete a voice recording, the associated transcripts and audio recordings are also deleted from its servers.
How to Delete Alexa Recordings by Voice
You can delete your last voice recordings with voice commands by saying, “Alexa, delete what I just said” or “Alexa, delete everything I said today.” If you want to delete all your previous recordings, you can say, “Alexa, delete everything I’ve ever said.”
How to Delete Your Alexa Recording History in the App
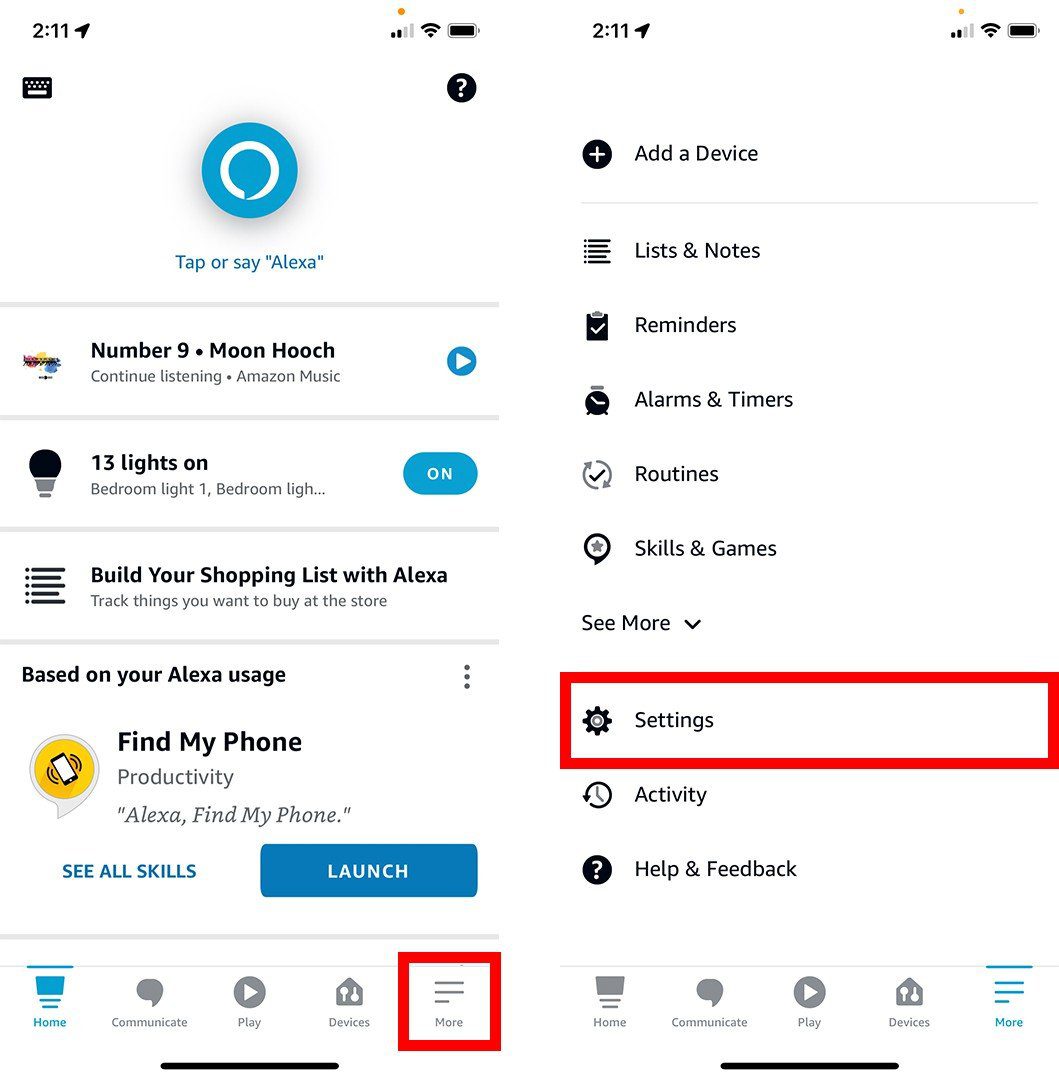
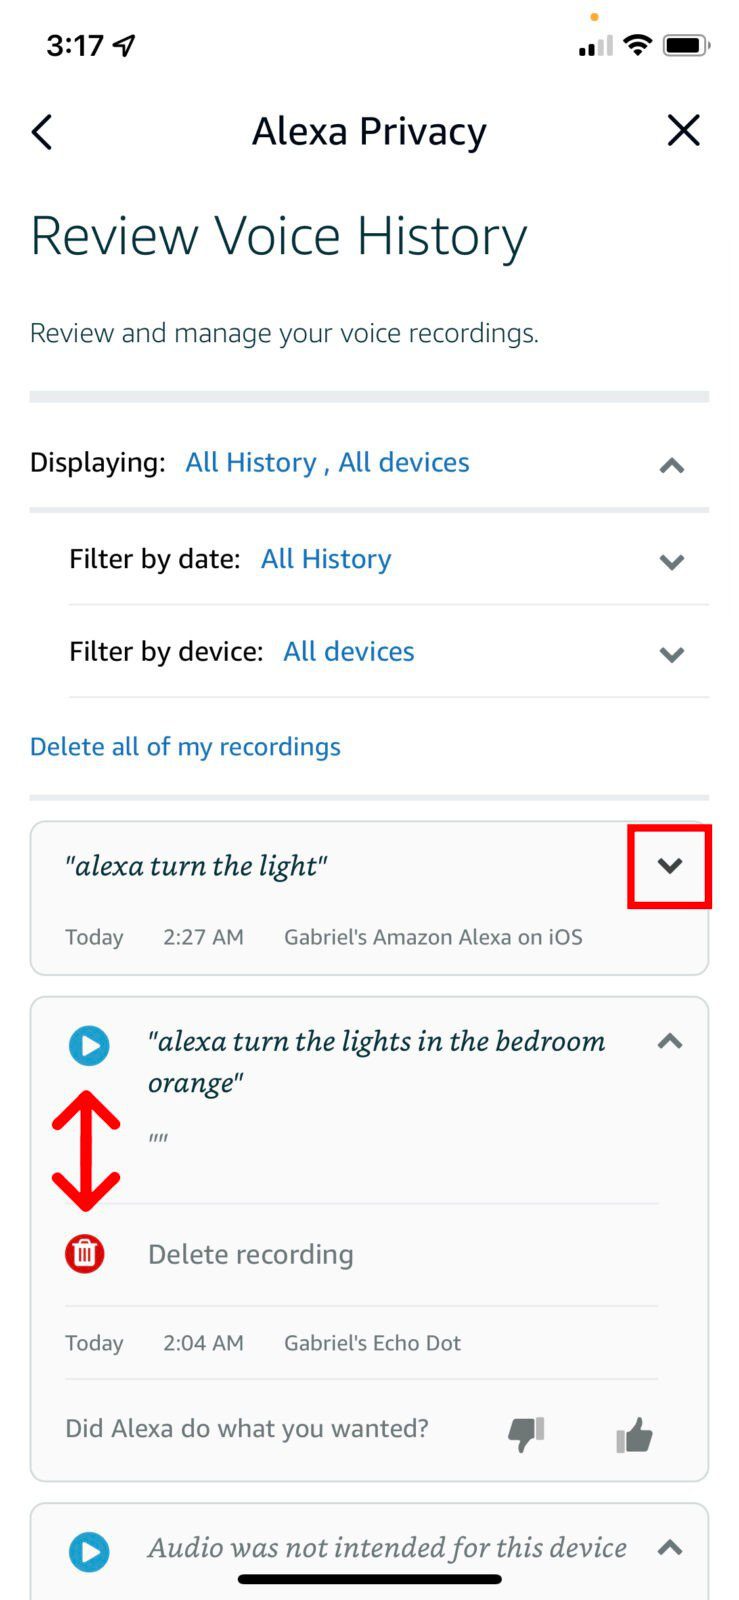
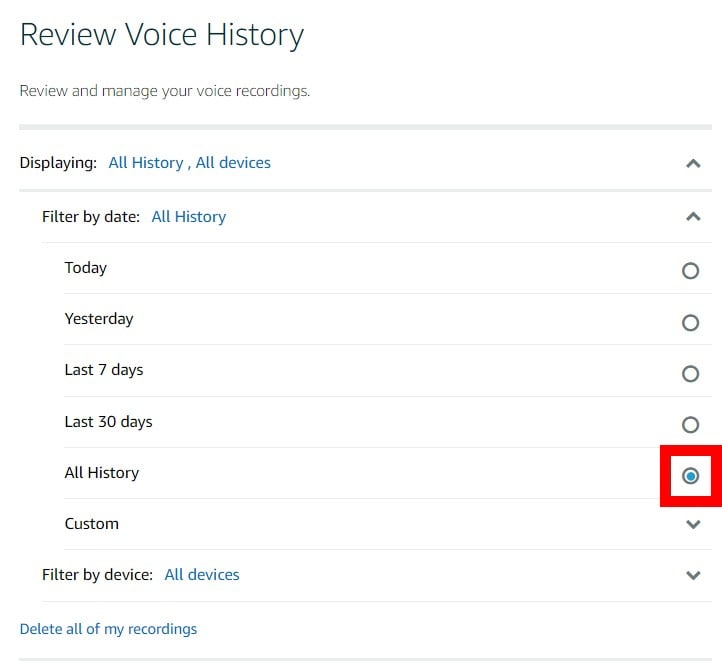
To delete all your Alexa recordings, open the Alexa app and go to More > Settings > Alexa Privacy > Review Voice History. Then tap the downward-facing arrow next to Displaying and then the arrow next to Filter by date. Next, select All History and tap Delete all of my recordings.
- Open the Alexa app. If you don’t already have the app, you can download it from the Apple App Store or the Google Play Store.
- Then tap More. You will see this three-line icon in the bottom-right corner of your screen.
- Next, tap Settings.
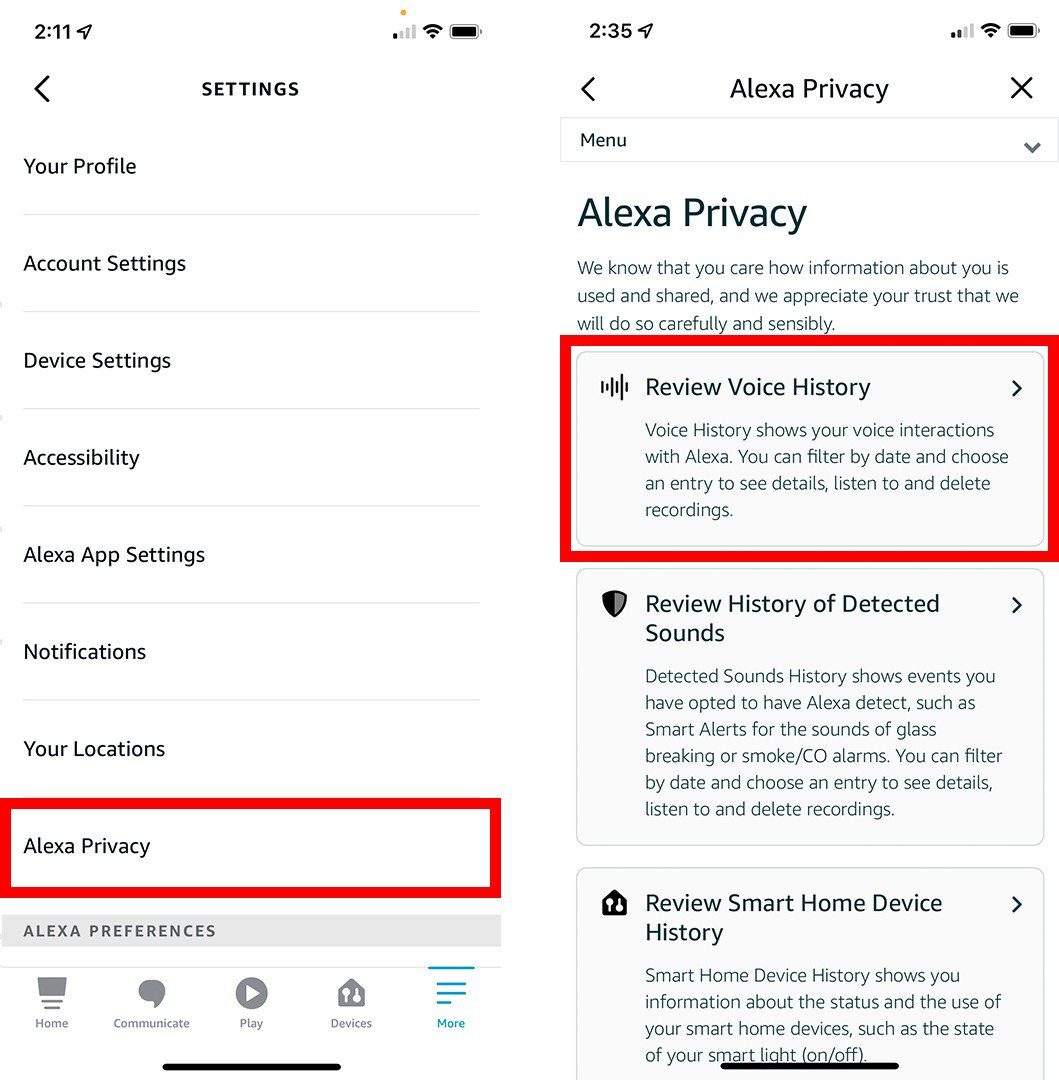
- Then tap Alexa Privacy.
- Next, select Review Voice History.
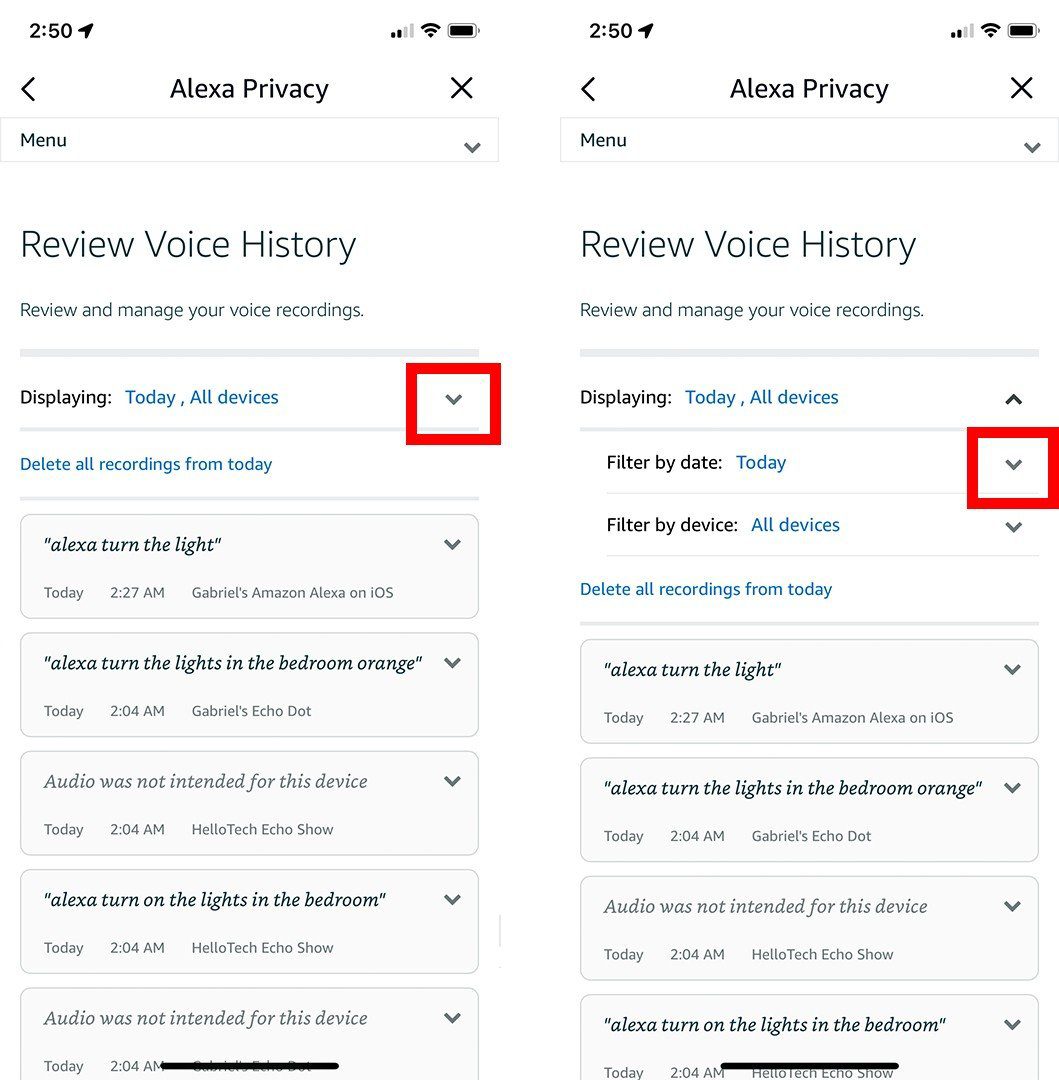
- Then tap the downward-facing arrow next to Displaying.
- Next, tap the arrow next to Filter by date. If you own multiple Alexa devices, also make sure to tap Filter by device and select All devices if it is not already selected.
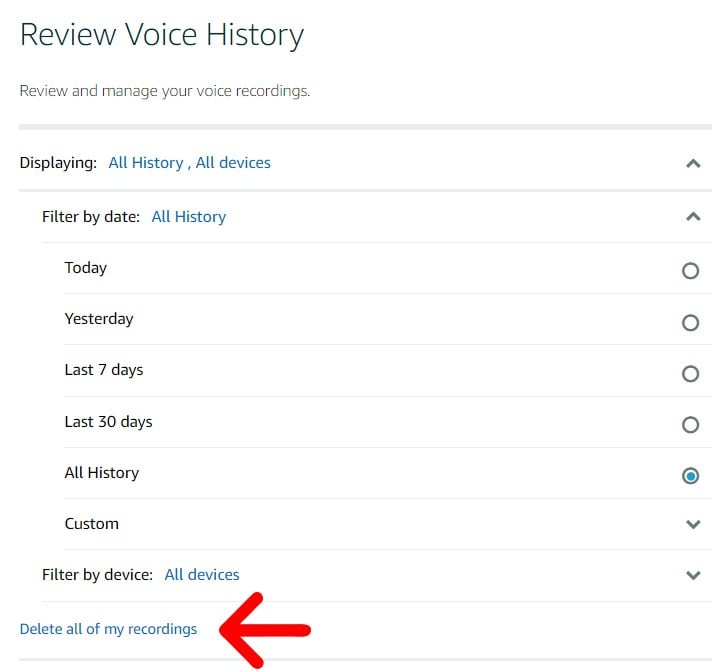
- Then select All History. You can also select another time range, depending on how many Alexa recordings you want to delete.
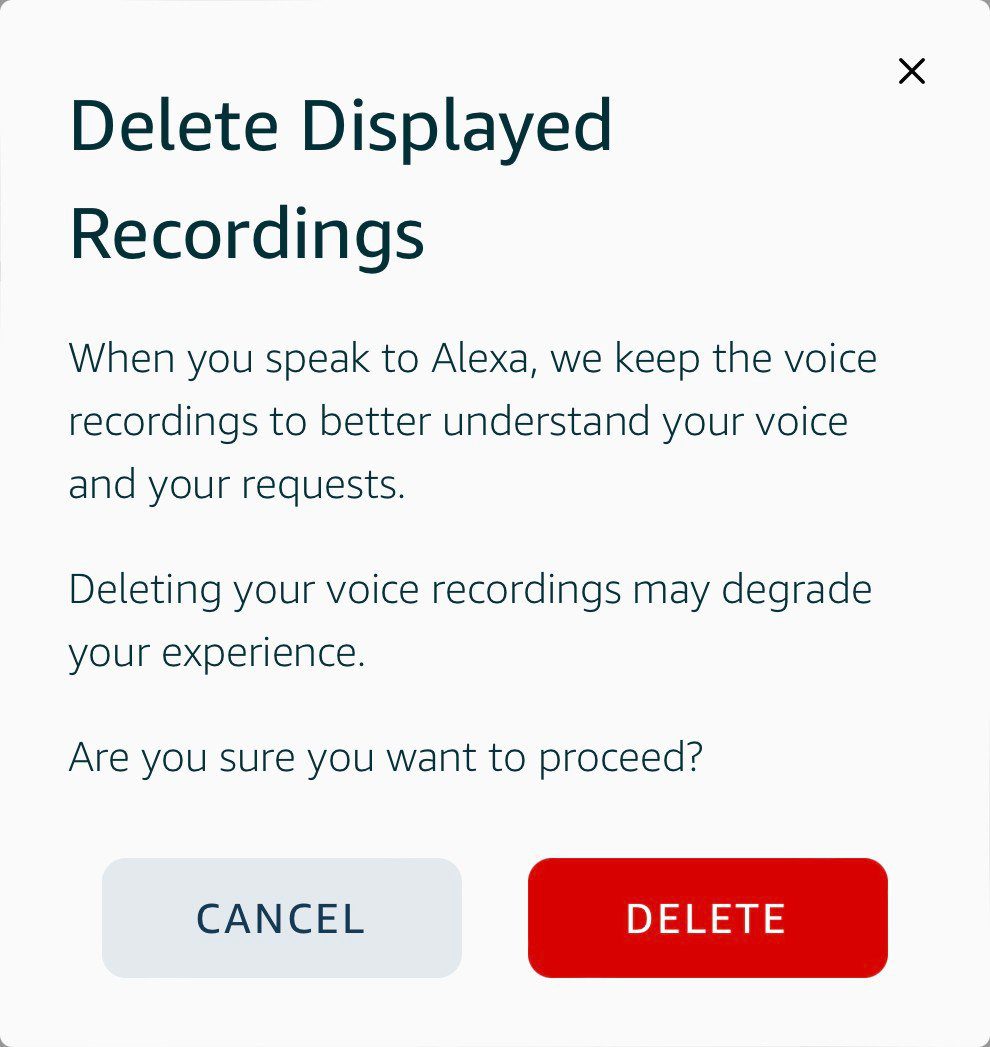
- Next, tap Delete all of my recordings.
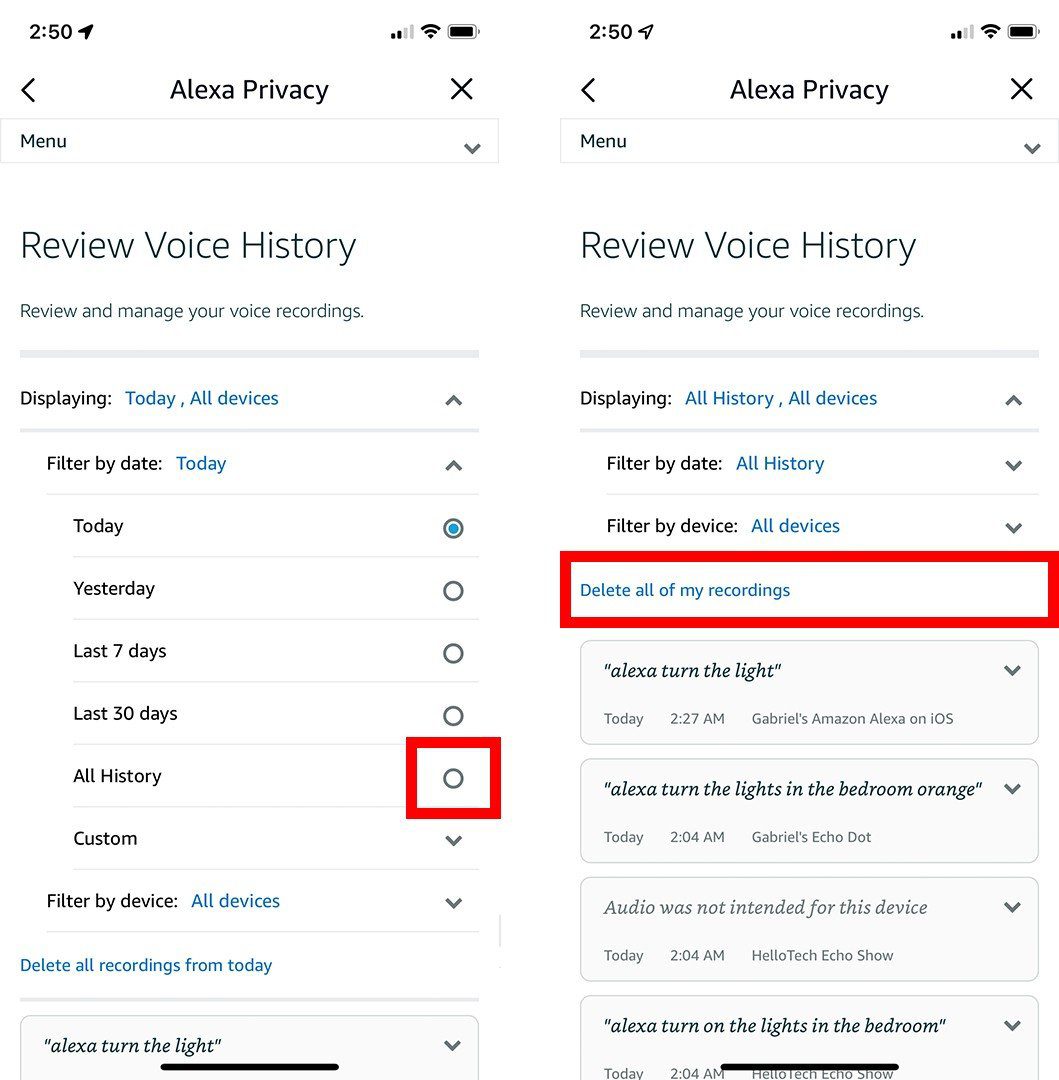
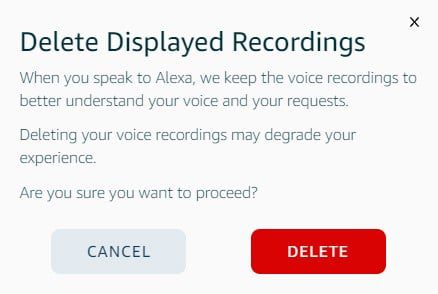
- Finally, tap Delete.
However, just because you deleted your voice recording history, that doesn’t mean Alexa will stop recording you in the future.
How to Stop Alexa from Saving Your Recordings
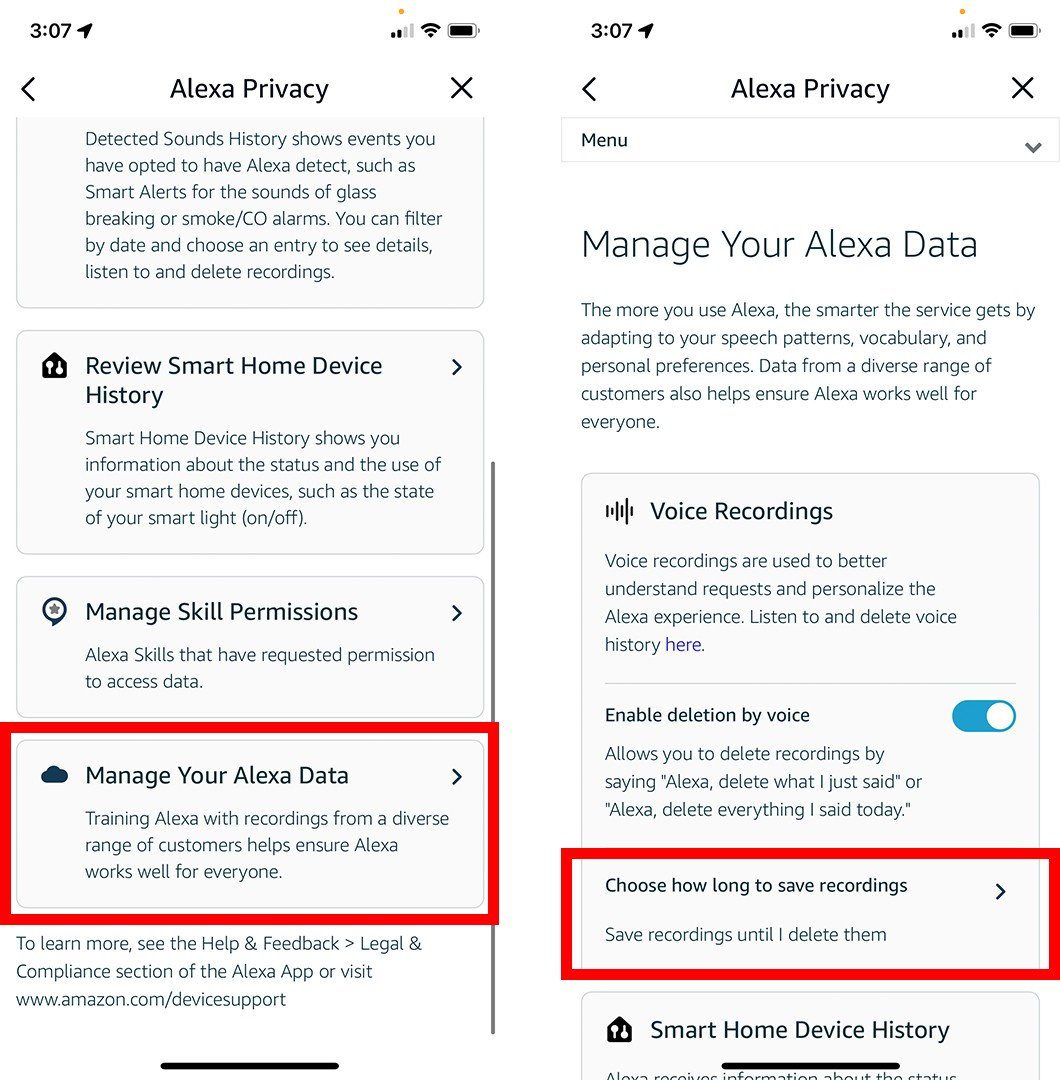
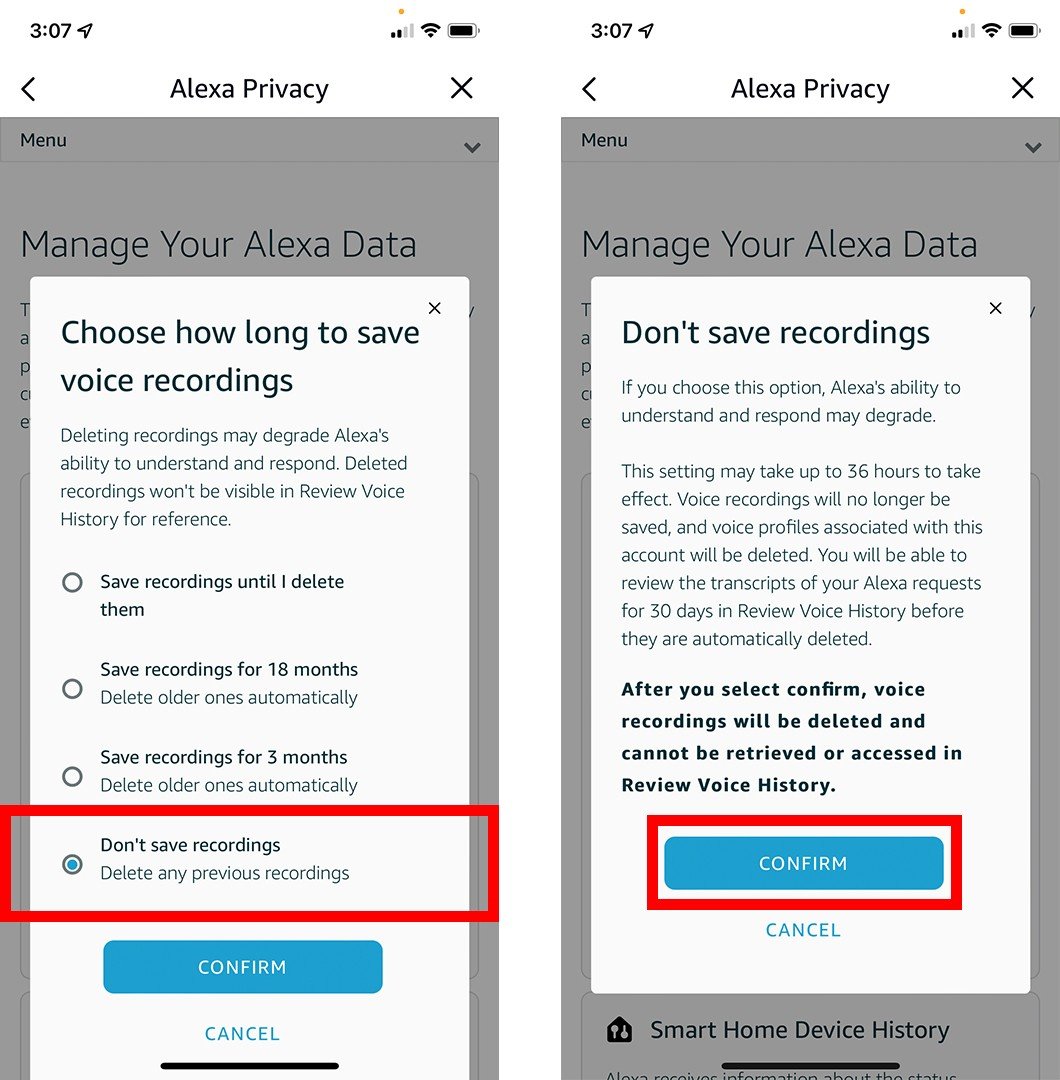
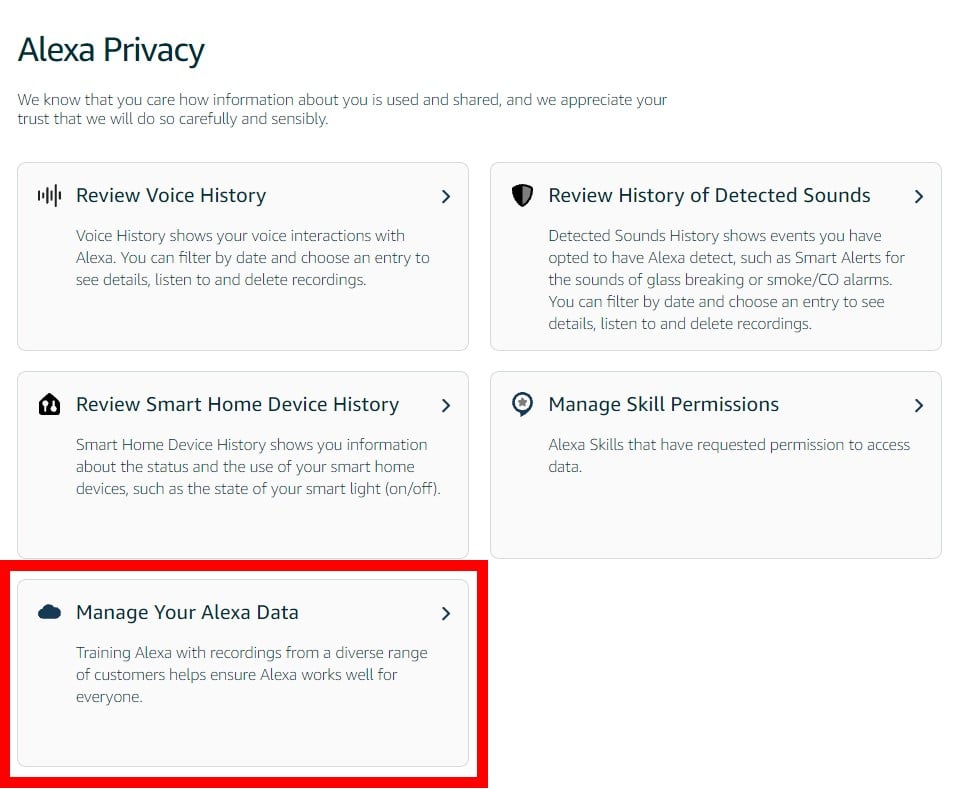
To stop your Alexa devices from saving your voice recordings, open the Alexa app and go to More > Settings > Alexa Privacy > Manage Your Alexa Data and tap Choose how long to save recordings. Then select Don’t save recordings and tap Confirm.
- Open the Alexa app.
- Then tap More.
- Next, tap Settings.
- Then tap Alexa Privacy.
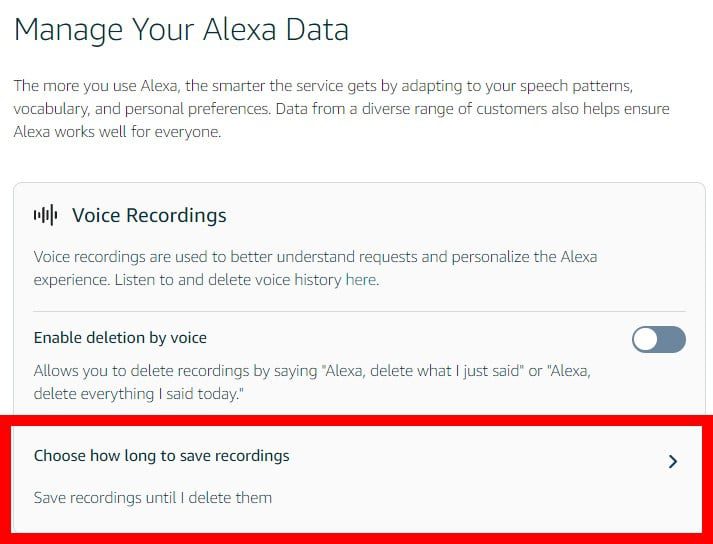
- Next, scroll down and select Manage Your Alexa Data.
- Then tap Choose how long to save recordings.
- Next, select Don’t save recordings and tap Confirm.
- Finally, tap Confirm again.
If you don’t have your smartphone, you can also delete your Alexa recordings on any web browser. Here’s how:
How to Erase Alexa Recording History Via Browser
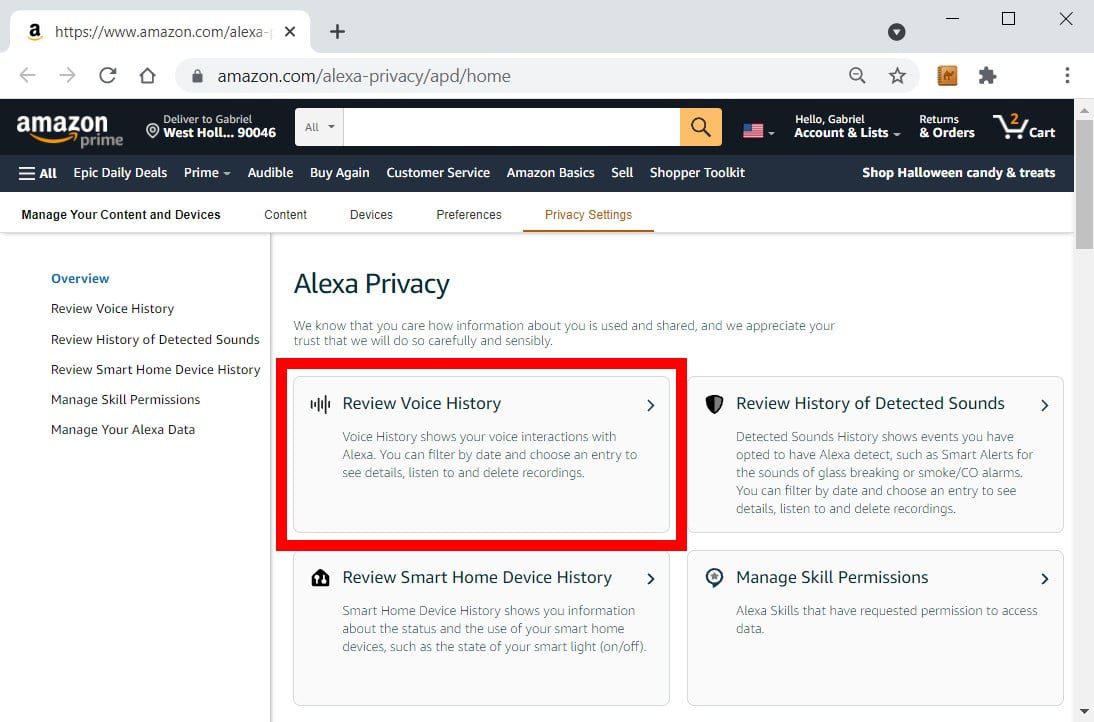
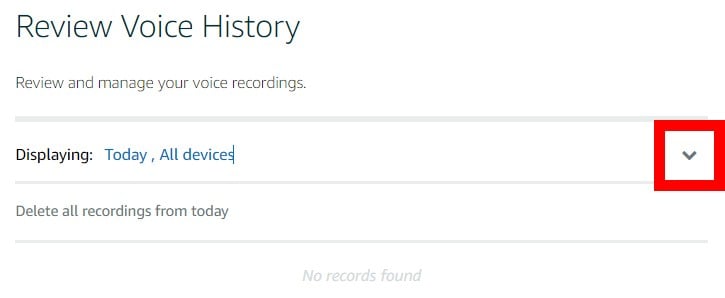
To erase your Alexa voice recordings on a web browser, go to amazon.com/alexa-privacy/apd/home and select Review Voice History. Then tap the downward-facing arrows next Displaying and then Filter by date. Finally, select All History and click Delete all of my recordings.
- Go to the Alexa Privacy Settings page on Amazon. You can find this at amazon.com/alexa-privacy/apd/home. You will have to sign in to your Amazon account if you aren’t already.
- Then select Review Voice History.
- Next, select the downward-facing arrow next to Displaying.
- Then select the downward-facing arrow next to Filter by date.
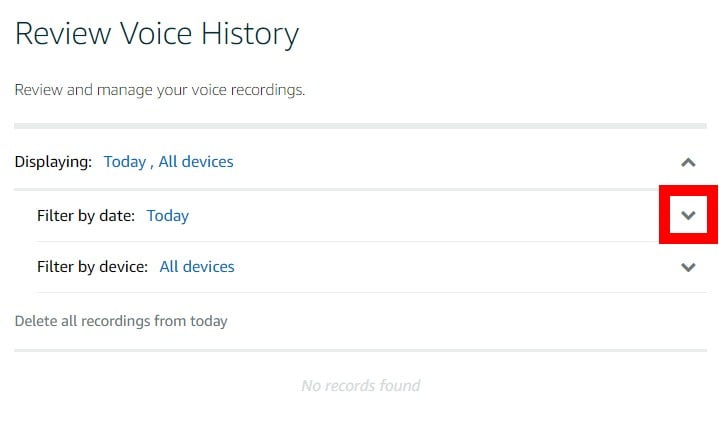
- Next, select All History.
- Then click Delete all of my recordings.
- Finally, click Delete.
How to Stop Alexa from Saving Your Voice Recordings
To stop Alexa from saving your voice recordings via a web browser, go to amazon.com/alexa-privacy/apd/home and select Manage Your Alexa Data. Then click Choose how long to save recordings and select Don’t save recordings. Finally, click Confirm and then Confirm.
- Go to amazon.com/alexa-privacy/apd/home.
- Then select Manage Your Alexa Data.
- Next, click Choose how long to save recordings.
- Then select Don’t save recordings and click Confirm.
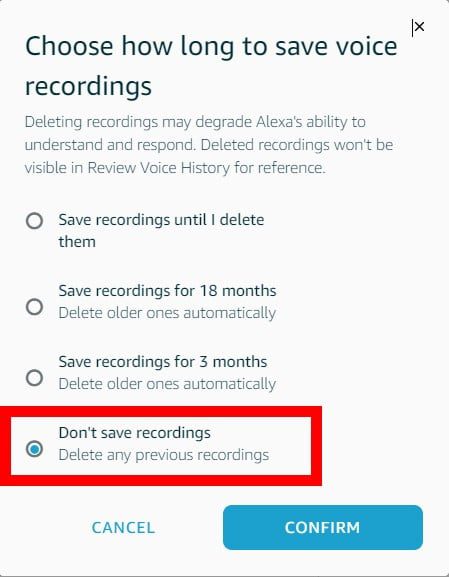
- Finally, click Confirm.

Once you know how to delete all your Alexa history, check out our list of the best smart home devices.
