Windows makes it easy to capture and save a picture of anything on your screen. Using keyboard shortcuts or the built-in Snipping Tool, you can quickly take a screenshot of your whole screen, a portion of your screen, or a specific window. Here are all the ways to take a screenshot on a Windows 10 or 11 PC and how to save your image on your computer.
How to Take a Screenshot Using Keyboard Shortcuts
To quickly take a screenshot of your whole screen, you can press the Print Screen (or PrtSc) button on your keyboard. To automatically save your screenshot to the Pictures folder on your computer, press the Windows + Print Screen buttons at the same time.
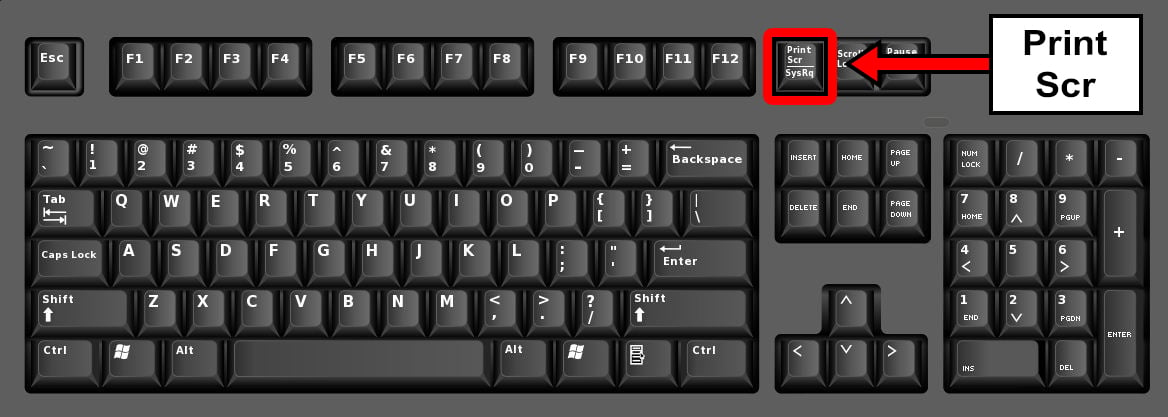
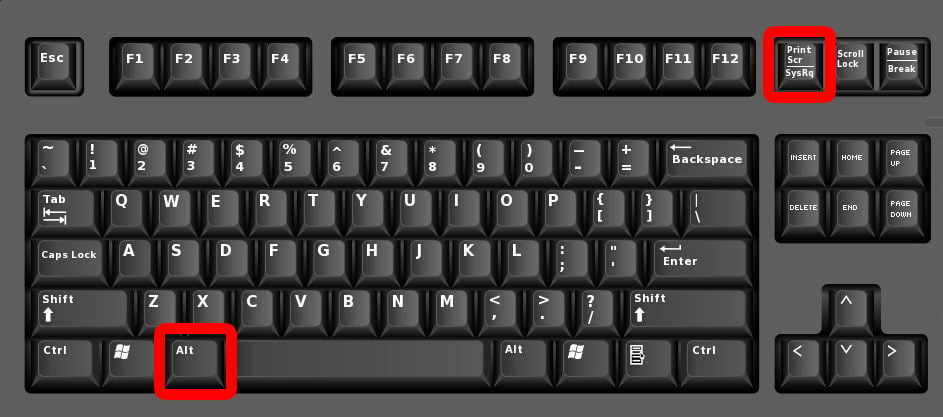
- To copy an image of your whole screen, press the Print Screen key. This button (which can also be labeled “PrtSc” or “Print Scr” on some keyboards) is located on the top row of most keyboards. More specifically, it is usually located just after the “F12” key.
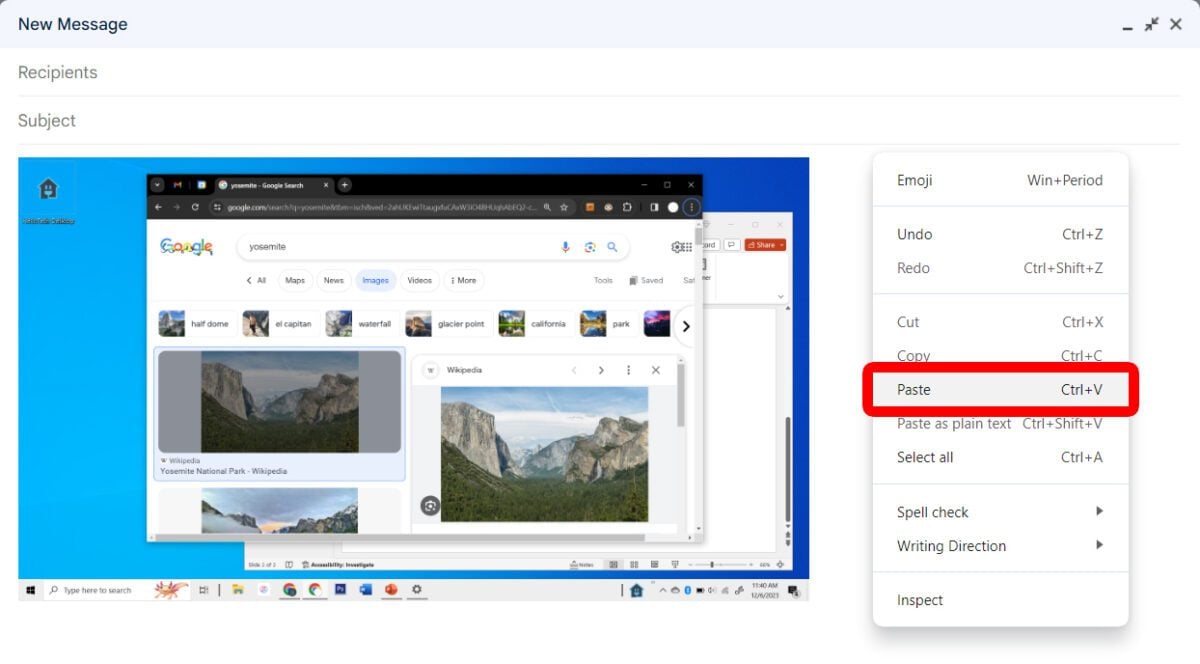
This method will only copy your screenshot. If you want to save your screenshot to your computer, you’ll need to open another application (like Microsoft Word, Paint, or a blank email). Then, you’ll need to paste the image by either right-clicking and selecting “paste” or by pressing the Ctrl + V keys on your keyboard.
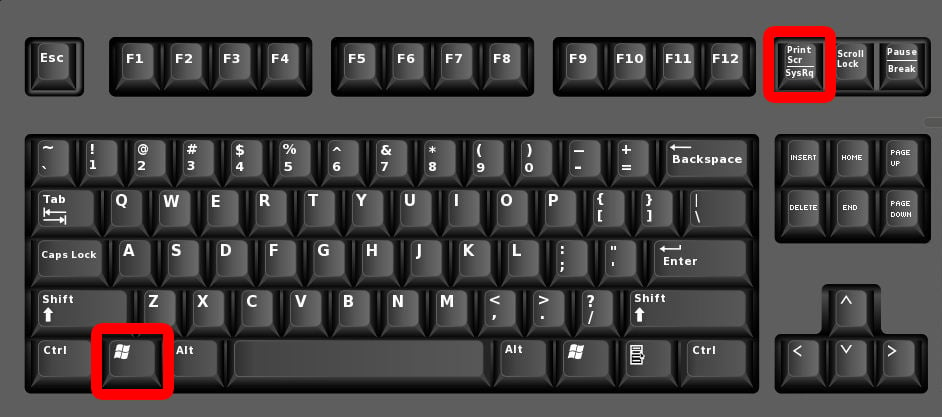
- To save an image of your whole screen, press the Windows + Print Screen keys. You’ll know that you have taken a screenshot when you see your screen flash.
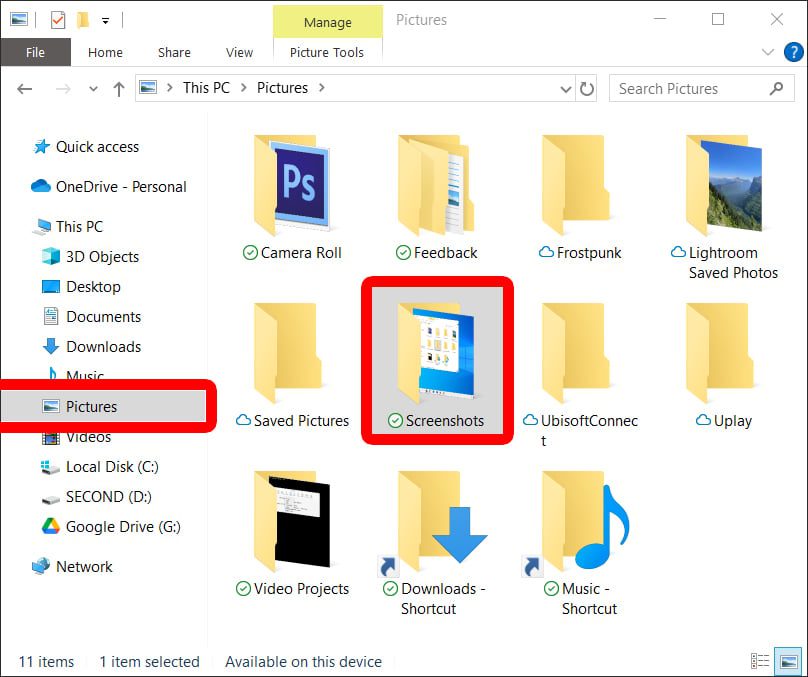
This method will automatically copy your screenshot and save an image to your computer. You can then find your saved image by opening File Explorer and going to ThisPC > Pictures > Screenshots.
- To copy a screenshot of your current window, press the Alt + PrtScn keys. This method will only save a copy of the window you currently have selected. For example, if you are surfing the web, you can press Alt + PrtScn to take a screenshot of the whole browser window you are using.
To save your screenshot, you will have to open another application and paste the image there using the Ctrl + V keys.
- To copy a screenshot of a specific area, press the Windows + Shift + S keys. When you press these keys at the same time, you will see your screen go dark, and your mouse pointer will turn into a cross.

In order to take a screenshot with this method, use your mouse to click and drag a box around the portion of the screen that you want to capture. Once you have the image that you want inside the box, just release the mouse button to copy the screenshot to your clipboard.
When you use this keyboard shortcut, a window will appear at the top of your screen. This will also allow you to take freeform screenshots, window screenshots, and fullscreen screenshots. All you have to do is click one of the options to change how you want to take a screenshot.

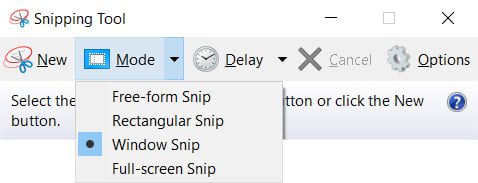
- Rectangular Snip: Allows you to draw a box around the image you want to capture.
- Free-form Snip: Allows you to capture any part of the screen you draw around.
- Window Snip: Allows you to take a screenshot of any window you select.
- Fullscreen Snip: Allows you to take a screenshot of your entire screen.
Since this method only copies your screenshots, you will have to open another application and paste the image there using the Ctrl + V keys.
Read More: The ultimate guide to Windows keyboard shortcuts
If you don’t want to use keyboard shortcuts, you can also use the Windows Snipping tool to take different kinds of screenshots. Here’s how:
How to Take a Screenshot Using the Windows Snipping Tool
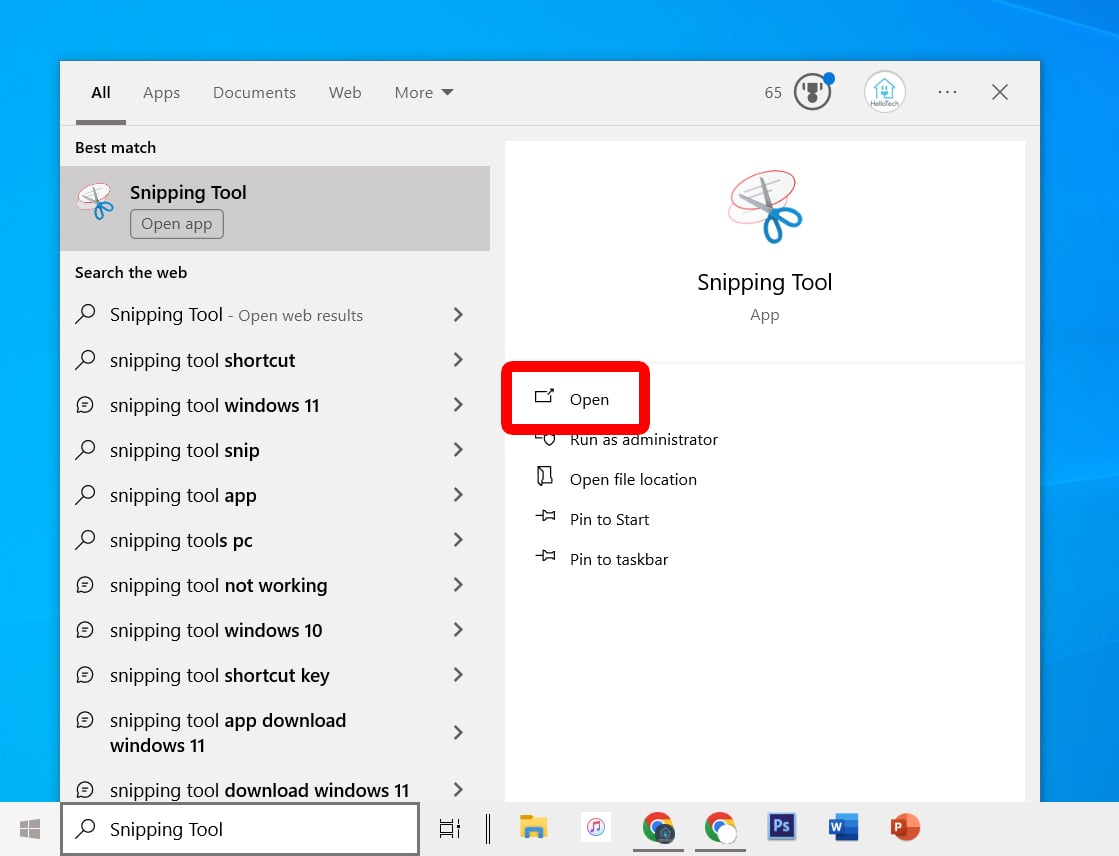
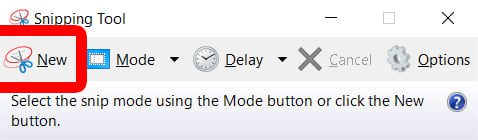
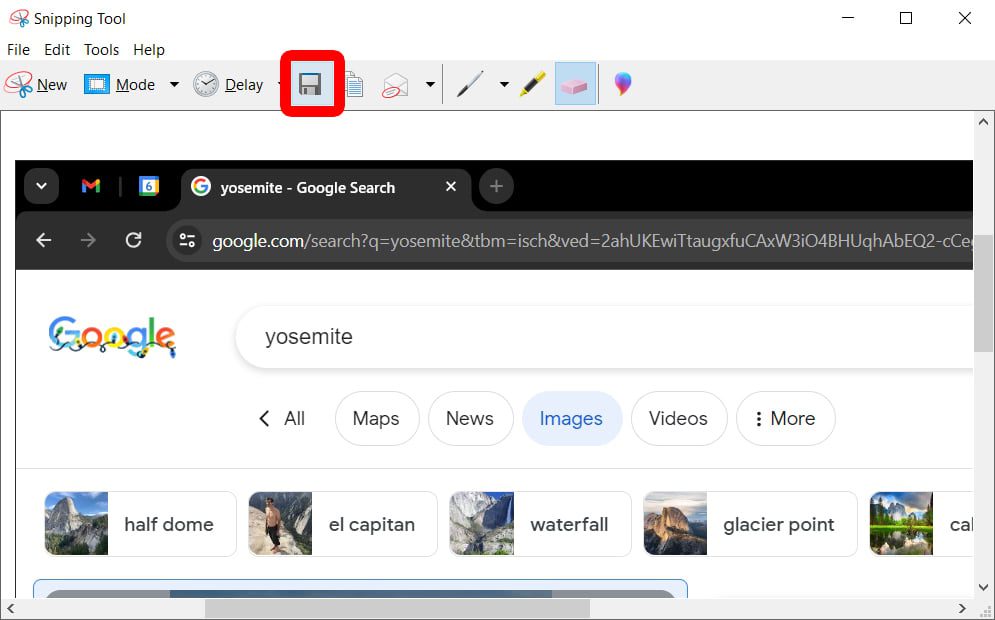
To take screenshots on your Windows 10 or 11 PC, click the Windows logo at the bottom of your screen, type Snipping Tool, and click Open. Then click New to take a screenshot and click the floppy disk icon to save the image to your computer.
- Click the Windows logo at the bottom of your screen. You should see this logo with 4 squares in the bottom-left corner of your screen. Clicking this will open the Start Menu.
- Then, type “Snipping Tool.” This will reveal the Snipping Tool app that comes built into your Windows PC. If you don’t see this app, you can also download it for free from the Microsoft Store here.
- Next, click Open.
- Then, click Mode to choose how you want to take a screenshot. On a Windows 11 PC, this will appear as a box with a plus sign icon.
- Next, click New to take a screenshot.
- Finally, click the floppy disk icon to save the screenshot to your computer. You can also click File > Save As on a Windows 10 computer or press the Ctrl + S keys on your keyboard to save the screenshot on a Windows 10 or 11 computer.
Read More: How to screen record on a Windows 10 PC
HelloTech editors choose the products and services we write about. When you buy through our links, we may earn a commission.
