How to Set up a Zoom Meeting on a Desktop Computer
Zoom has become one of the most widely used platforms for video conferencing. If you’ve ever joined a Zoom meeting before, you might have noticed that you didn’t need to sign up to attend. However, if you want to host a meeting, you need to create a Zoom account first. Here’s everything you need to know about how to set up a Zoom meeting, add contacts to Zoom, and schedule a meeting for the future.
How to Create a Zoom Account
To create a Zoom account, your first have to download the Zoom installer. Then open the installer and select Sign In > Sign Up Free. Follow the on-screen instructions to activate your account from the email Zoom sends you.
Note: If you already have a Zoom account, you can scroll down to the next section to see how to set up a Zoom meeting in the app. If you are using an iPhone or Android device, check out our guide on how to set up Zoom meeting on your phone here.
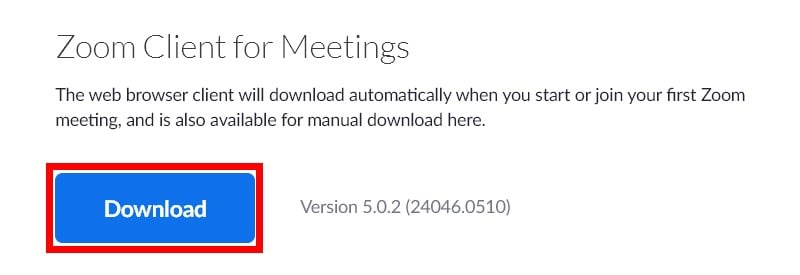
Download the Zoom app installer. Go to the Zoom download center and click the blue Download button under Zoom Client for Meetings.
Then open the downloaded file. You can find this file in your downloads folder, or wherever you chose to save it. Once the installation is complete, the Zoom app will open automatically.
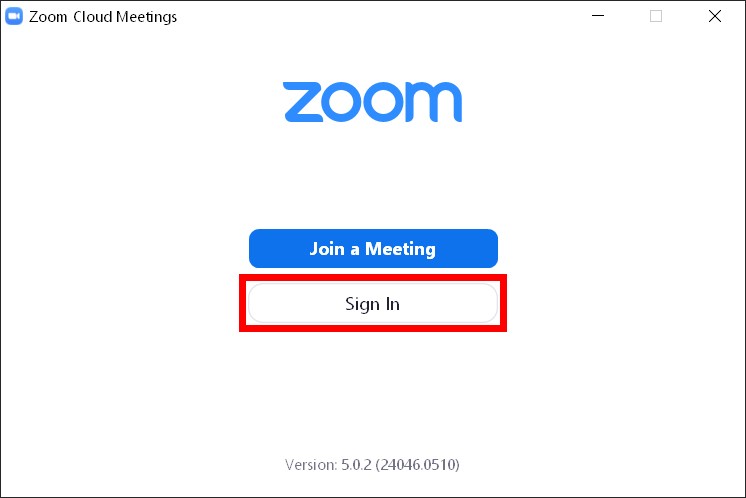
Next, click Sign In.
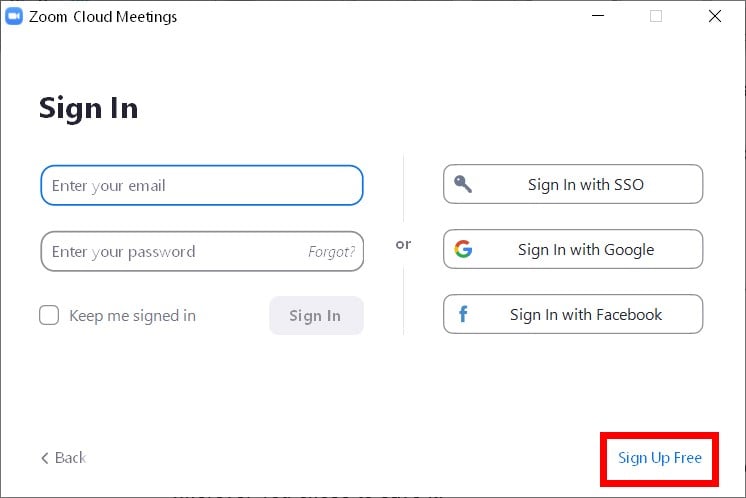
Then click Sign Up Free to create your Zoom account. You will see this in the bottom-right corner of the window. Once you click this, it will open a new browser window.
Next, enter your date of birth, email address, and click Sign Up.
Then go to your email inbox and open the message from Zoom. This will have a subject line that says, “Please activate your Zoom account.”
Next, click Activate Account. Once you do, you will be redirected to Zoom’s website.
Finally, enter your name, create a password, and click Continue.
Once you click Continue, your Zoom account will be set up. You can now open the app to set up a Zoom meeting. Here’s how:
How to Set Up a Zoom Meeting on a Desktop Computer
To set up a Zoom meeting, open the Zoom
app and sign in. Then click New Meeting > Participants > Invite.
Next, click the Email tab and select a service. Finally, send the email
to everyone you want to invite.
Open the Zoom app and click Sign In.
Then enter your email address and password and click Sign In.
Next, click the New Meeting icon. This is the video camera icon with an orange background. Another window will then open, showing you a video of the conference room you created.
Then click Join with Computer Audio or Test Speaker and Microphone. If this is your first time using Zoom, it is a good idea to test your audio before you begin.
First, you will be asked if you can hear a ringtone. If you don’t hear anything after a moment, make sure to click No. This will cause Zoom to shuffle through your speakers one by one. You can also select a different speaker by clicking the drop-down above Output Level. Once you do hear a tone, click Yes.
Then you will be asked to test your microphone. All you have to do is speak a few words and wait. If you hear your words spoken back to you after a moment, click Yes. Otherwise, click No or click the drop-down to select another microphone from the list.
Note: If you don’t see a live video of yourself in the app, click the up arrow next to Stop Video in the lower-left corner of the window. Then choose a different video source. If you don’t see this button, move your mouse over the video screen, and a menu will pop up at the bottom of your window. If your webcam still isn’t working, check out our step-by-step guide on how to use your phone as a webcam for free.
Then click Participants at the bottom of the window. This is the button with the outline of two people in the bottom-middle portion of the meeting window. Clicking this will open a sidebar on the right side of your video.
Next, click Invite at the bottom of the right sidebar.
Then click the Email tab. This is at the top of the window, next to Contacts.
Next, select an email service. If you don’t have a Gmail or Yahoo Mail account, you can click the Default Email button. You can also click Copy Invite Link or Copy Invitation in the bottom-left corner of the window. This lets you send the link for the meeting, the meeting ID, and the meeting password using any method you want.
Then enter the email addresses of the participants you want to invite to the Zoom meeting.
Finally, click Send to invite all the participants.
If you are setting up meetings with the same people repeatedly,
you can add them as contacts in the Zoom app to make things easier. Here’s how:
How to Add Contacts in Zoom
To add contacts in Zoom, open the app and click the Contacts
icon. Then click the + sign and select Add a Contact. Next, add an email
address and click Add Contact. They will have to accept your invitation
to be added to your contacts list.
Open the Zoom app and sign in.
Then click the Contacts icon. This is the button shaped like the outline of a person in the upper part of the window.
Next, click the plus sign. You will find this in the upper-left part of the window next to Channels.
Then select Add a Contact. This will open a pop-up window.
Then enter an email address and click Add Contact. Every contact you add will receive an email with a link. Once they click the link, they will be asked to approve your request to be added as your contact.
Note: The contacts you send a request to will have to sign into Zoom to accept your invitation within 30 days.
Once your contact accepts your invitation, you can then add them when you start a meeting by going to Participants > Invite. Then, you will see their name or email address under the Contacts tab.
All you have to do is select the contacts you want to add to the meeting and click Invite in the bottom-right corner of the window.
Since it takes time for participants to accept your invitations,
it is a good idea to schedule a Zoom meeting in the future. Here’s how:
How to Schedule a Meeting With the Zoom Desktop App
To schedule a meeting on Zoom, click the Schedule icon in the app and enter the start time and other details of your meeting. Then click Schedule and add your guests in your calendar client before clicking Save.
Open the Zoom app and sign in.
Then click the Schedule icon. This is the calendar icon with a blue background.
Enter the details of your meeting. You can enter a meeting topic, set the starting time and duration, make it a recurring meeting, and more. You can also click Advanced Options at the bottom of the window to change more settings.
Then Click Schedule at the bottom of the window. Your chosen calendar client will then open in a new browser tab.
Note: After clicking Schedule, you might have to sign in to your account and allow Zoom to access your calendar.
Next, add your guests and review the other details of the meeting.
Finally, click Save to send the calendar invite to your guests.