If you live in a crowded area, there might be times when your WiFi slows down or drops off randomly. These performance issues can happen when too many of your neighbors are connecting to the same WiFi channels, which can interfere with your signal. Here’s how to change the WiFi channel on your router, and how to find the best channel on a Windows or Mac computer.
What Is a WiFi Channel?
WiFi routers use radio waves to transmit data to all your connected devices. These radio waves are divided into different “WiFi spectrum bands,” which are further divided into “WiFi channels.” Basically, a WiFi channel represents the frequency your router uses to transmit data.
If you think of WiFi bands like highways, then WiFi channels would be like lanes on those highways. In order to achieve the best internet speeds, you want to connect to the fastest WiFi band and the least-crowded WiFi channel.
Before you change your WiFi channel, you should make sure you’re connected to the best WiFi band. There are currently three different WiFi bands available to choose from:
- 2.4 GHz = Slowest speeds, longest range
- 5 GHz = Faster speeds, lower range
- 6 GHz = Fastest speeds, shortest range

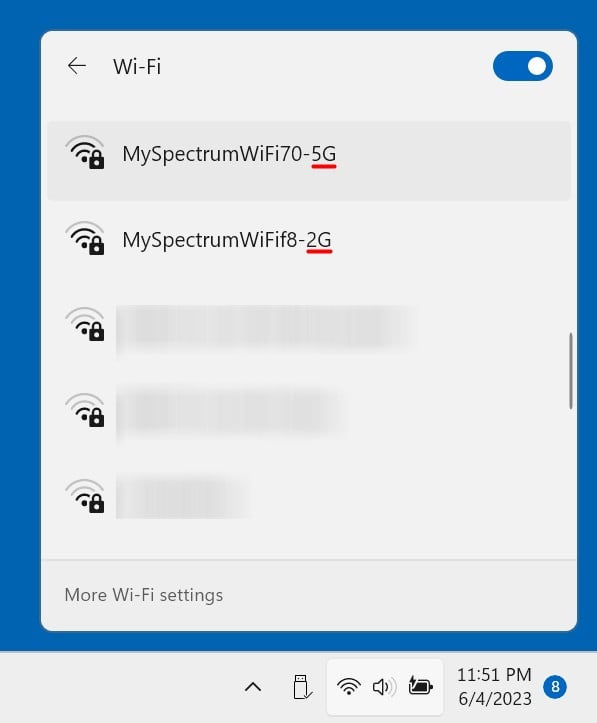
If you have a dual-band or tri-band router, you might be able to change your WiFi band simply by switching to a different WiFi network. Usually, you can just look for networks with names that end in “5G,” 6G,” or “6E” to get the fastest speeds. On the other hand, networks that end in “2G” are typically the slowest.
Read More: What is a dual-band router?
If you don’t want to deal with the hassle of changing your WiFi channel, HelloTech can help. We have thousands of technicians across the country who can come to your home and troubleshoot your WiFi issues in person.
How to Change Your WiFi Channel
To change your WiFi channel, open a web browser and type your router’s IP address into the address bar. Then, press Enter on your keyboard and go to Wireless Settings. Next, choose your WiFi band and change the channel. Finally, click Save or Apply.
- Open a web browser and type your router’s IP address into the address bar. You can use any web browser you want, like Google Chrome, Safari, or Microsoft Edge. If you don’t know what your router’s IP address is, check out our step-by-step guide on how to find your router’s IP address on a Windows or Mac computer.
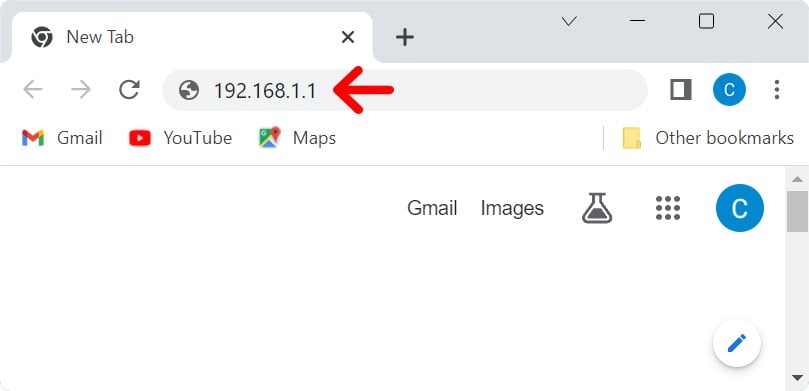
- Then hit Enter on your keyboard.
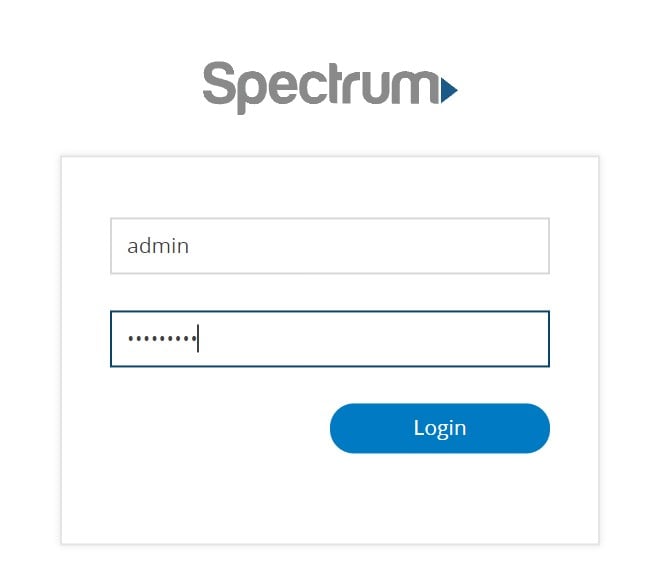
- Next, enter your router’s username and password. This is not the same as your WiFi network’s name and password. If you don’t know your WiFi router’s login credentials, check out our step-by-step guide on how to find your router’s username and password here.
- Then open Wireless Settings in your router. The exact name and location of this option will depend on your router. In many cases, you’ll have to select Advanced Settings first.
- Next, choose your WiFi frequency band.
- Then click Channels to change your WiFi channel.
- Finally, make sure to hit Save or Apply.

Read More: Why is my WiFi so slow?
Now that you know how to change your WiFi channel, here’s a quick overview of the best ones to choose from.
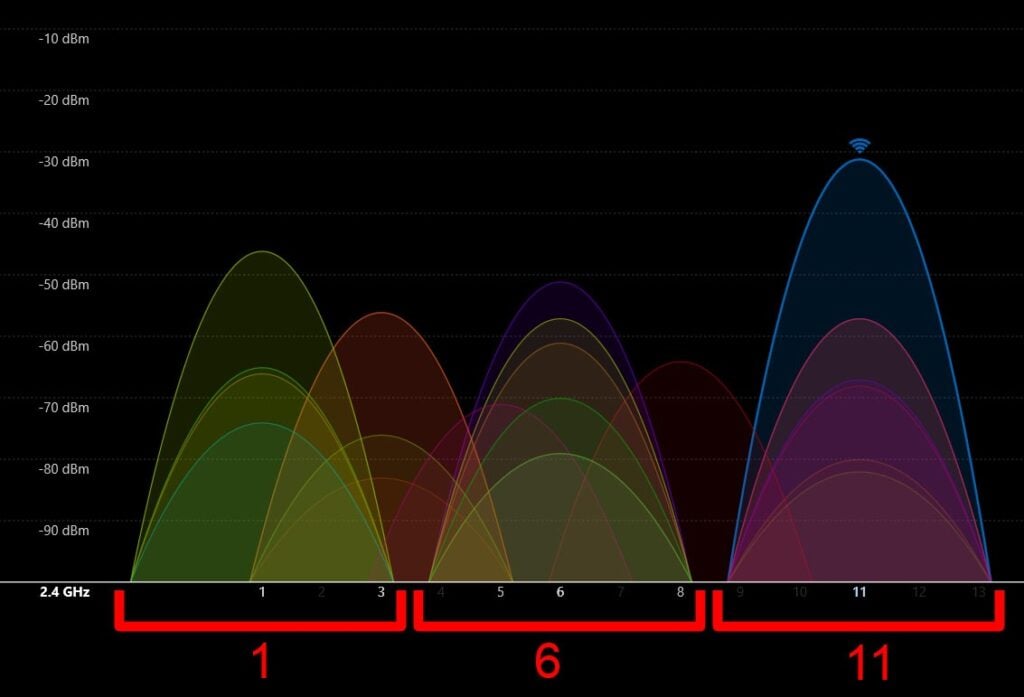
Best WiFi Channels for 2.4GHz
There are a total of 11 WiFi channels you can connect to on the 2.4GHz band, but you should only connect to channels 1, 6, or 11. While all 11 channels are 22MHz wide, they are only separated by 5MHz from each other, so there are only three channels that don’t overlap.
Basically, if you choose any channel that isn’t 1, 6, or 11, you’ll get more interference from other networks, which typically use channels 1, 6, or 11. This means your WiFi signal will experience interference from both sides, which can slow your network down significantly.
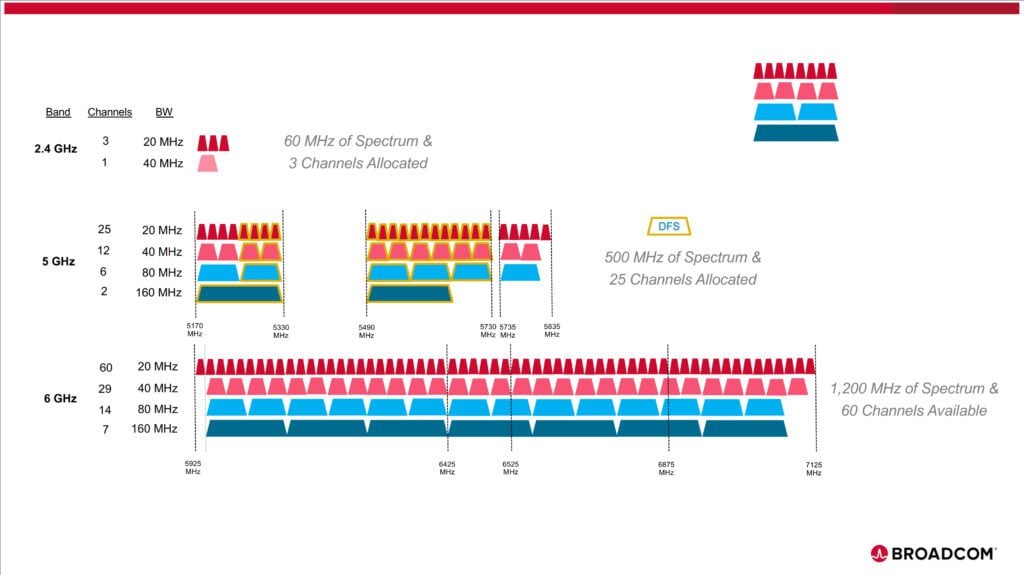
Best WiFi Channel for 5GHz and 6GHz
If you’re using the 5 GHz band, there are around 25 non-overlapping channels you can choose from. And the newest 6GHz band has around 60 non-overlapping channels. In addition, these newer bands also have wider channels to accommodate higher-bandwidth activities.
In order to find the least crowded WiFi channel in your area, you will need to use a WiFi analyzer app. These free app will also show you which WiFi channel to change to on Windows or Mac computers.
How To Find the Best WiFi Channel on Windows
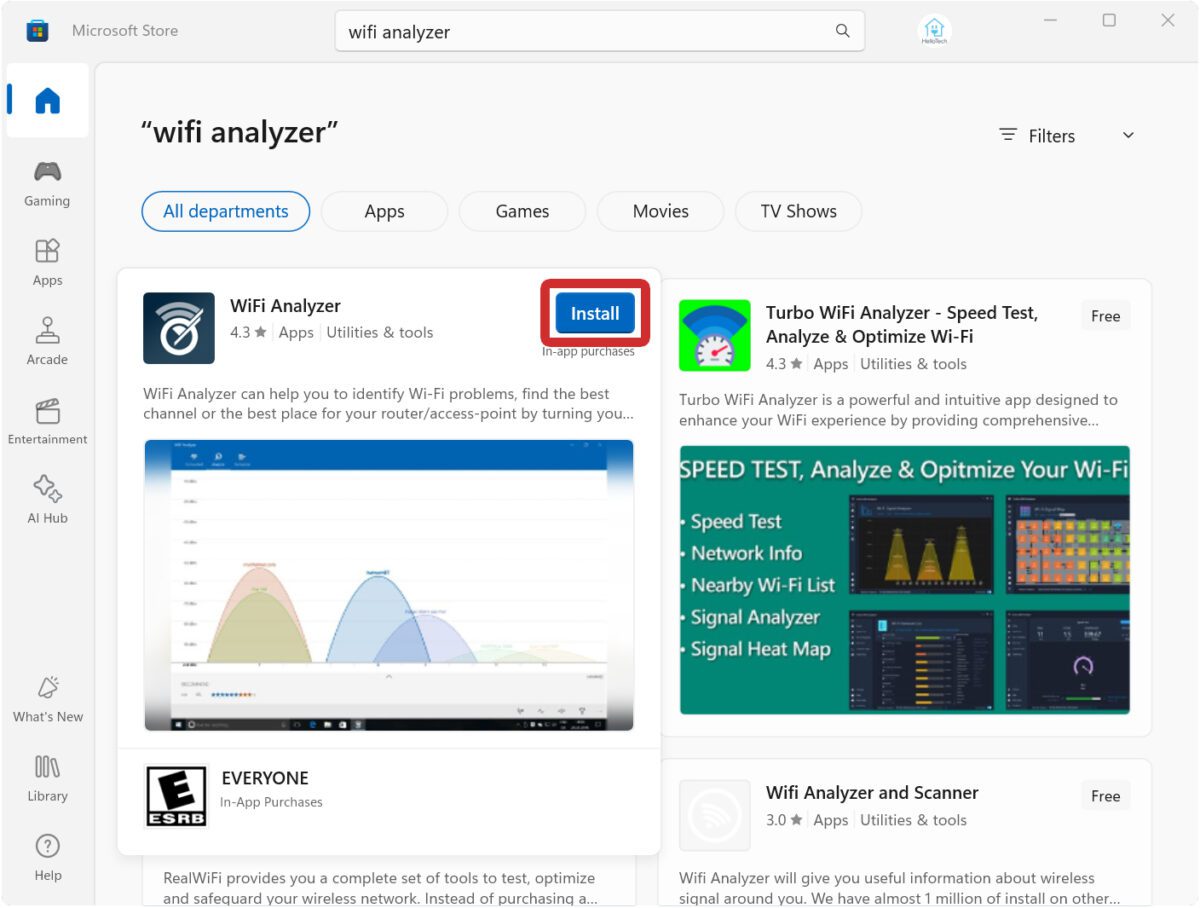
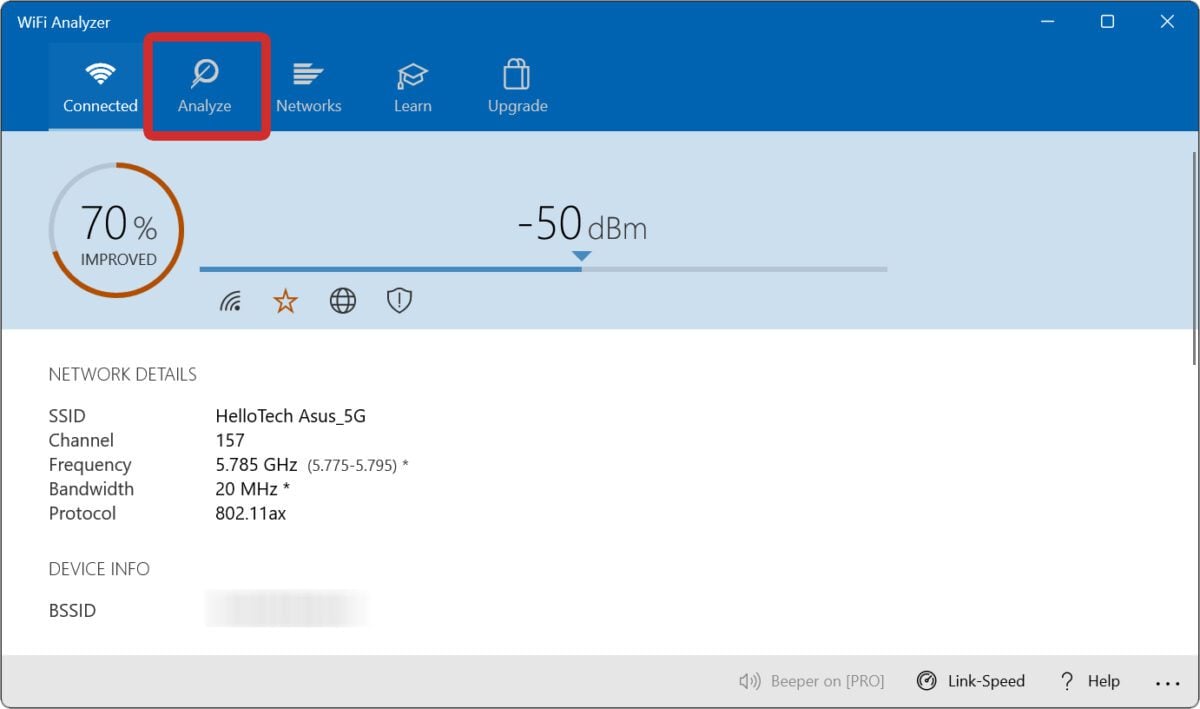
To find the best WiFi channel in your area, download the free WiFi Analyzer app for Windows 10 or 11. Once you install the app, open it and go to the Analyze tab. Select the right WiFi band at the bottom of the window, and you will see a recommendation for the best channel above that.
- Download the WiFi Analyzer app. This app is available for free on the Microsoft Store for both Windows 10 and Windows 11 computers.
- Then, open the app and go to the Analyze tab. You will see this at the top of the screen.
- Next, select your WiFi band. You can do this by clicking the “2.4 GHz” or “5 GHz” button at the bottom of the window. If it reads “2.4 GHz,” that means you are viewing all the 5 GHz networks and vice-versa.
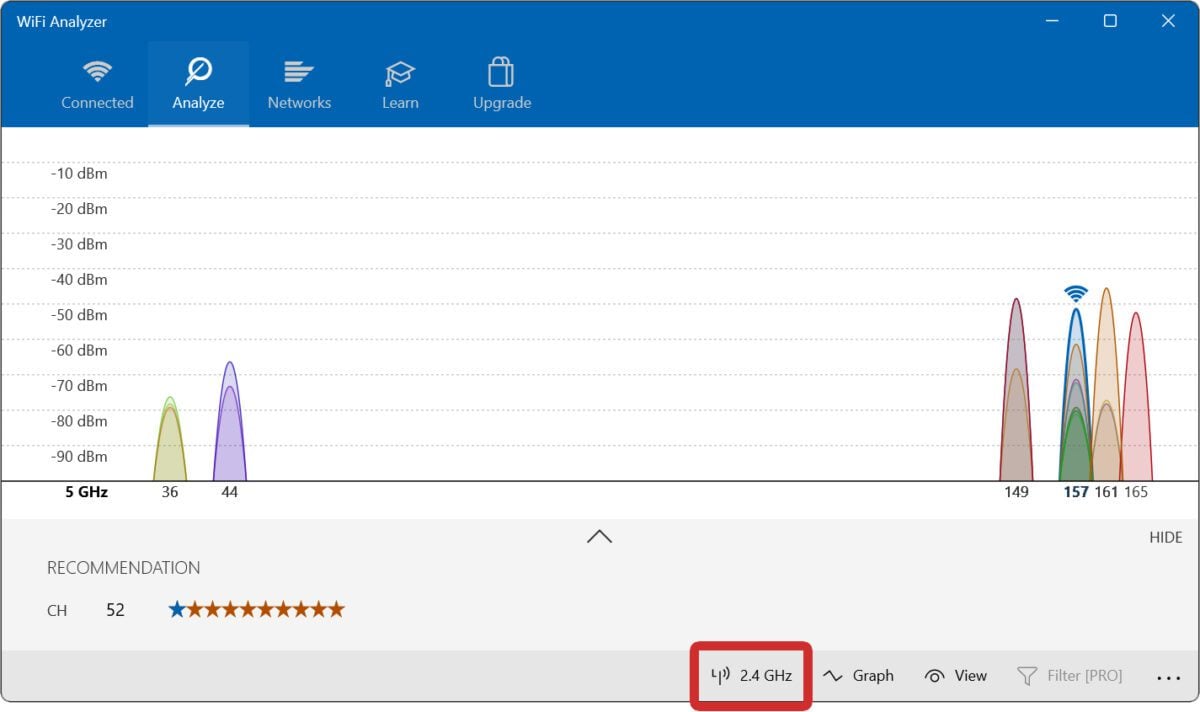
- Finally, you can find the best WiFi channel to use at the bottom of the window. You will see the channel number right after “CH” and right before the star rating (in this case, the best channel on the 5 GHz band is 52).
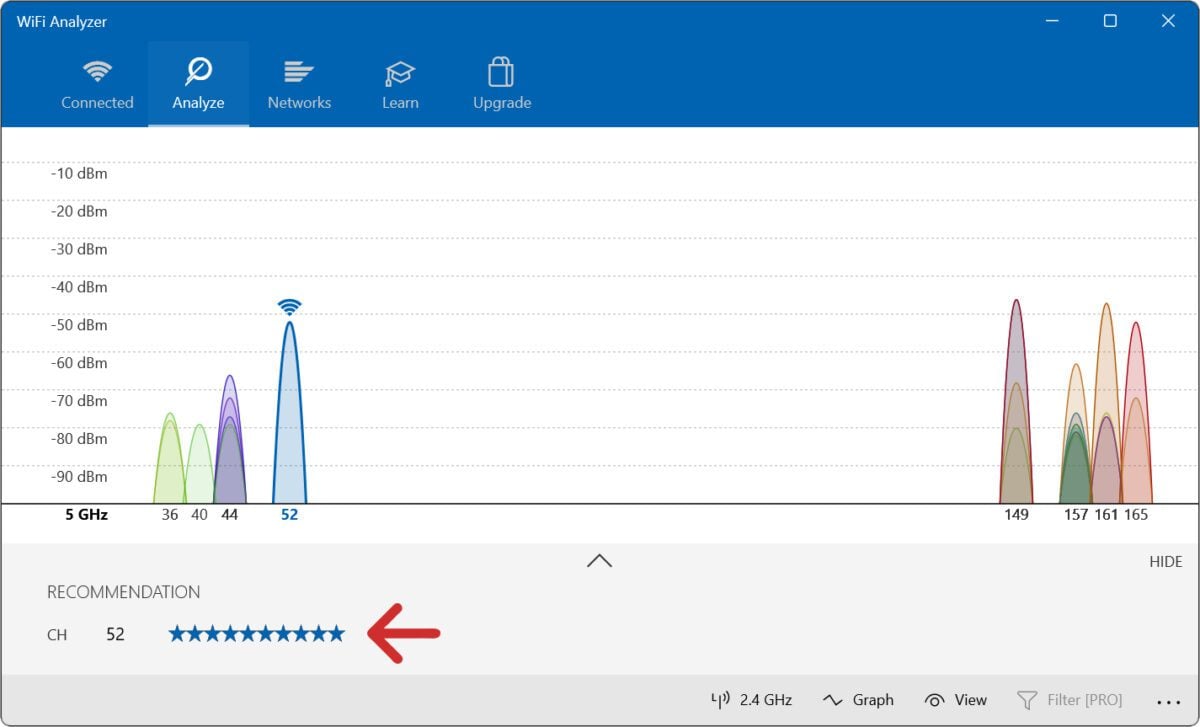
You can also tap the arrow icon at the bottom to reveal all the recommended channels and how strong they are.
How To Find the Best WiFi Channel on Mac
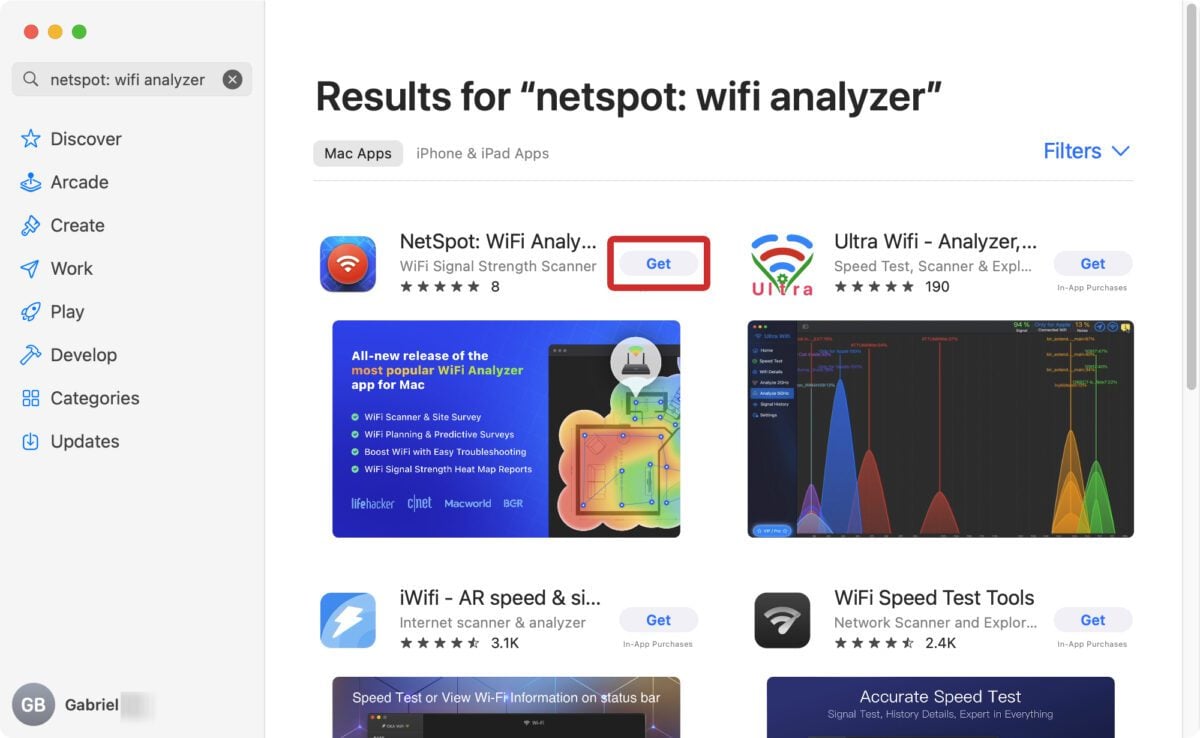
To find the best WiFi channel in your area, download the free NetSpot app for Mac. Then, install the app and launch it. Next, select your WiFi network, click Details, and select your frequency band. Then, you will be able to find which channels are the least crowded.
- Download the NetSpot app. You can get this app for free on the Mac App Store, and it’s also available for Windows computers on the Microsoft Store.
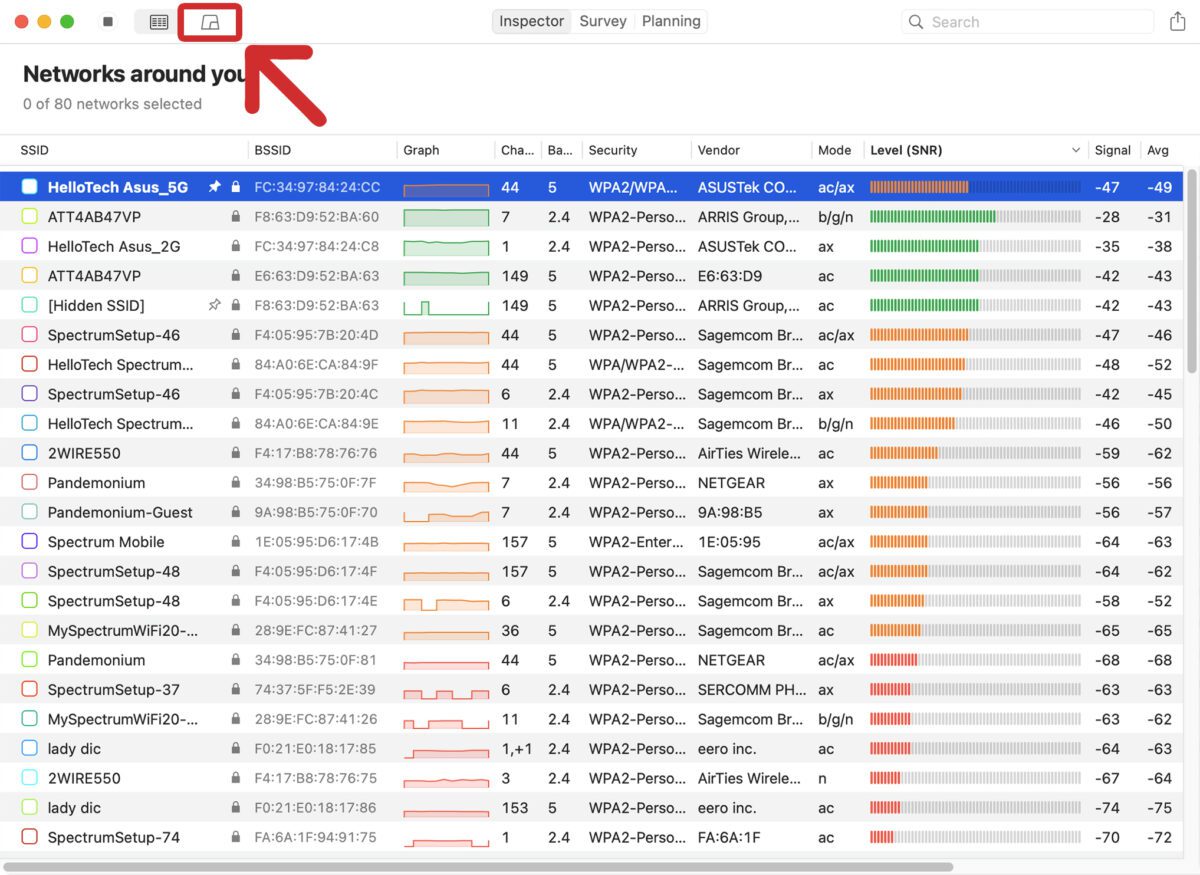
- Install the app, open it, and click the “Signal level and noise graphs” button. You will see this button at the top of the window next to the table icon.
- Then, select your WiFi band. You will see the options for “2.4 GHz” and “5 GHz” in the top-left portion of the window.
- Next, check the box at the top of the list of networks. This will select all networks near you. You can also select them individually by checking the boxes next to each network.
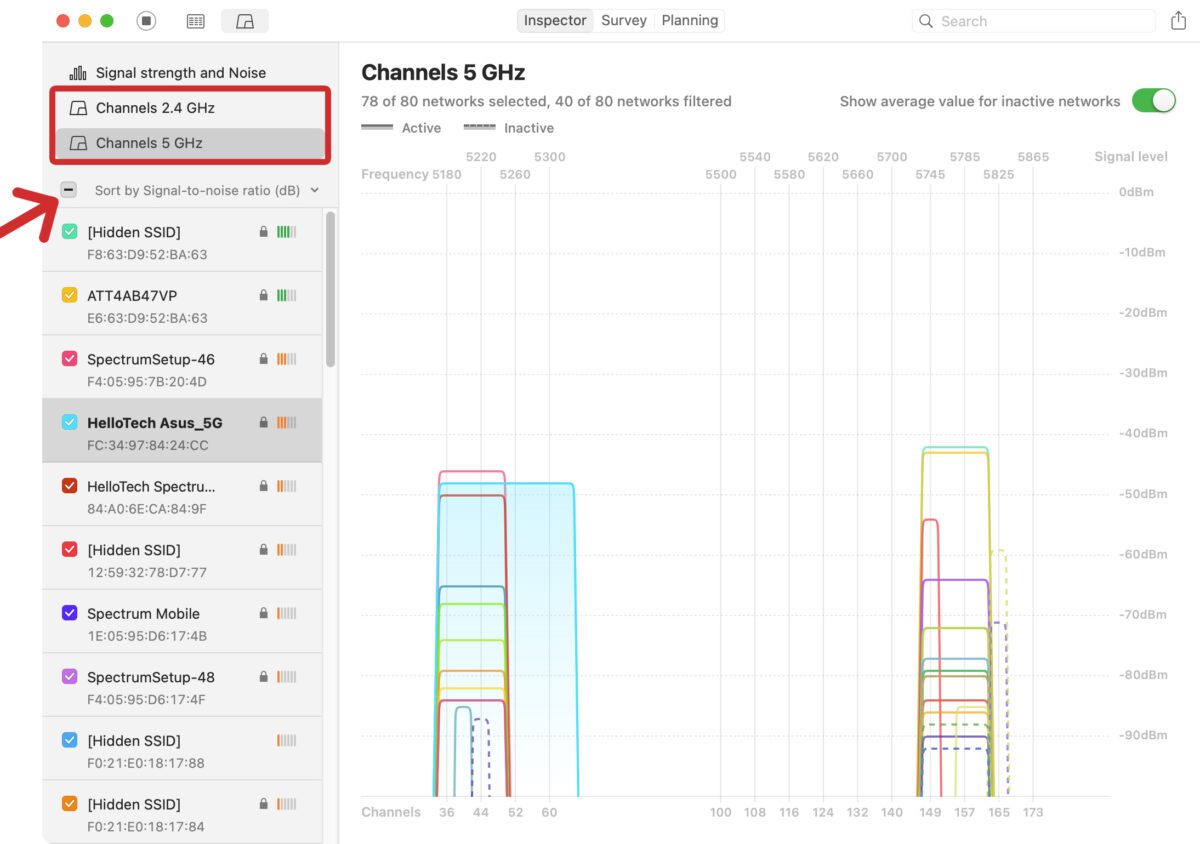
- Finally, the best channels will be the ones with the least traffic. Each network in your area will show up as a different bar. You can tell which channel each network is using by looking at the numbers in the center of each bar.
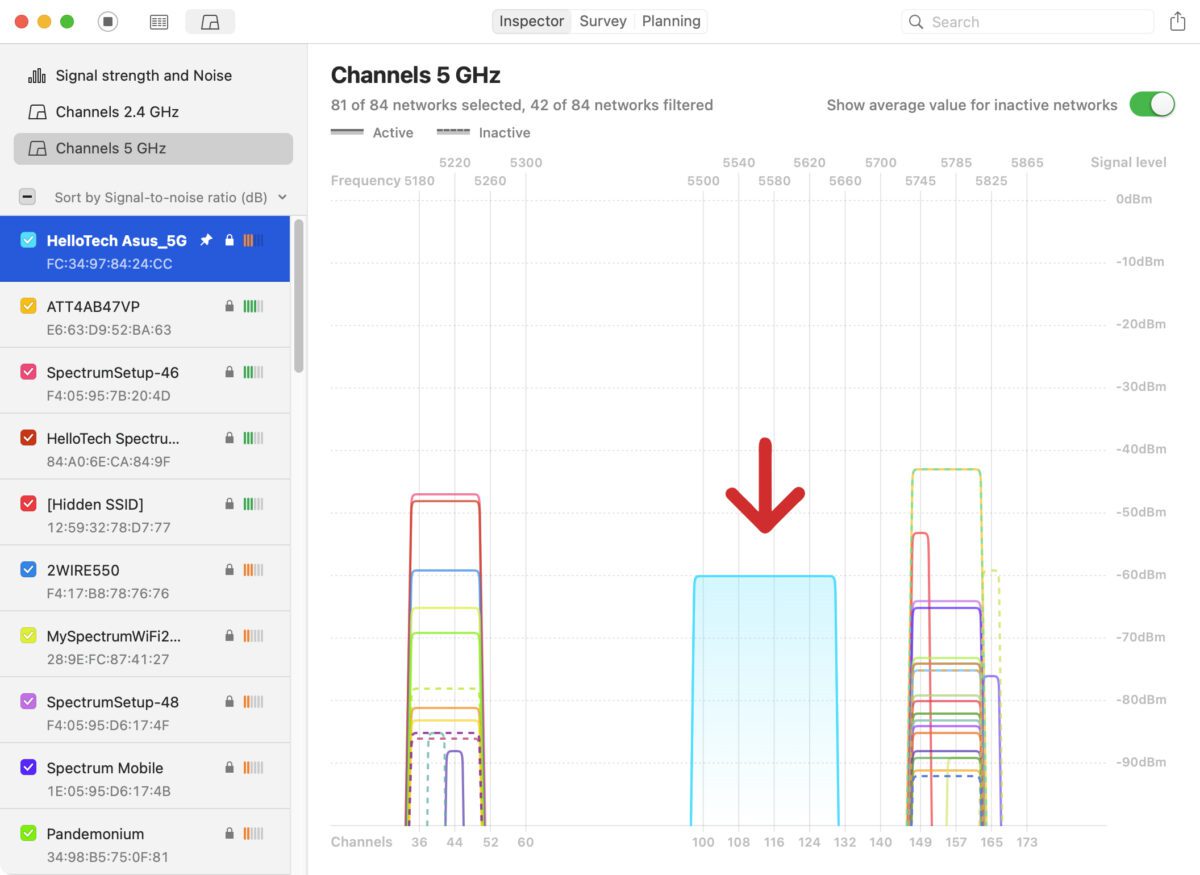
Since this app doesn’t recommend a specific WiFi channel to use, you might have to change it on your router a few times, just to see which channel provides the best signal. However, it is a good way to show you which channels are overcrowded, so you can switch to a different one.
If your WiFi signal is still weak, HelloTech can send a professional to your home as soon as today to fix it for you. Our technicians are certified to install a new router or mesh WiFi system, fix your connectivity issues, and extend your current WiFi signal. We’ll even stick around after the job’s done to answer any of your questions.

HelloTech editors choose the products and services we write about. When you buy through our links, we may earn a commission.
