Most computers these days come with Hard disk drives (HDD), but you can enjoy better computer performance if you upgrade to a solid-state drive (SSD). But when you buy an SSD for your computer, you will have to copy over all your data (or clone the drive) to get your operating system and all your files on your new drive. Here’s how to clone a hard drive on a Mac or Windows 10 PC.


How to Clone a Hard Drive to SSD in Windows 10
- Download the free version of EaseUS Todo. You will need to enter your email address in order to download the application.
- Follow the on-screen instructions to install the program on your computer.
- Insert the SSD into your computer. Make sure that the SDD is properly connected. If you only have room in your computer for one drive, you might have to connect your SSD with a USB-to-SATA adapter or an external dock for the cloning process. Then you can insert your SSD when the process is complete.
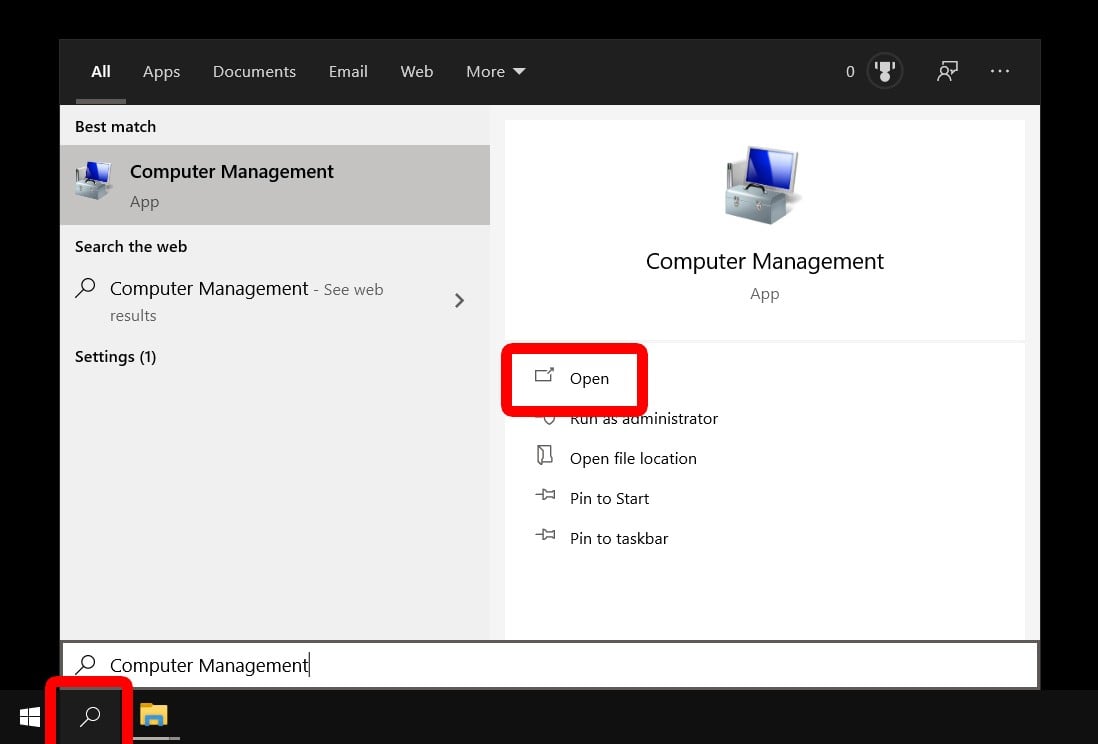
- Click on the magnifying glass icon in the bottom-left corner of your screen and type “Computer Management” in the search box.
- Then click Open.
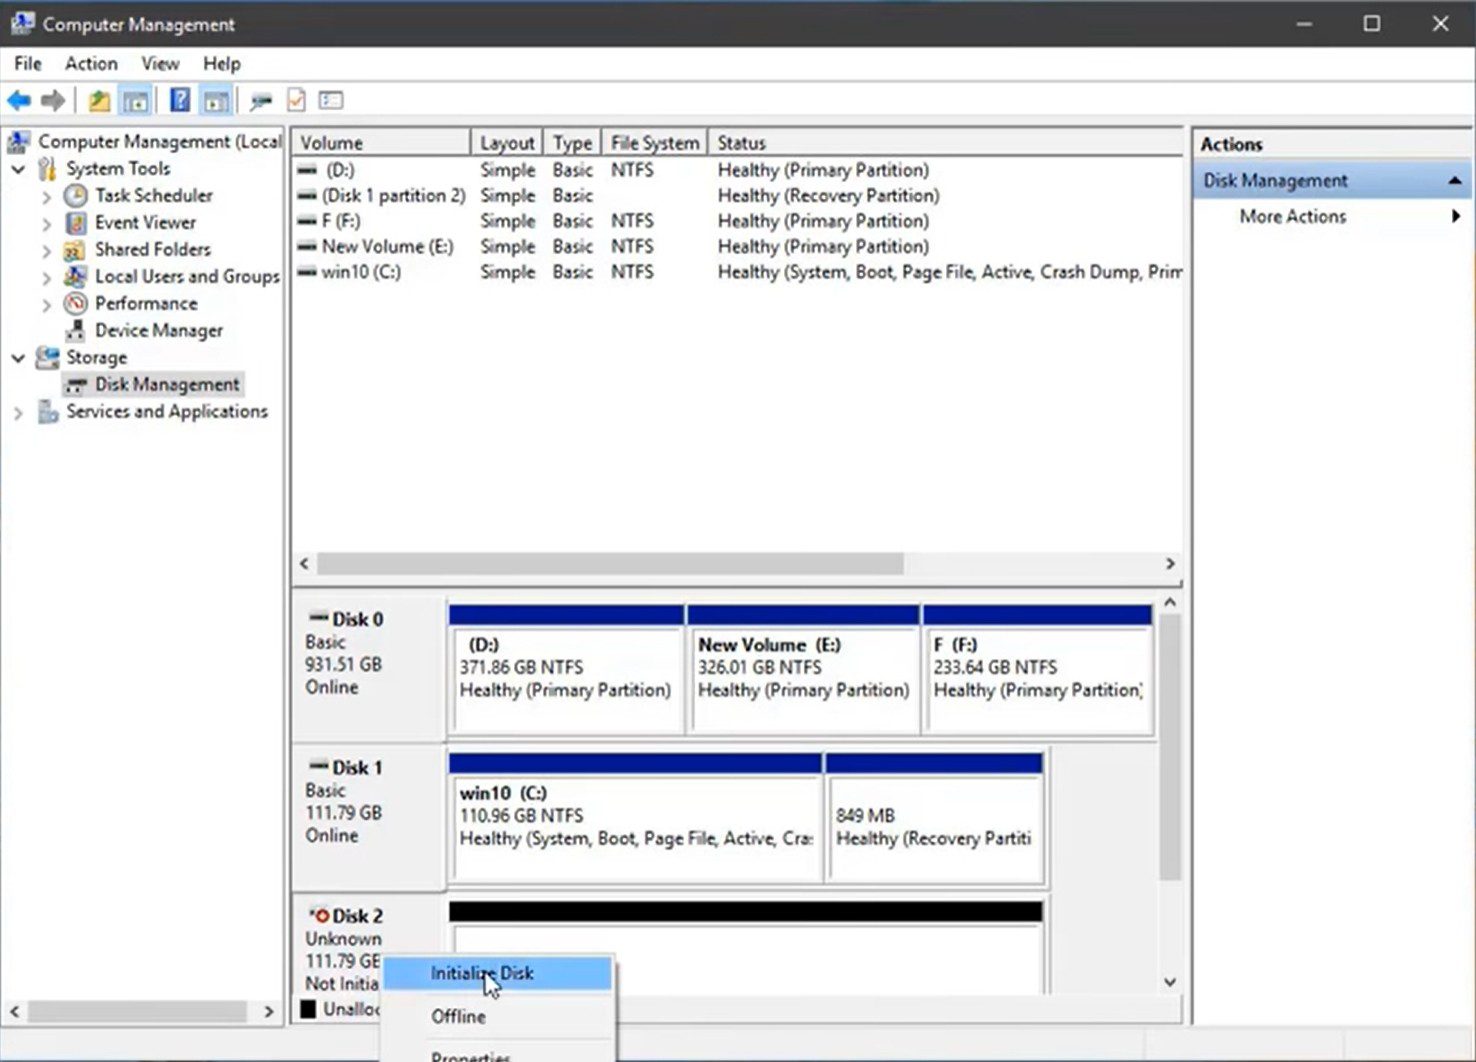
- In the Computer Management window, initialize the SSD when prompted. If you are not prompted to initialize your disk, you can right-click on your disk and select Initialize Disk.If you don’t know which disk is your source and which is your new SSD, you can tell by looking at their sizes.
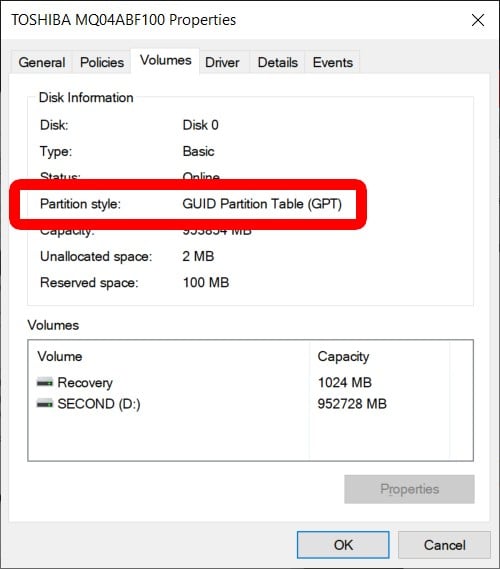
- Select the same partition as your source drive. To find this, you can right-click on your source disk and click properties. Then select the Volumes tab, where you will find your partition style, which should either be GUID Partition Table (GPT) or Master Boot Record (MBR). Then choose the same partition style for your SSD.
- Click OK.
- Open the EaseUS Todo application.
- Click the “Clone” icon in the left sidebar. If you do not see this, click the three horizontal lines in the upper-left corner of your window to expand the menu.

- Select your source hard disk and click Next. This is your original drive, the one that you are cloning your operating system and files from.
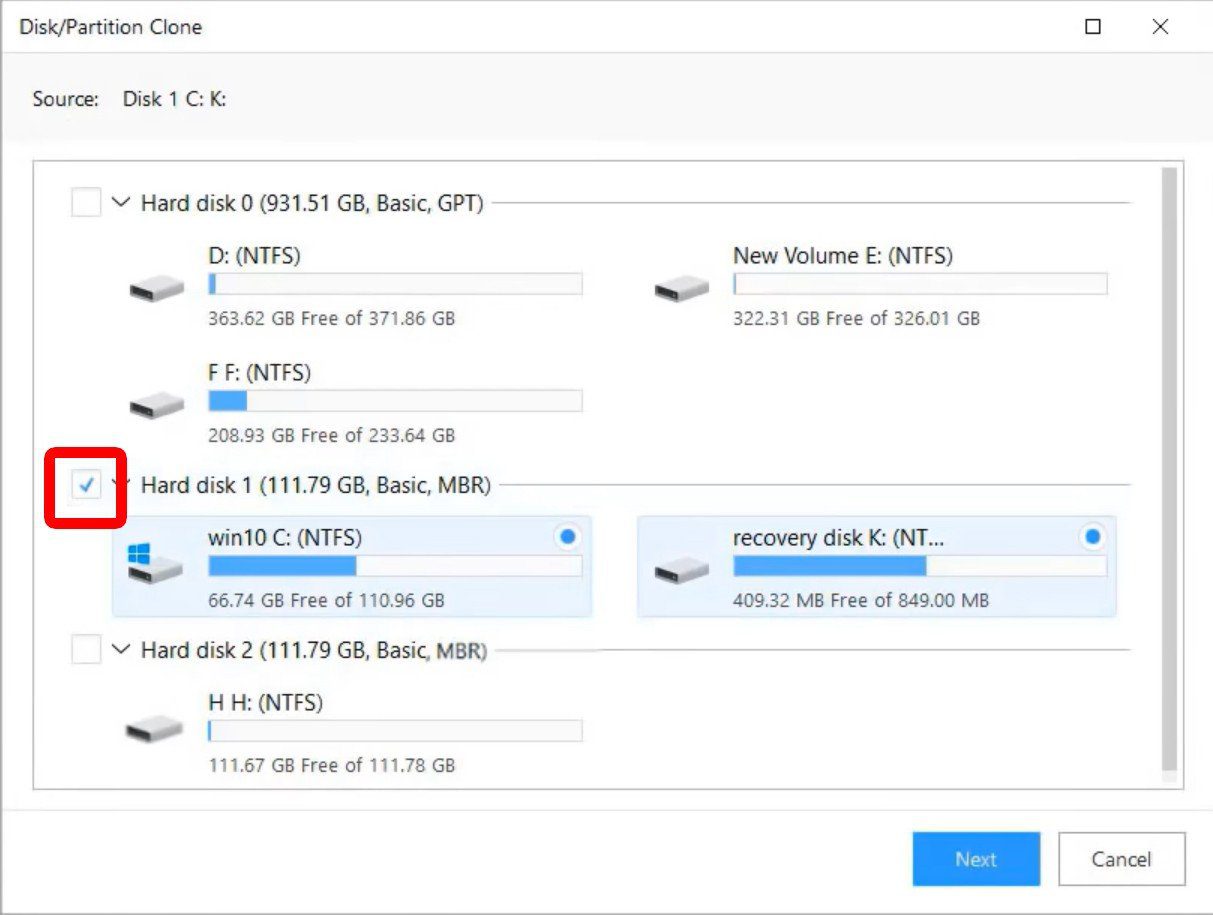
- Then select the target disk or your SSD, but don’t click Next.
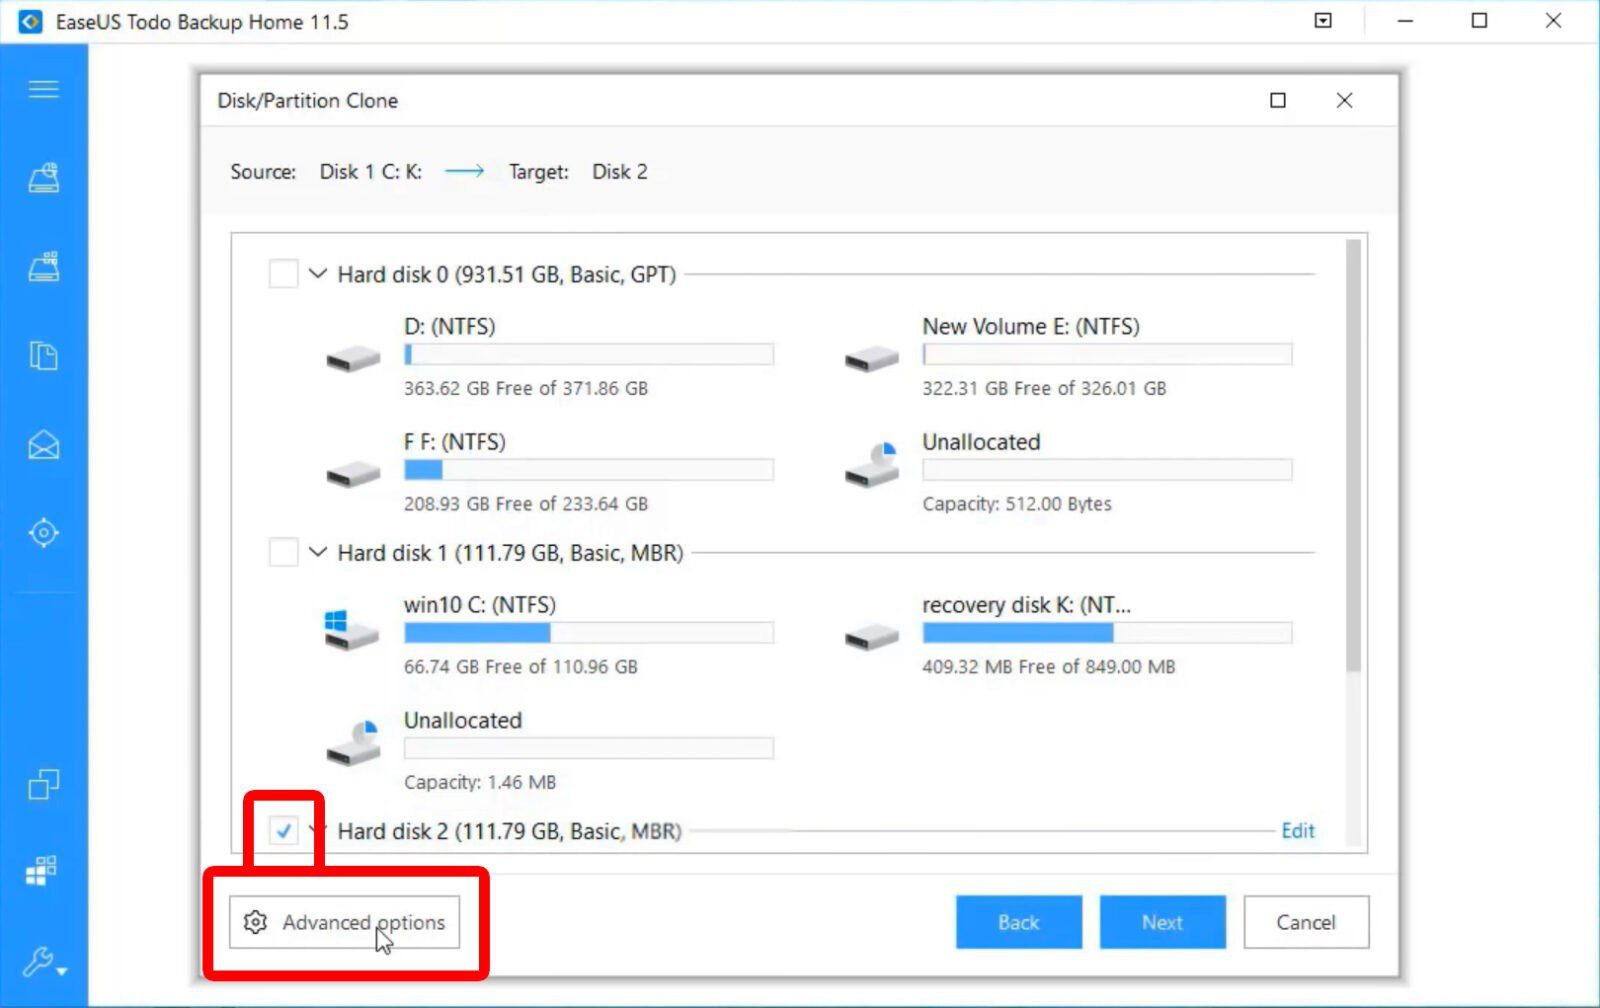
- Next, click “Advanced Options” and then select “Optimize for SSD.” This will ensure that your partitions are aligned and that you are getting the most out of your SSD.
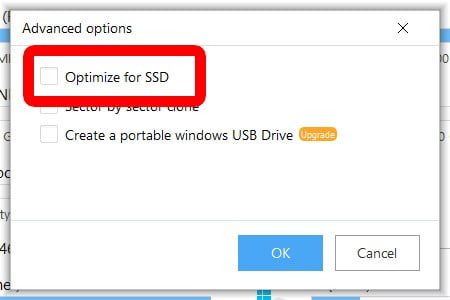
- Click OK and then NEXT.
- Click “Proceed” when prompted by the software.
- Wait until the cloning process is completed. This may take a while, depending on how large your hard drive is.
- Click “Finish” when the cloning process is completed.
How to Boot from SSD After Clone on Windows
Once you’ve made a clone of your hard drive, you can then boot from the SSD to use your computer. Here are the steps on how to boot from SSD after you clone your hard drive.
- Insert your SSD into your computer. If you did the cloning process with an external SDD, you have to insert it into the computer before you can boot from it. If you were able to clone with the SSD already inserted in your computer, you can skip this step.
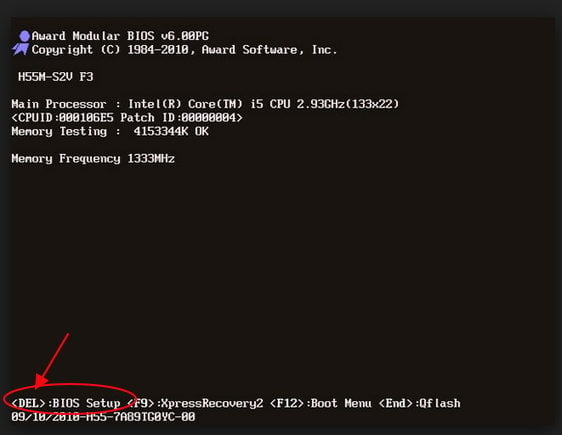
- Restart your computer and go to the BIOS setup. Depending on your computer model, you will need to press ESC, F1, F2, F8, or F10 while the computer is restarting. You can look up your BIOS key online or check your startup screen.
- Then go to the Boot section. You will see on-screen instructions on how to navigate the BIOS menu.
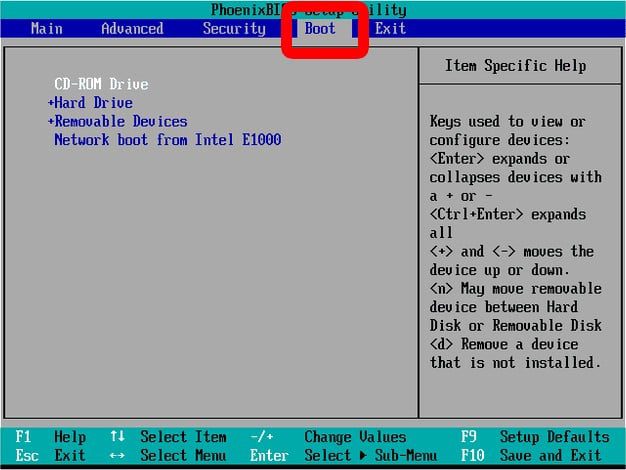
- Move your SSD to the top of the list. You can use your keyboard to change the order of which drive your computer boots from. Putting your SSD at the top of the list tells your computer to boot from that drive first.
- Exit from the BIOS main menu.
- Wait for your computer to reboot.
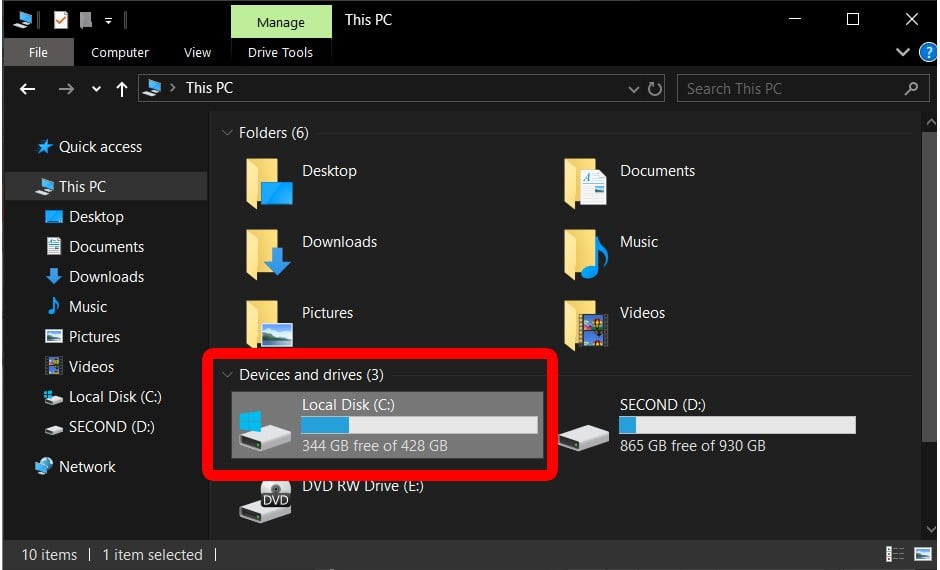
- Open Windows Explorers and click This PC in the left sidebar to confirm that your SSD is your new C: drive. You can tell that your SSD is the new C drive by looking at the size.
How to Clone Mac Hard Drive to SSD
If you have a computer running on Mac OSX, you can do the cloning process using Disk Utility. The system refers to the process as “Restore,” not clone, because you are restoring data from one source drive to another.
- Insert your SSD drive into your Mac.
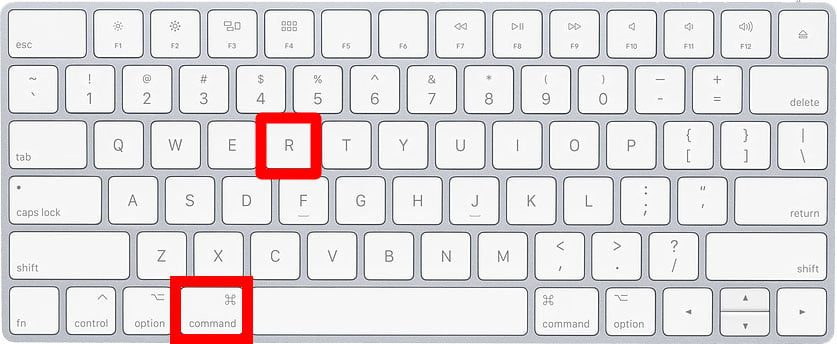
- Then restart your Mac while holding down the Command + R keys on your keyboard. This will take you to the Apple Recovery Menu.
- Let go of the keys when you see the Apple logo appear on your screen.

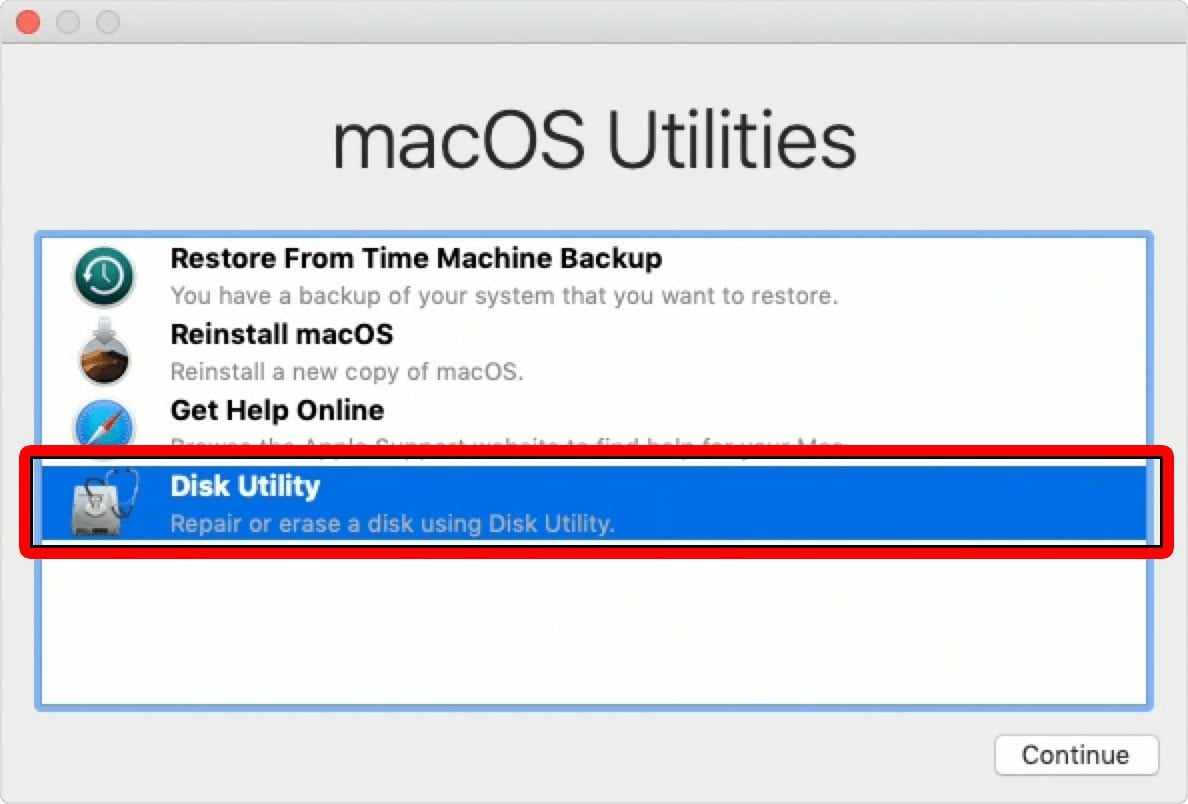
- When your computer starts up, click Disk Utility.
- Then select your SSD from the left sidebar.
- Next, click Restore.
- Then select the drive you want to clone from the drop-down menu. If you want to copy over all of your files, make sure you select your hard drive, not the Base System.
- Wait for the restore process to finish.
- Click “Done” when the restore process is completed.
How to Boot from SSD After Clone on Mac
- Restart your Mac.
- While it’s restarting, hold down the “Option” key.
- From the boot switcher menu, select your SSD.
- Continue with the restart of your Mac computer.
If you want to know more about the difference between SSD and HDD, check out our article here.
HelloTech editors choose the products and services we write about. When you buy through our links, we may earn a commission.
