With the numerous companies that manufacture Windows computers and components, it can be difficult to find out what kind of CPU you have, how much RAM you have, and more. Checking your computer’s specifications also makes it easier to upgrade your hardware and understand the system requirements for new programs you want to install. Here are several ways to check your CPU, GPU, RAM, hard drives, internet adapters, and other specs on your Windows 10 PC.
Read More: How to check your specs on a Windows 11 PC
How to Quickly Check Your Specs in Windows 10
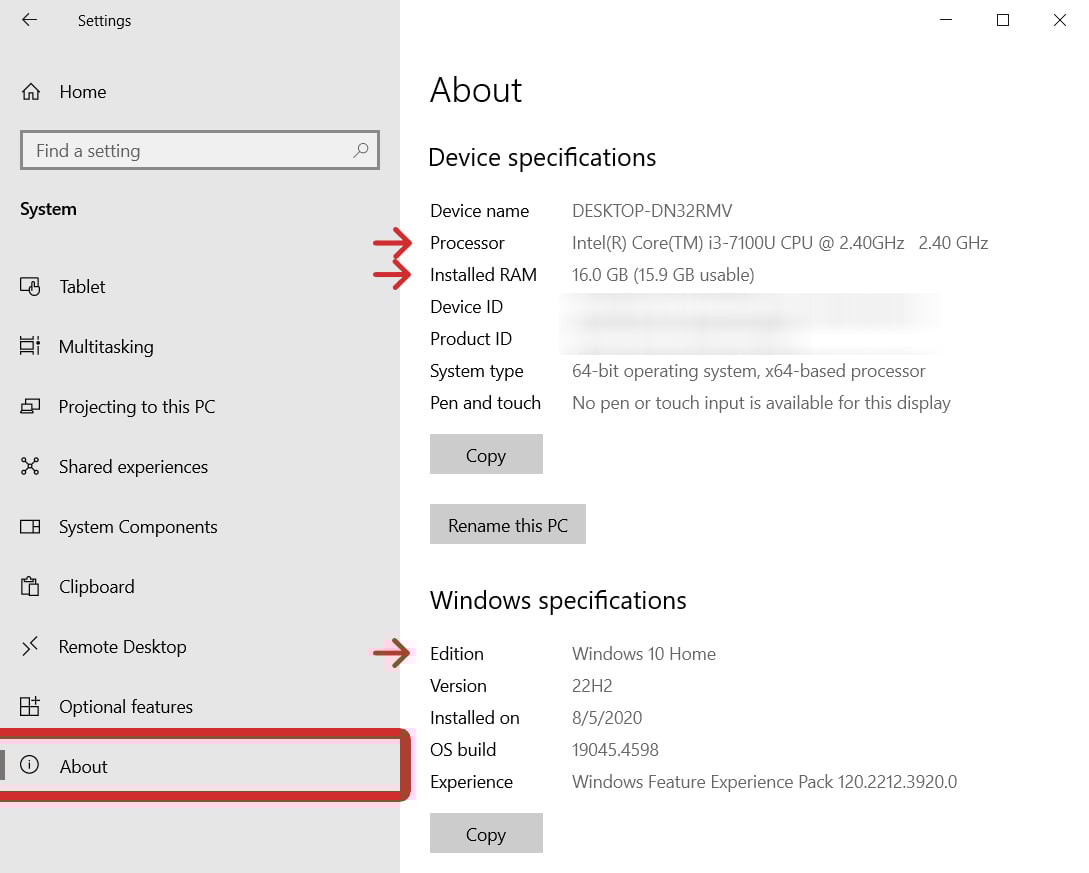
To check your general specs on a Windows 10 PC, press the Windows + I keys on your keyboard to open a settings window. Then go to System, scroll down the left sidebar, and select About. From here, you can check your CPU, RAM, and which version of Windows 10 you are running.
- Press the Windows + I keys on your keyboard. When you press these keys at the same time, a settings window will open. Alternatively, you can open settings by left-clicking the Windows logo at the bottom of your screen, typing “settings,” and selecting Open.
- Then, select System.

- Next, click About. You can find this by scrolling down to the bottom of the left sidebar.
- Finally, check your specs on the right side of the window. Here you can find details about your CPU, RAM, the version of Windows you are running, and more.
If you need more information about your specs, there’s an easy way to find out how your hardware is performing in real-time. This is especially important information if you are wondering whether you need to upgrade any hardware.
How to Check Real-Time Specs in Windows 10
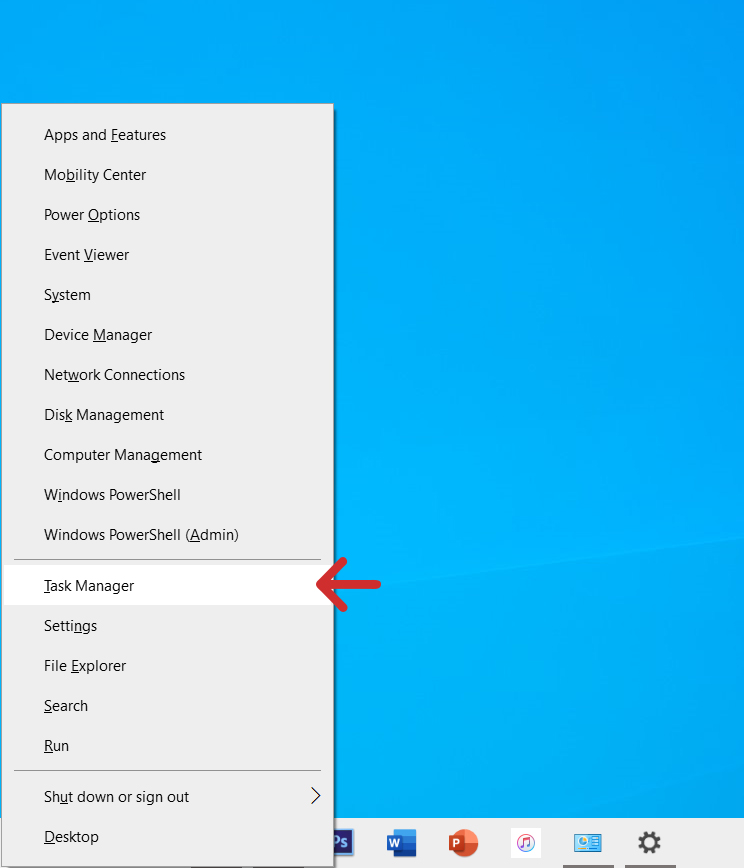
To check your specs on a Windows 10 PC, press the Windows + X keys on your keyboard and select Task Manager from the pop-up menu. Then select the Performance tab to check your CPU, Memory, Disk, Ethernet, Wi-Fi, and GPU usage in real-time.
- Press the Windows + X keys on your keyboard. This will open a ‘Quick Link’ menu in the bottom-left corner of your screen.
- Then, select Task Manager. You can also press the “T” key on your keyboard when the Quick Link menu is open.
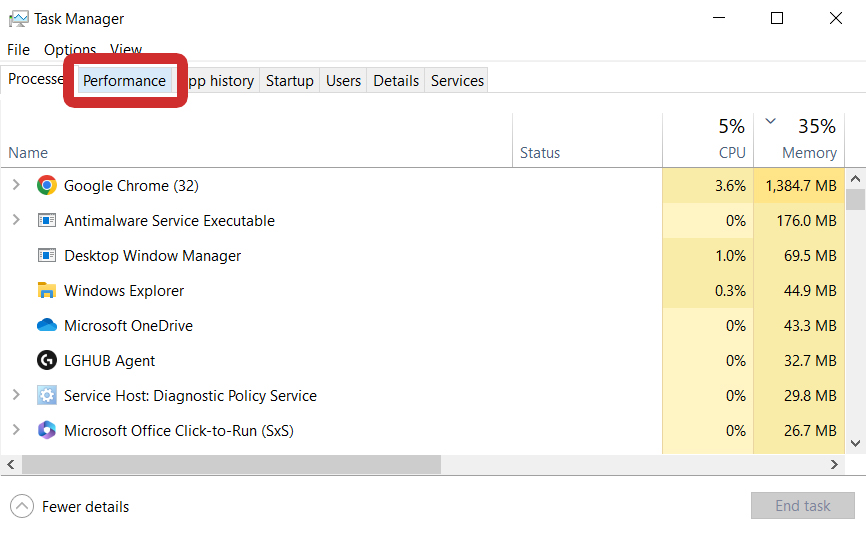
- Next, select the Performance tab. You will see this at the top of the window next to Processes.
- Then, choose CPU, Memory, Disk, Ethernet/Wi-Fi, or GPU. You will see these options in the left sidebar of the Task Manager window.
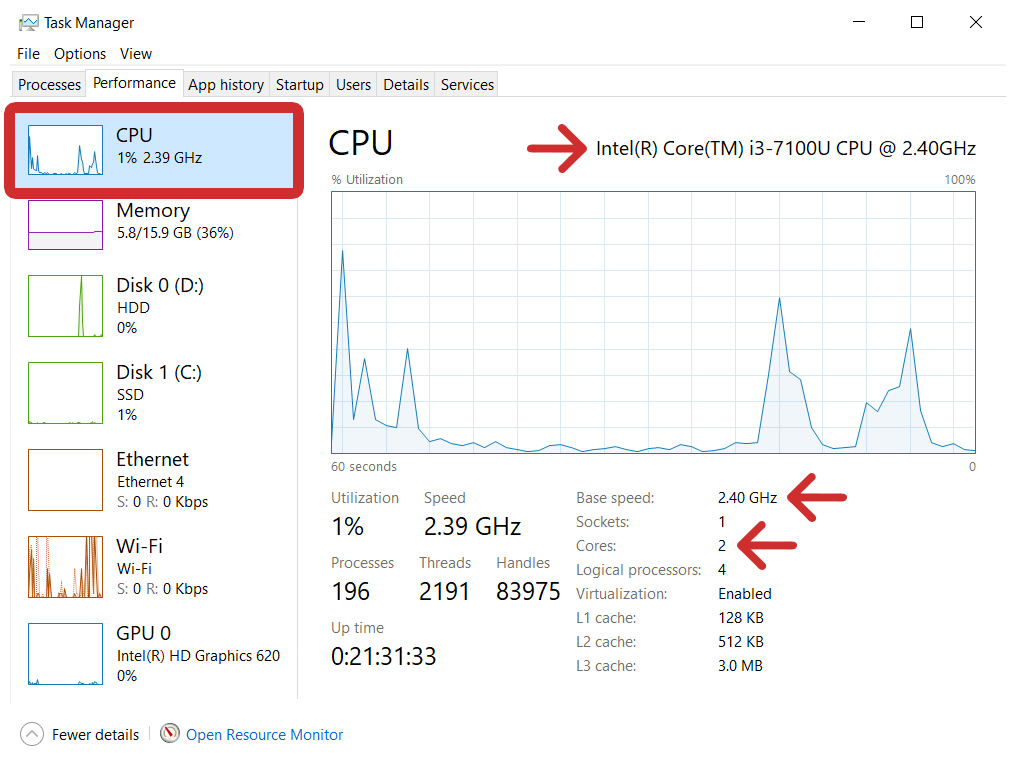
- Finally, check your general specs in the top-right corner of the window and your real-time specs below.
How to Check Your CPU Specs in Windows 10
To check your CPU specs, press the Windows + X keys on your keyboard and go to Task Manager > Performance > CPU. Then you will see your processor’s name in the top-right corner. Below that, check your CPU base speed, how many cores it has, and more.
Read More: What is a CPU?
Note: If you’re looking for more detailed information for your CPU and other hardware specs, scroll to the sections below on using System Information, Device Manager, and Windows PowerShell.
How to Check Your RAM Specs in Real-Time
To check your RAM specs, press the Windows + X keys on your keyboard and go to Task Manager > Performance > Memory. Then, you will see your total RAM capacity in the top-right corner. Below that, you can check how much RAM is ‘In Use’ and how much is ‘Available.’
Read More: How much RAM do you really need?

In the bottom-right corner of this window, you’ll also find other important information about your RAM, including its speed, how many memory slots your computer has available, and more.
How to Check Your Hard Drive Specs in Real-Time
To check your hard drive specs, press the Windows + X keys and go to Task Manager > Performance > Disk. In the top-right corner, you will see the name of your hard drive. In the bottom-right corner, you can check your drive’s total storage capacity and the type of drive it is.
Read More: What’s the difference between SSD and HDD?
Note: If you have more than one drive, your main drive will usually be labeled as “(C:).” This is typically where your Windows 10 operating system will be installed, as well as most of your apps. Other disks can include external hard drives, USB sticks, or secondary internal drives.
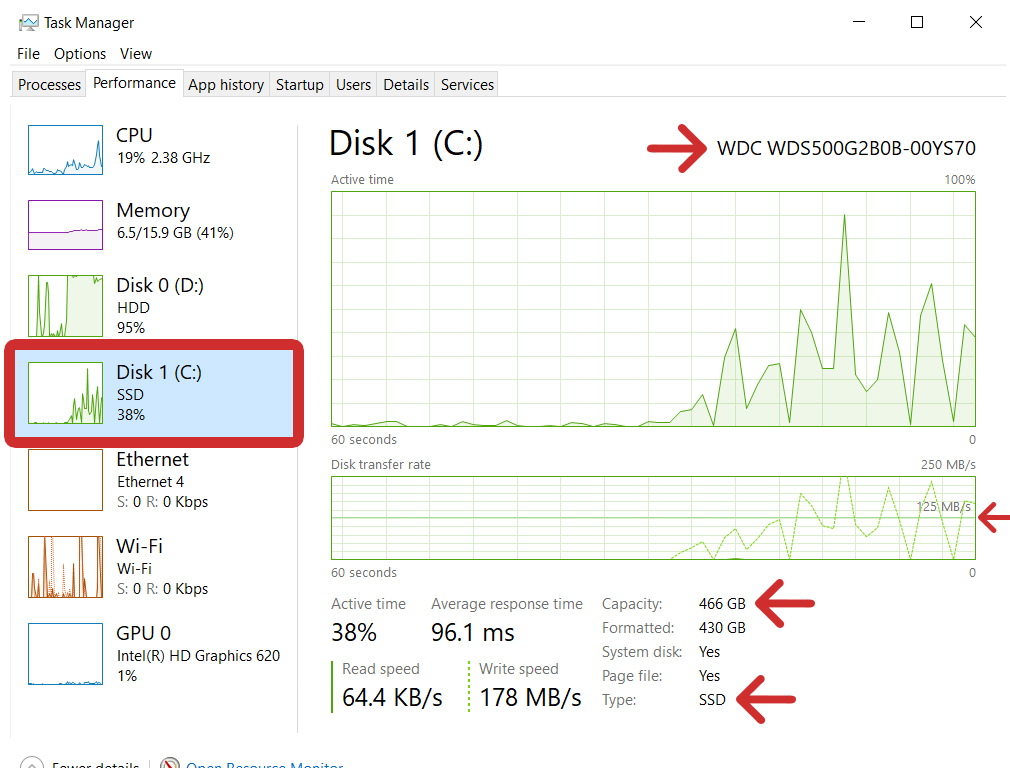
You’ll see real-time information about your hard drives while files are being transferred. Then, you will be able to see its Read/Write speed at the bottom of the window. While these speeds fluctuate, you can use the line in the second graph to see the drive’s average transfer rate.
How to Check Your Internet Specs in Real-Time
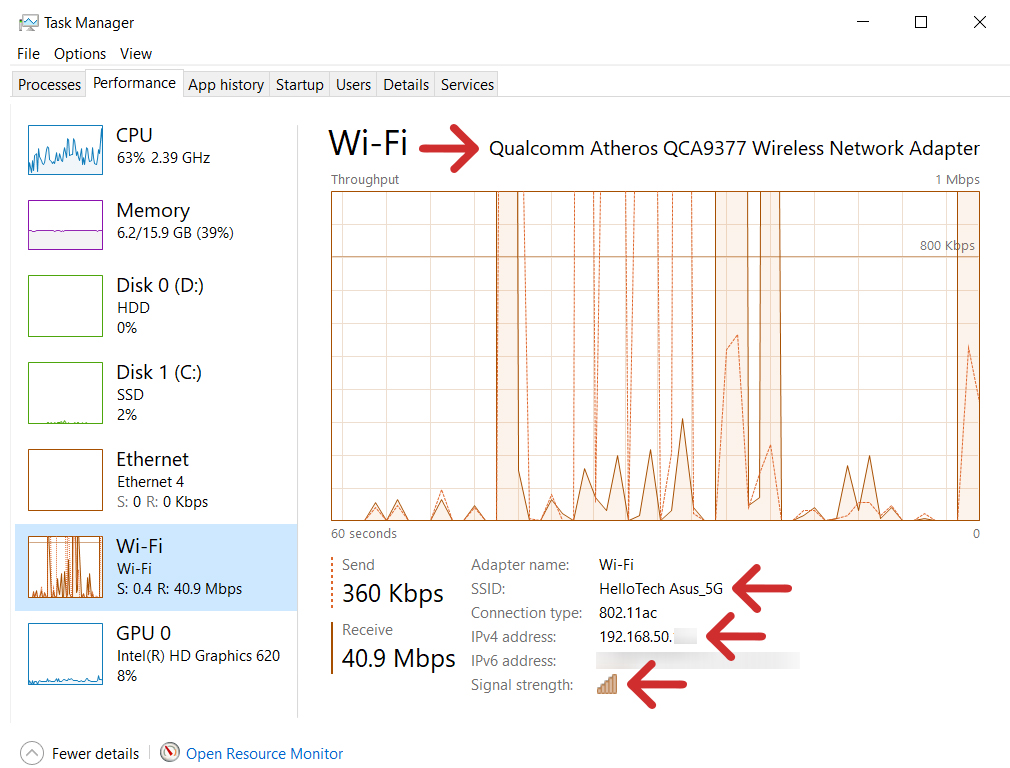
To check your internet specs, press the Windows + X keys and go to Task Manager > Performance > Wi-Fi or Ethernet. Then you will see your adapter’s name in the top-right corner and your network name (SSID), router IP address, and signal strength below.
Read More: How to test your WiFi speed at home
How to Check Your GPU Specs in Real-Time
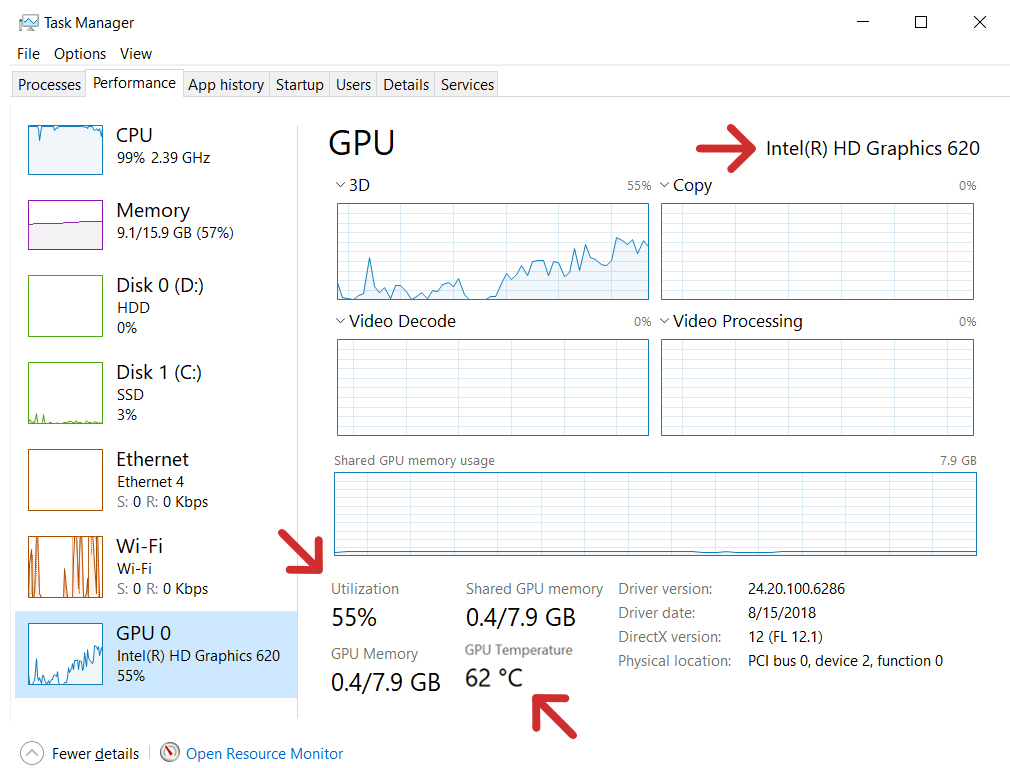
To check your GPU specs, press the Windows + X keys on your keyboard and go to Task Manager > Performance > GPU. Then you will see the name of your GPU in the top-right corner, as well as information about the utilization and temperature of your GPU below.
Read More: How to set up dual monitors on a Windows 10 PC
How to Check Your Specs with System Information
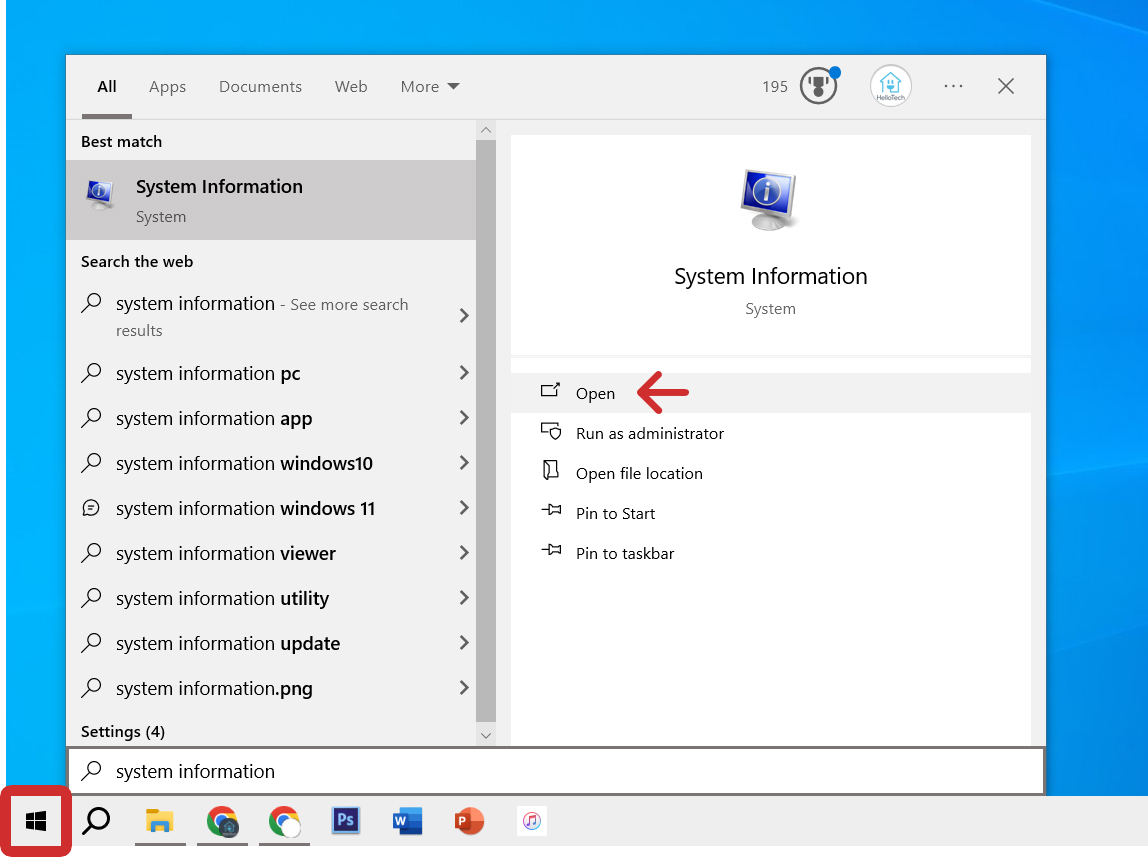
To check detailed specs for any device on your Windows 10 PC, left-click the Windows logo at the bottom of your screen, type “system information” and click Open. Then use the menu in the left sidebar and the search bar at the bottom of the window to search for specs.
- Click the Windows logo at the bottom of your screen. This is the logo with 4 squares, usually located in the bottom-left corner of the screen. Alternatively, you can press the Windows + R keys on your keyboard, type “msinfo32” into the Run box, and hit Enter on your keyboard.
- Then, type “System Information.”
- Next, click Open. You can also press the Enter key on your keyboard.
- Finally, use the menu in the left sidebar and the search bar at the bottom of the window to check for any specs.

If you want to find information for certain devices, here are some common paths:
- CPU: Under System Summary next to Processor
- GPU: UnderSystem Summary > Components > Display
- Motherboard: Under System Summary next to BaseBoard Manufacturer/Product/Version
- RAM: Under System Summary next to Installed/Total/Available Physical Memory
- Hard Drives: Under System Summary > Components > Storage > Drives
How to Check Your Specs Using Device Manager
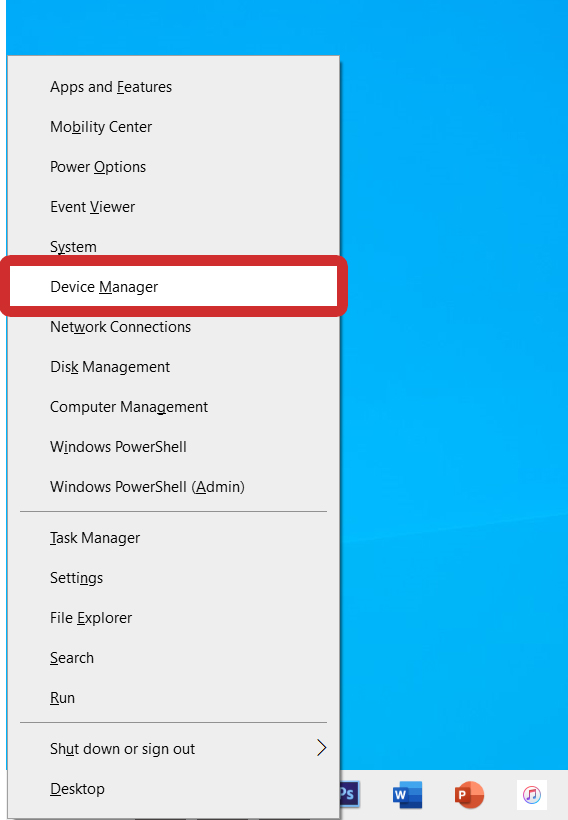
To check the specs for any device on your Windows 10 PC, press the Windows + X keys on your keyboard and select Device Manager. Then click the arrow icon next to a hardware category, right-click a device, and select Properties to check its name, status, and more.
- Press the Windows + X keys on your keyboard.
- Then, select Device Manager.
- Next, click the arrow next to the hardware you want to check. For example, the entry below Display adapters shows what GPU you have. You can also find your CPU under Processors, your RAM under Memory technology devices, and your hard drives under Disk drives.

- Then, right-click the device and select Properties. If your device isn’t working properly, you can try selecting Update driver from this menu.

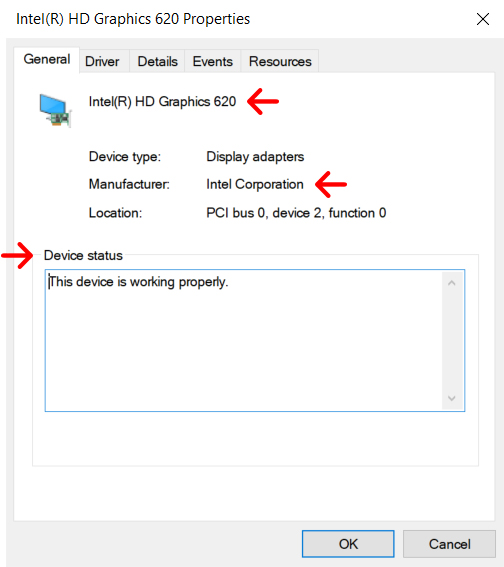
- Finally, check the specs in the General tab. From here, you can see your device name at the top, the type, manufacturer, and location below, and the Device status at the bottom.
If you still can’t find the specs you’re looking for, you can use the Windows Management Instrumentation command (wmic) to get specific information about your hardware devices, including serial numbers, power requirements, and more.
How to Check Your Specs with Windows PowerShell
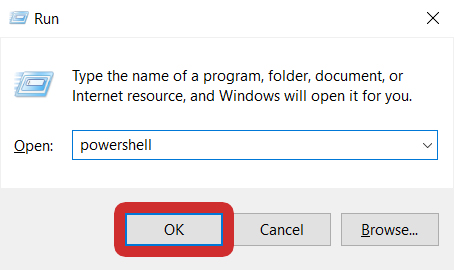
To check the most detailed specs on a Windows 10 PC, press the Windows + R keys on your keyboard, type “PowerShell” into the Run box, and click OK. Then enter this text into the window “wmic CPU get /format:list” or replace “CPU” with MEMORYCHIP, DISKDRIVE, or GPU.
- Press the Windows + R keys on your keyboard. When you press these keys at the same time, a Windows Run box will open.
- Then, type “powershell” into the Run box and click OK. You can also press the Enter key on your keyboard.
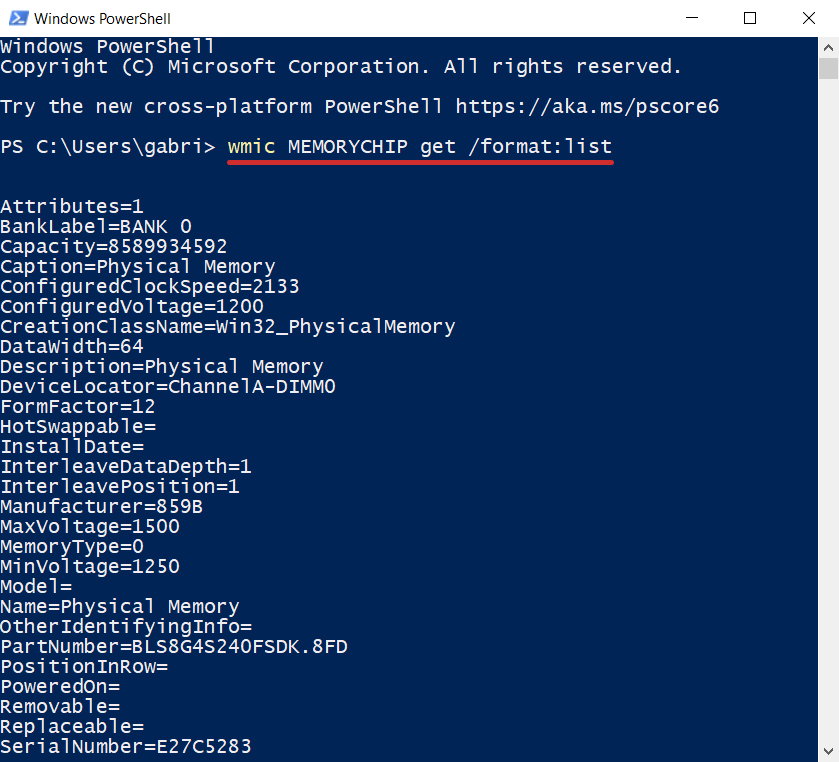
- Finally, type “wmic CPU get /format:list” into the PowerShell window and hit Enter. You can also copy and paste it into the window instead.
Here are some other helpful PowerShell commands you can use to check the specs on your Windows 10 computer:
- Basic Info: systeminfo
- Whole Computer: Get-ComputerInfo
- CPU: Get-ComputerInfo -ClassName Win32_Processor
- RAM: wmic MEMORYCHIP get /format:list
- GPU: wmic GPU get /format:list
- Hard Drives: wmic DISKDRIVE get /format:list
- Motherboard: wmic BASEBOARD get /format:list
- Battery: powercfg /batteryreport