Your Windows 10 computer will automatically sleep after a certain amount of time in order to help conserve power or your laptop’s batteries. However, it can be annoying if your computer keeps going to sleep when you don’t want it to. Here’s how to turn off sleep mode on your Windows 10 PC and prevent your computer from sleeping in the future.
How to Turn Off Sleep Mode on a Windows 10 PC
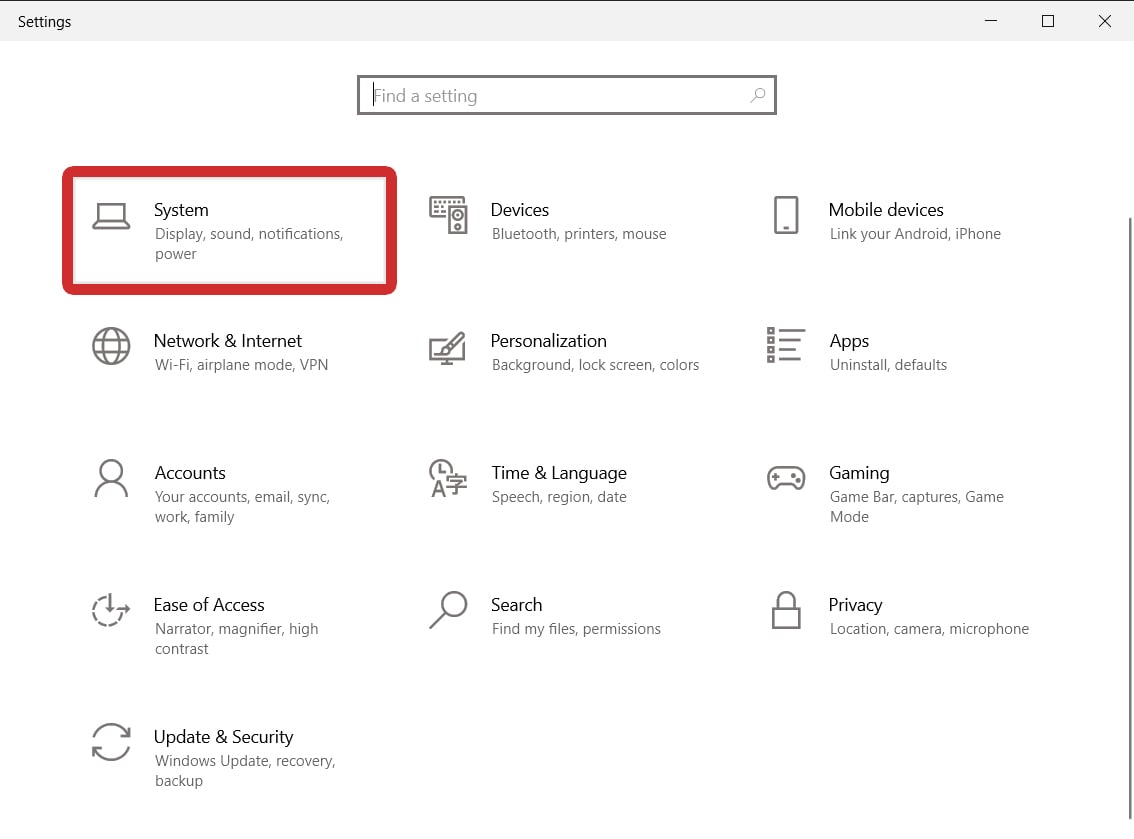
To turn off sleep mode on a Windows 10 PC, press the Windows + I keys to open a settings window. Then, go to System > Power & sleep and select the drop-down menus under Sleep. Finally, choose Never to completely turn off sleep mode on your computer.
- Press the Windows + I keys on your keyboard. When you press these keys at the same time, a settings window will open. Alternatively, you can open settings by clicking the Windows logo at the bottom of your screen, typing “settings” into the search bar, and clicking Open.
- Then, go to System.
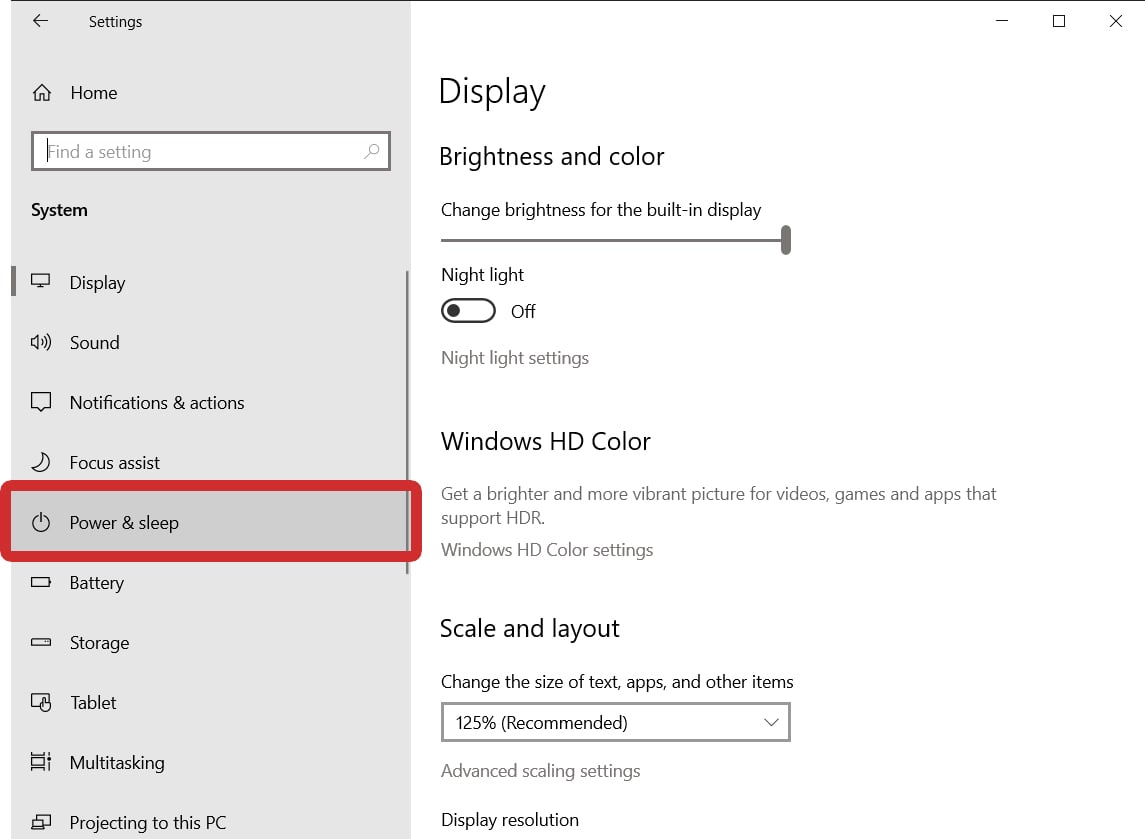
- Next, click Power & sleep. You will see this in the left sidebar. If you don’t see this option, try expanding the window by clicking the square icon in the top-right corner.
- Finally, click the drop-down boxes under Sleep and change them to Never. Your computer will not enter sleep mode anymore. You can also choose to adjust the time it takes before your computer goes to sleep.
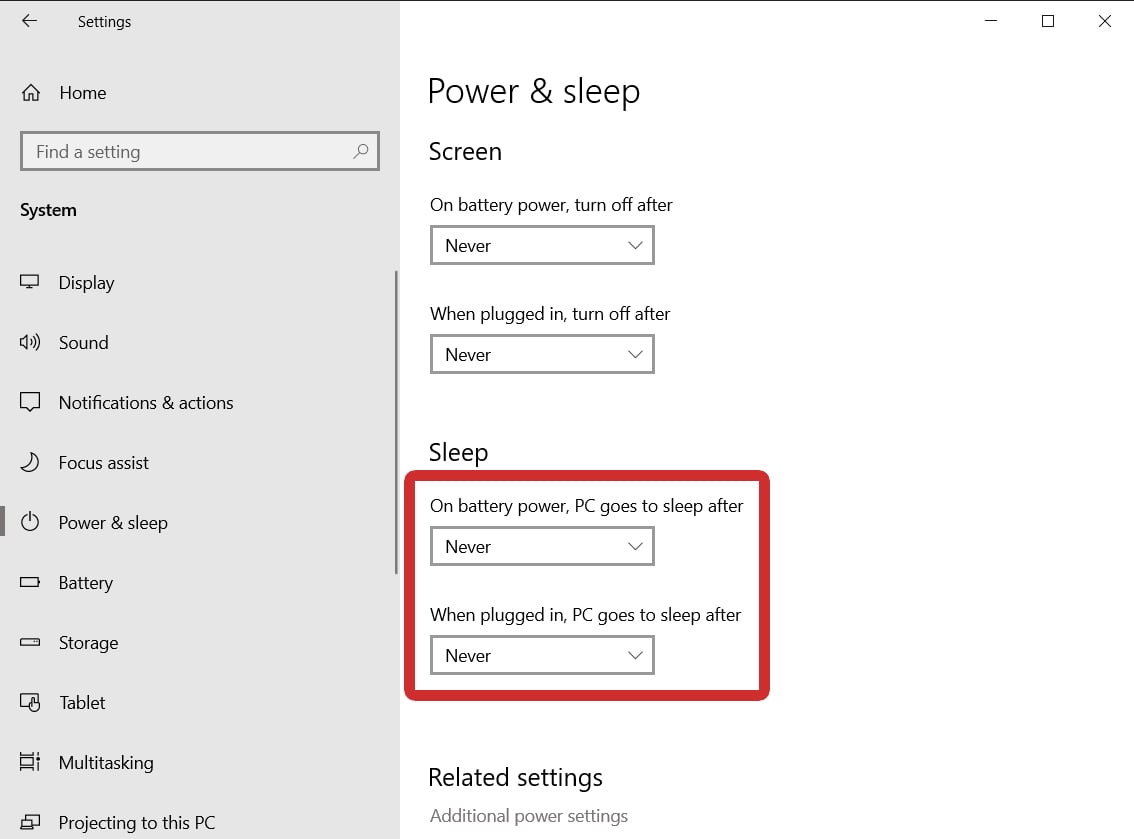
From here, you can also set how long it takes for your screen to turn off. Under the Screen section above Sleep, set the options to Never if you want to keep your screen on whenever your computer is running.
Read More: How to set up dual monitors on Windows 10
If these steps don’t work, you might have to change other settings in the Control Panel instead. Here’s how:
How to Prevent Your Windows 10 PC from Sleeping
To prevent your Windows 10 PC from entering sleep mode, click the Windows logo at the bottom of your screen, type “Control Panel,” and click Open. Then go to System and Security > Change when the computer sleeps. Finally, set all values to Never and click Save changes.
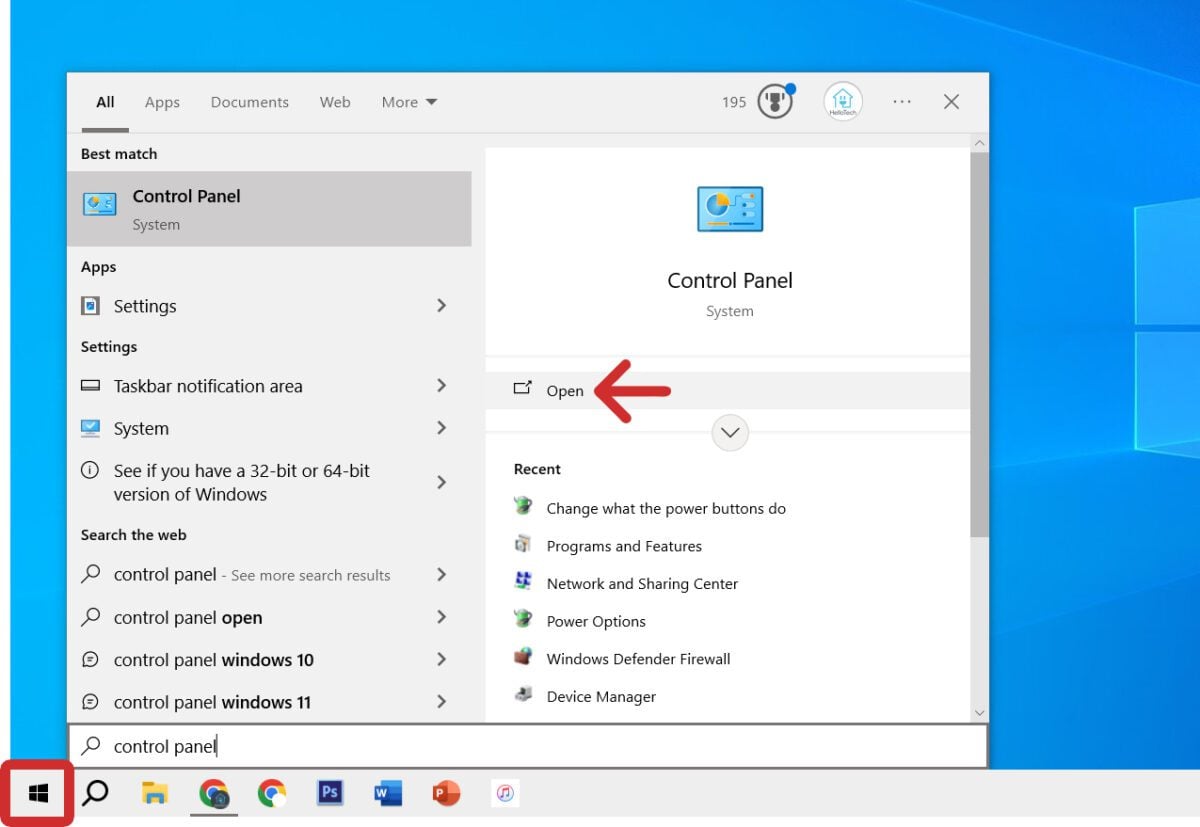
- Left-click the Windows logo at the bottom of your screen. This will open the Windows Start menu.
- Then, type “Control Panel.” When you start typing, a search bar will appear. You won’t have to type the whole phrase to see the right option appear.
- Next, click Open. You will see this on the right side of the pop-up window. Alternatively, you can press Enter on your keyboard.
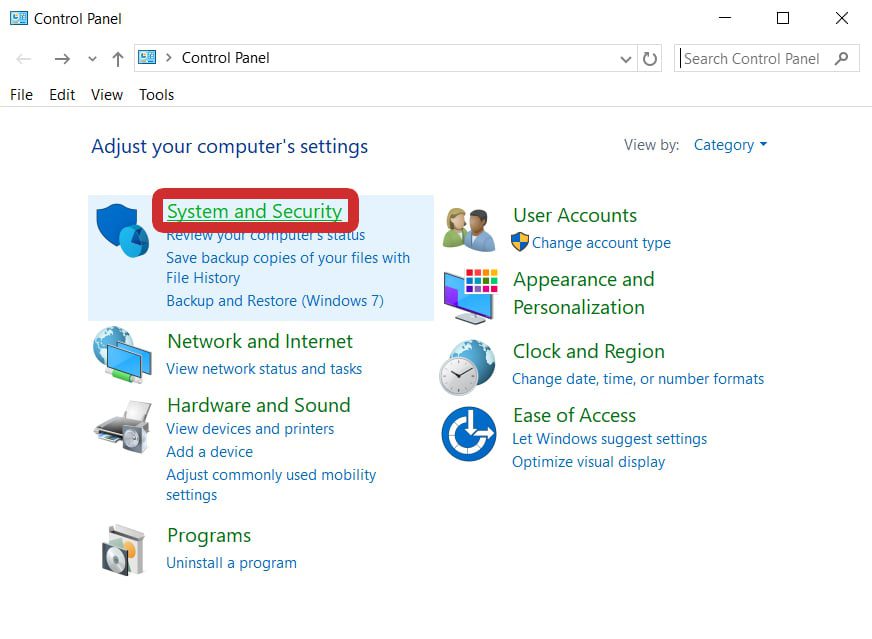
- Then select System and Security.
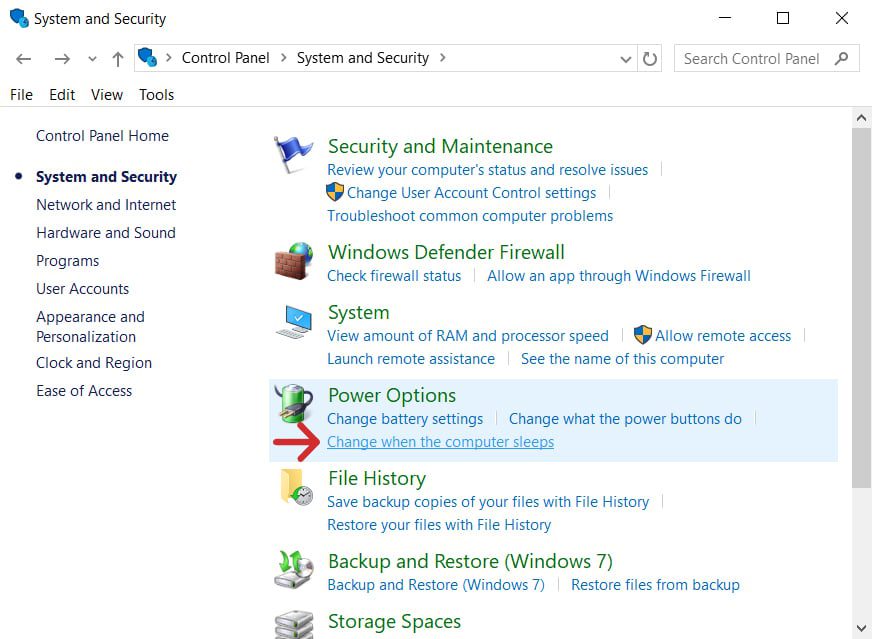
- Next, click Change when the computer sleeps. You will see this under Power Options.
- Then, set all options to Never to turn off sleep mode.
- Finally, click Save changes.
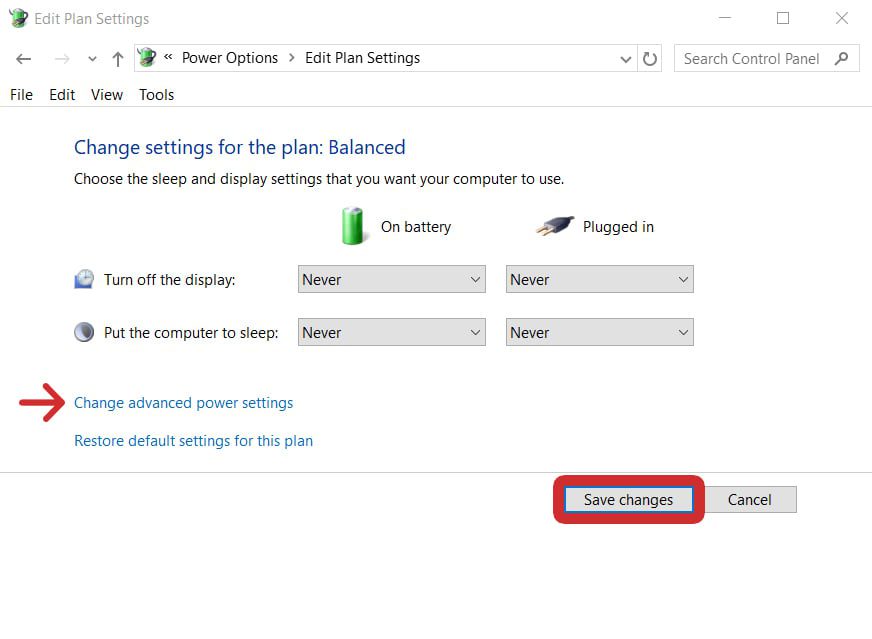
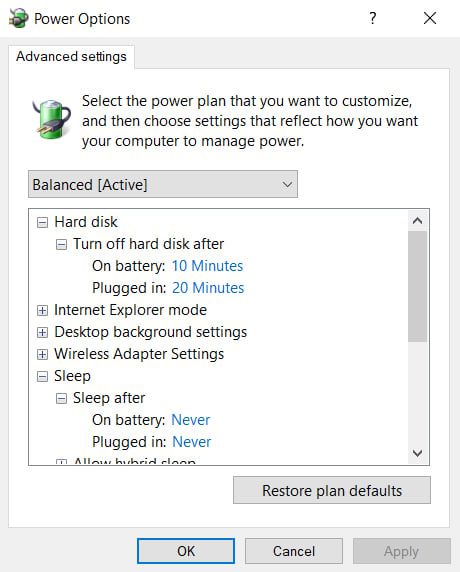
If you want to make sure sleep mode is off everywhere, click Change advanced power settings just above the Save changes button. This will open a menu with all the settings you can change for sleep, hibernation, and more.