Before you buy a new computer, it’s a good idea to check your specs first. Finding out which processor your current computer is using can help you determine if you should upgrade to a new PC in the first place. On the other hand, if you need more RAM or storage, you might just be able to upgrade those components alone. Here’s everything you need to know about how to check the specs of your CPU, GPU, RAM, and Hard drives on a Windows 11 PC.
How To Check Your CPU in Windows 11
To check your CPU specs on a Windows 11 PC, press the Windows + i keys on your keyboard at the same time to open a Settings window. Then go to System > About, and you will see your CPU model name and clock speed listed next to Processor.
- Press the Windows + i keys on your keyboard. When you press these keys at the same time, it will open a Settings window.


- Then select the System tab. You will see this on the left side of the Settings window. If you don’t see this option, try expanding the window by clicking the square icon in the top-right corner.

- Next, go to About. You will need to scroll down all the way on the right side of the Settings window to see this option.
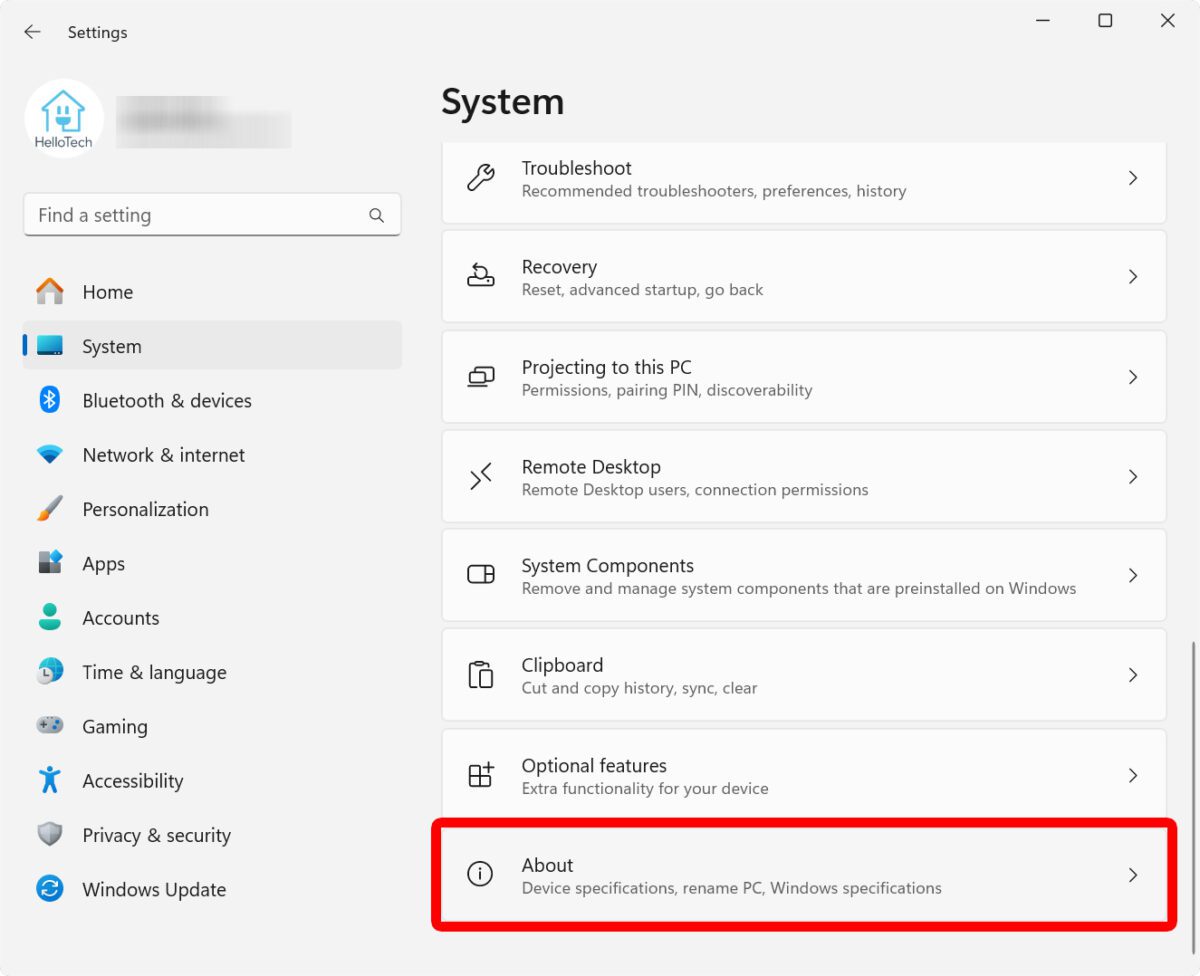
- Finally, you will see your CPU specs next to Processor. This will tell you the model name of your processor, as well as the base clock speed.

From this About window, you can also quickly check how much RAM you have installed and which version of Windows you are running.
How To Check Your RAM in Windows 11
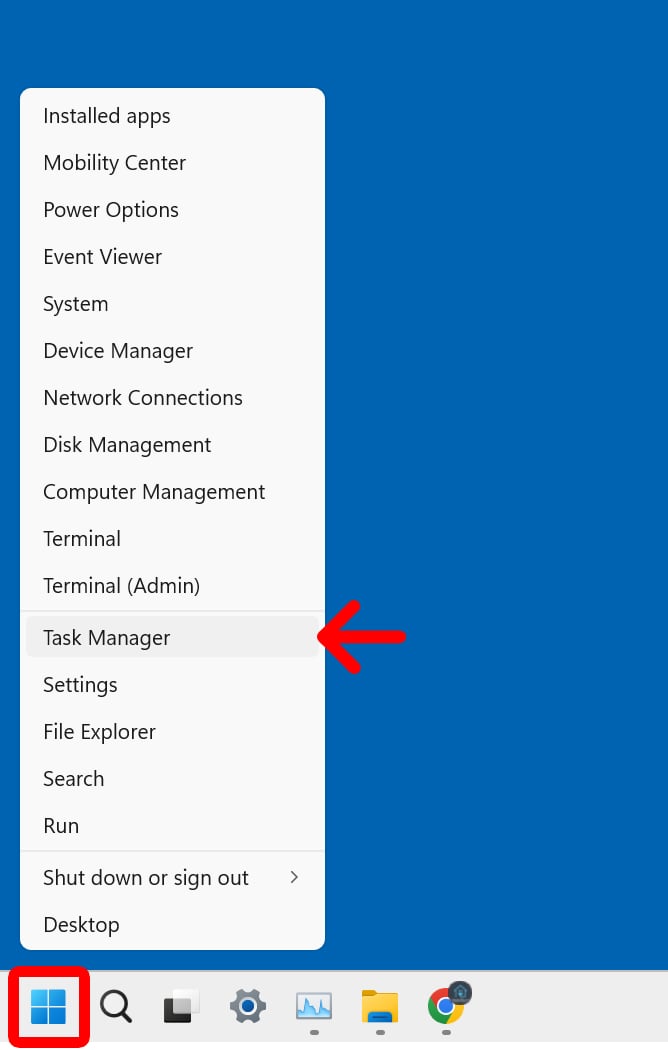
To check the RAM specs on your Windows 11 PC, right-click the Windows logo at the bottom of your screen and select Task Manager. Then click the Performance tab and select Memory. Finally, you will see how much RAM your computer has in the top-right corner.
- Right-click the Windows logo at the bottom of your screen. By default, this will be centered in the Taskbar at the bottom of your screen.
- Then select Task Manager.
- Next, select the Performance tab. You will see this on the left side of the window. If you don’t see this tab, try expanding your window by clicking the square icon in the top-right corner.
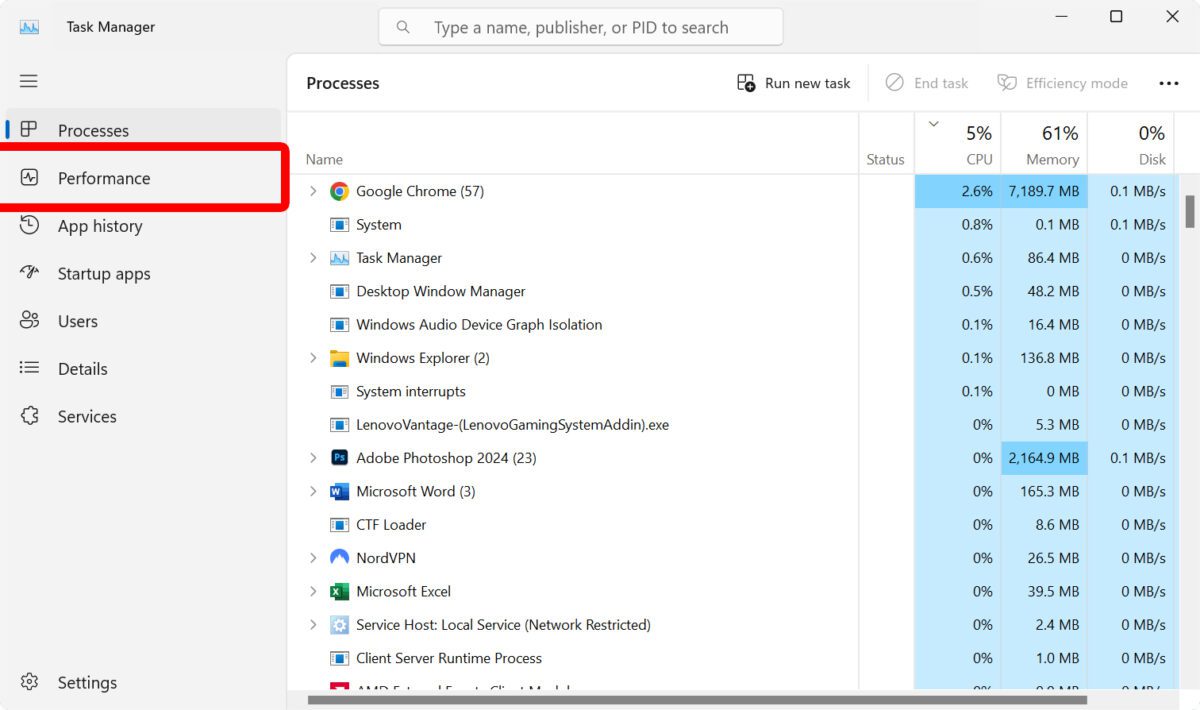
- Then, click Memory.

- Finally, you will see how much RAM your Windows 11 PC has in the top-right corner. The top number will show you the total RAM you have installed, while the number below will show you how much RAM is actually available to use.

If the graph shows you are using too much memory or your applications are running slow, it might be time to upgrade your RAM. In the bottom-right section of the window, you can also check your RAM speed, how many memory slots you are using, and your RAM’s form factor.
Read More: How much RAM do you really need?
Using Task Manager to Check Other Specs
Using the Task Manager is a good way to check your other PC specs and the performance of your hardware components. For example, if you click on the CPU tab, you’ll be able to see how many cores your processor has and other helpful information.
The GPU tabs also show you the current temperature of your graphics card and other real-time information.

However, to find all the graphics cards on your Windows 11 PC, you might want to use the System Information tab instead.
How To Check Your Graphics Card in Windows 11
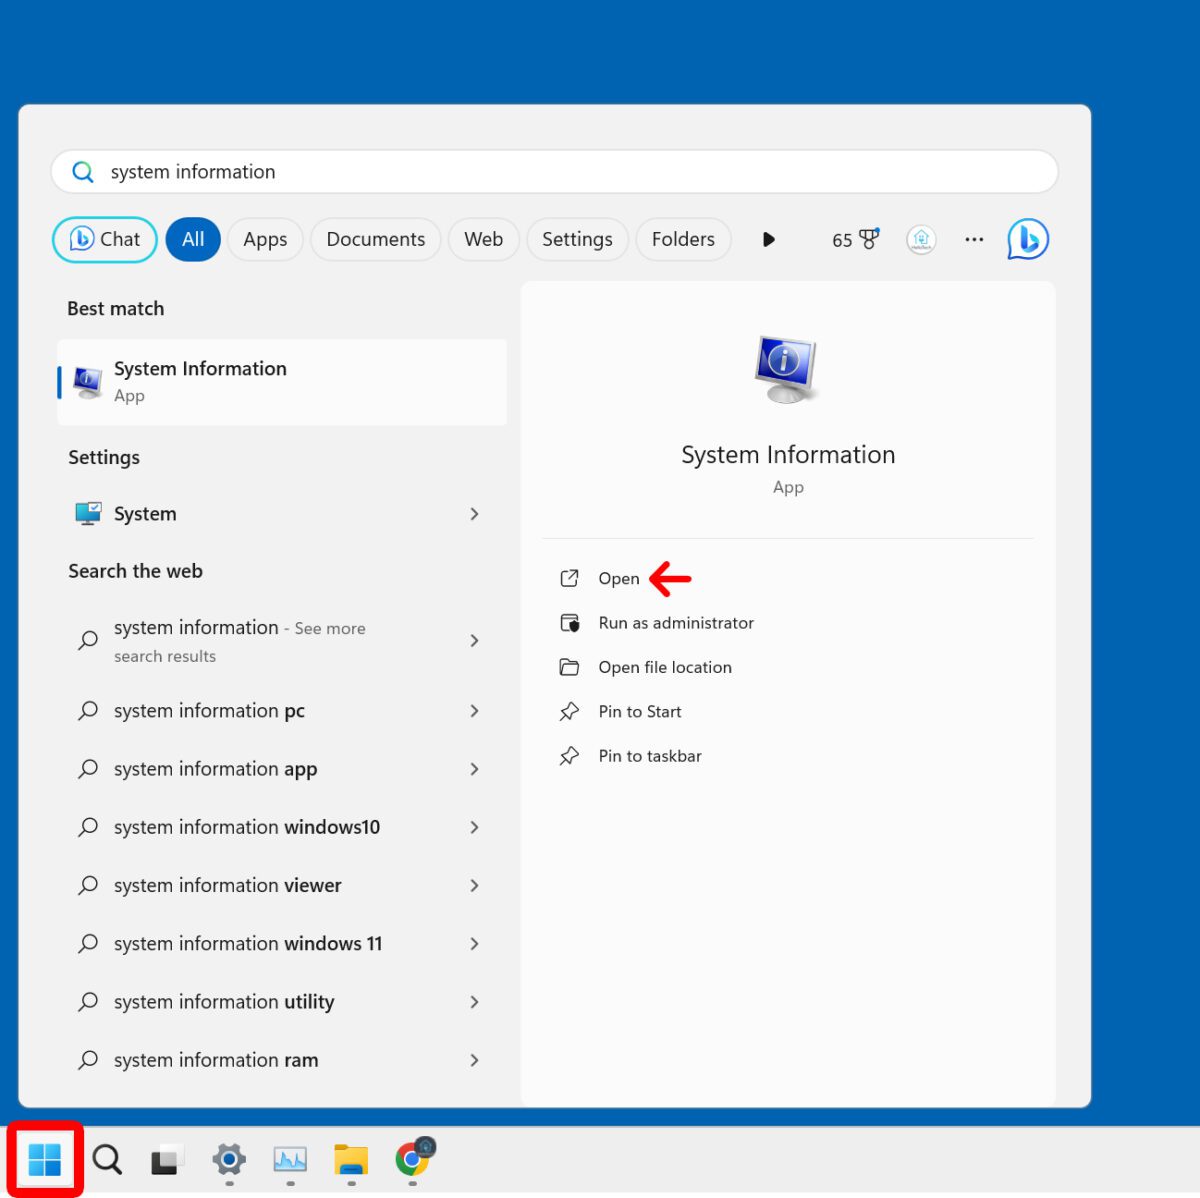
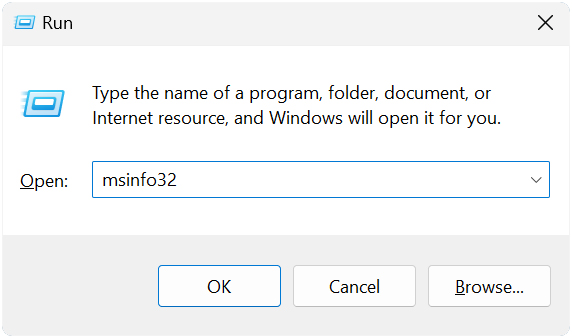
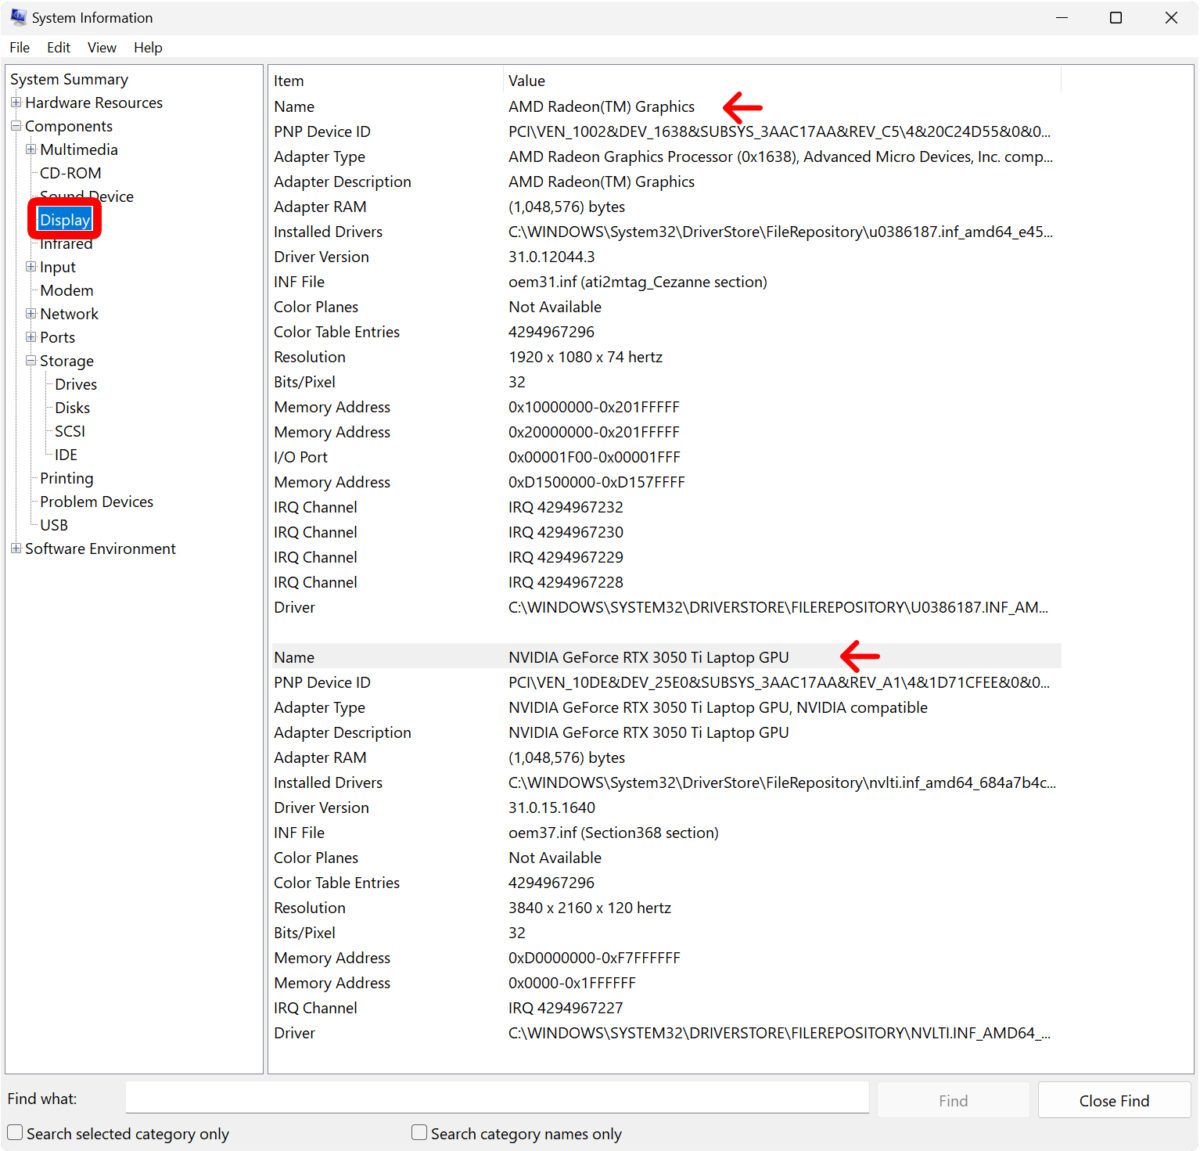
To find out which graphics cards are installed on your Windows 11 PC, click the Windows logo at the bottom of your screen and type “System Information.” Then go to Components > Display, and you will see the model of all your GPUs next to “Name.”
- Left-click the Windows logo at the bottom of your screen. This will open the Windows Start Menu.
- Then type “System Information” and click Open. If you don’t see a search bar at the top of the Start Menu, you can start typing and one will appear.
- Then press the plus sign next to Components.
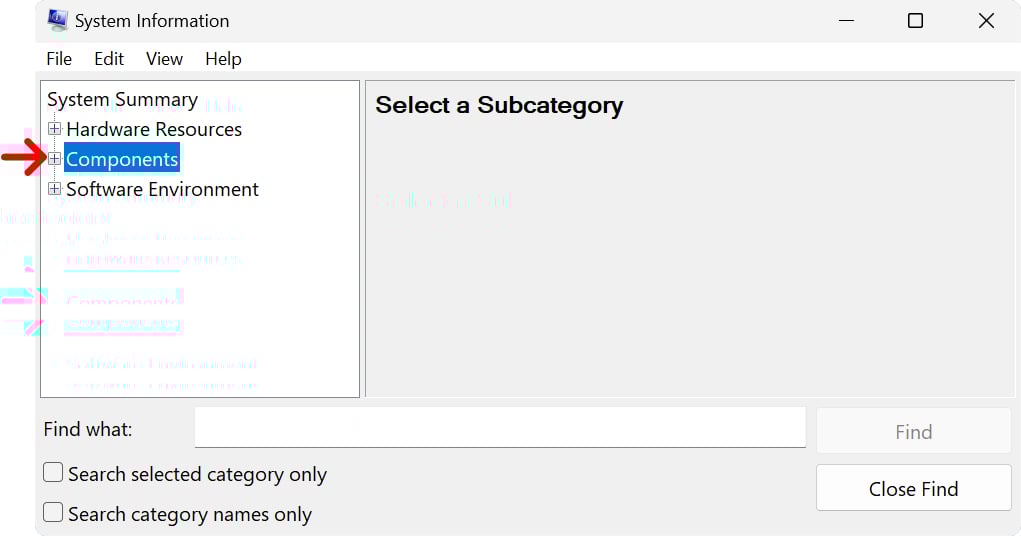
- Next, click Display.
- Finally, you will see the model of all your GPUs next to Name. If you have more than one graphics card, they will all appear with a space between them.
How To Check Your GPU Specs in Windows 11 Settings
If you want more useful information, you can also check your GPU specs through Windows Settings. To do this, press the Windows + i keys on your keyboard and go to System > Display > Advanced Display. Finally, select Display adapter properties to see the specs of your graphics memory.

From the Advanced Display window, you can also see other important information about your graphics, including the bit-depth, color format, and color space. You can also change your refresh rate by clicking the drop-down menu next to Choose a refresh rate.
How To Check Your Hard Drive Specs on a Windows 11 PC
To check your hard drive specs on your Windows 11 PC, press the Windows + i keys to open a Settings window. Then go to System > Storage, and you will see your total storage space and available space at the top of the window. To find out more about other drives, go to
- Press the Windows + i keys on your keyboard. When you press these keys at the same time, it will open a Settings window.
- Then go to System. You will see this on the left side of your screen. If you don’t see this option, try expanding the window by clicking the box icon in the top-right corner.

- Next, select Storage.
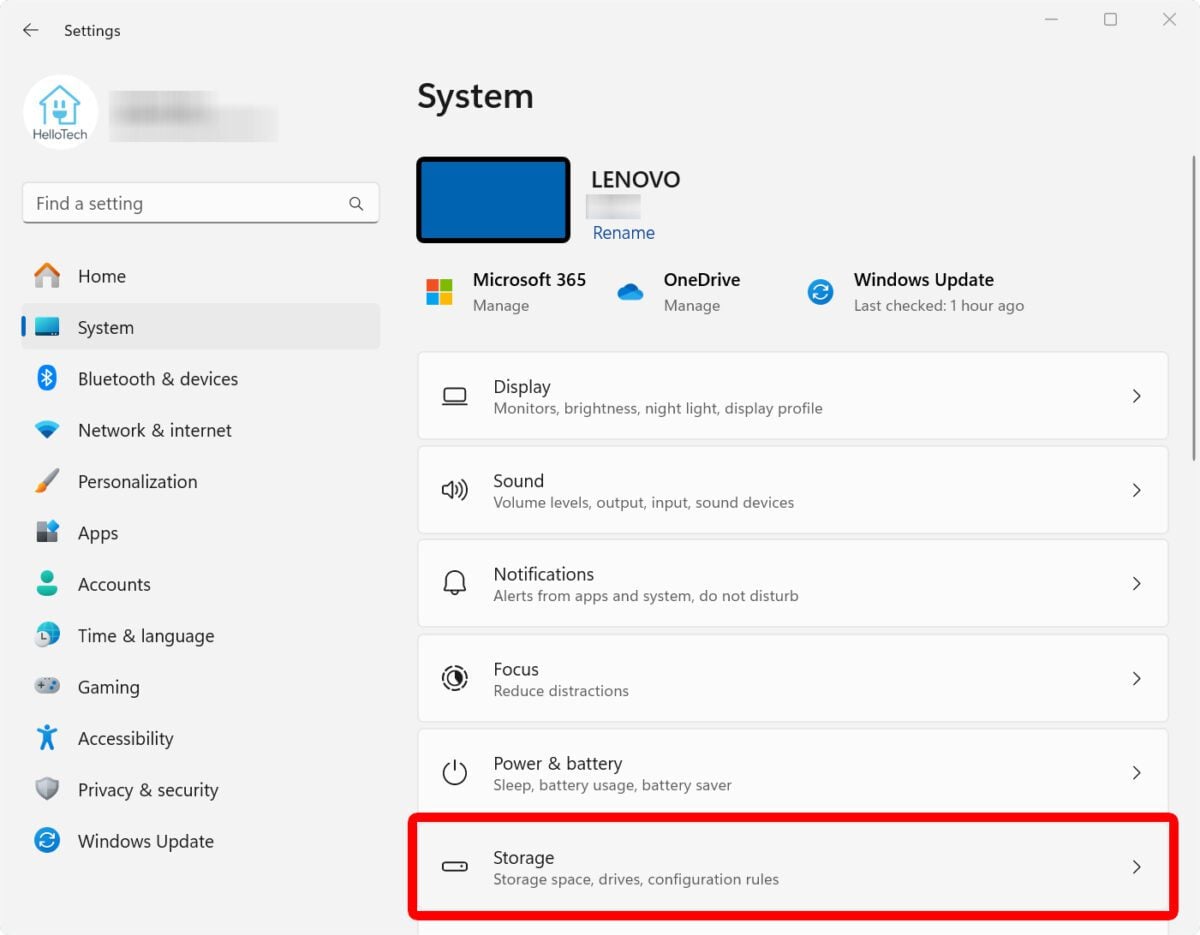
- Finally, you will see your storage specs at the top of the window. You will see your total storage space in the center, your used storage on the left, and your free storage on the right.
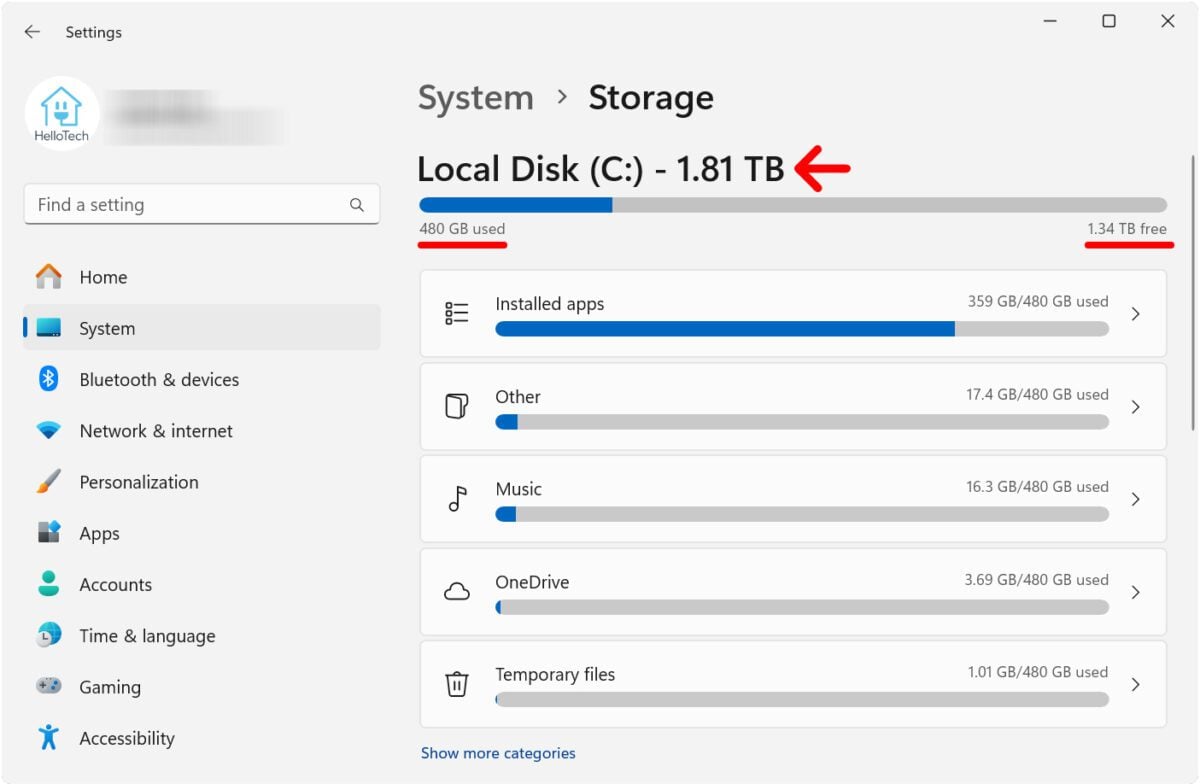
Your storage space will be broken down into how much space your apps, media, and other files are taking up. If you select any of these categories, you will then be able to see details about them and free up space on your computer.
Read More: How to delete apps from your Windows 11 PC
How To See More Information About Your Hard Drives
From this Storage Settings window, you can also scroll down and select Advanced storage settings > Disks & volumes to see more information about all the hard drives on your Windows 11 computer.

From here, click Properties to see all the hard drives connected to your Windows 11 PC and check their health and temperature.
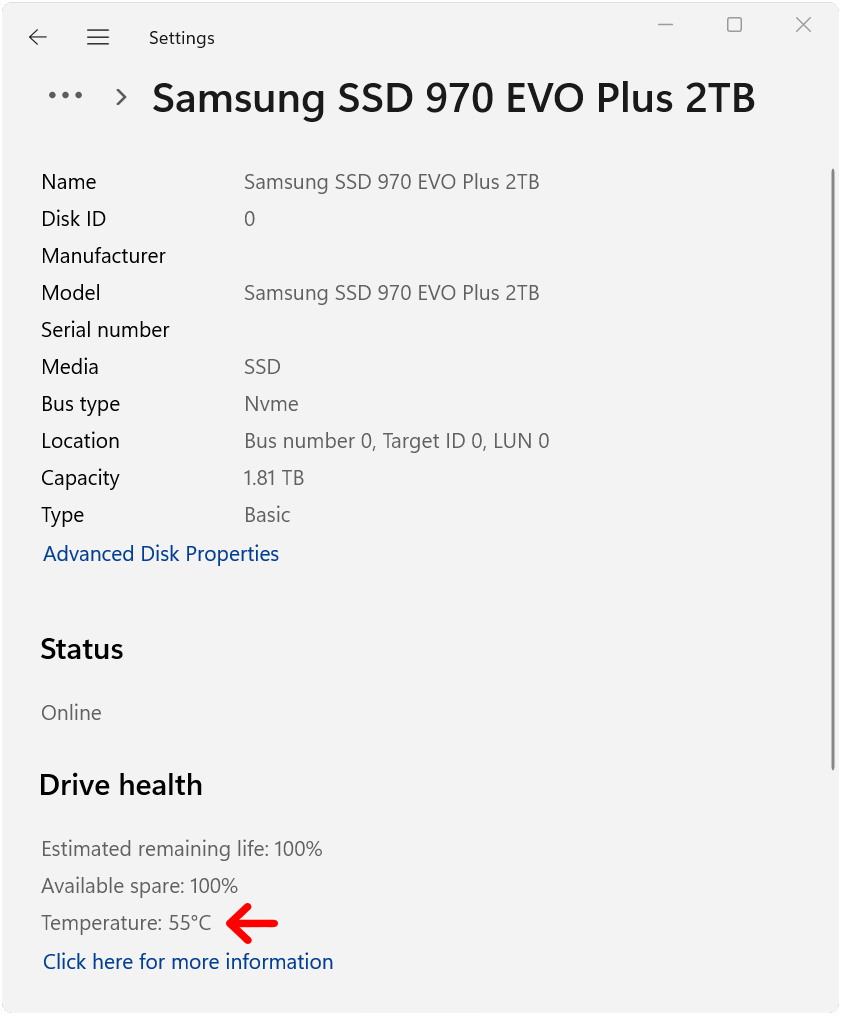
If you see a critical warning under Drive health, it might be time to upgrade your hard drive.
Read More: What’s the difference between HDD and SSD?
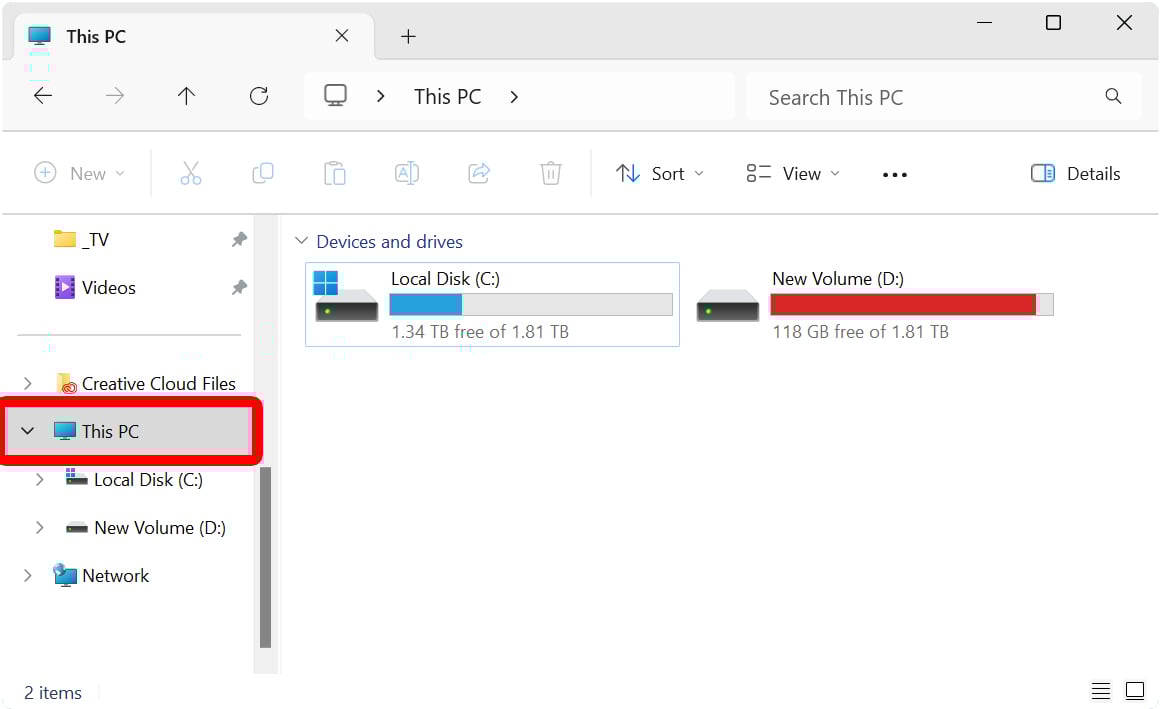
You can also use File Explorer to quickly see how much space you have on your drives. To do this, left-click an empty space on your desktop and press the CTRL + N keys on your keyboard. Then select This PC from the left sidebar.
Now that you know how to check your CPU, GPU, RAM, and hard drive storage on your Windows 11 PC, check out our guide on what to look for in a new laptop.
If you need help with your Windows 11 PC, HelloTech can send an expert to you. Our friendly technicians can come to your door as soon as today to help you repair any issues with your computer and get it running like new.