While an iPhone can be quite expensive, all the photos you have on it are probably more valuable. That’s why it’s so important to back up your photos, so you don’t lose them in case something happens to your iPhone. Here’s how to transfer photos from your iPhone to the Photos app on your Mac, a folder on your Mac, and with AirDrop.
How to Import Photos From Your iPhone to the Photos App
To import photos from your iPhone to the Photos app, connect it to your Mac using a USB cable. Then open the Photos app on your Mac and select your iPhone from the left sidebar. Finally, select the photos you want to import or click Import All New Items.
- Connect your iPhone to a Mac with a USB Cable.
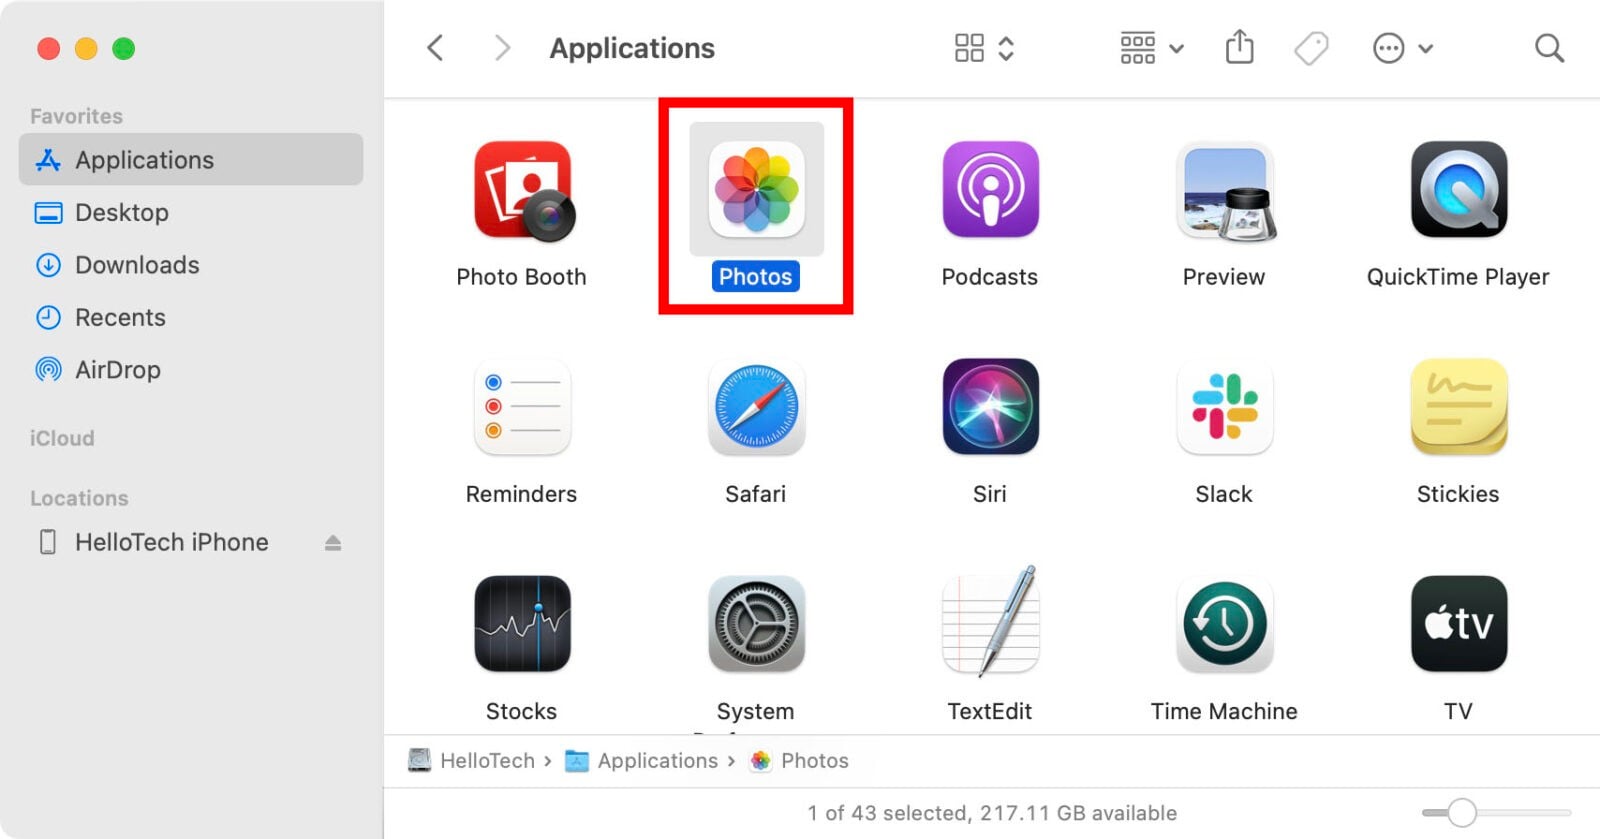
- Then open the Photos app. You can find this app in your Applications folder by right-clicking anywhere on your desktop and hitting the Command + Shift + A keys at the same time.


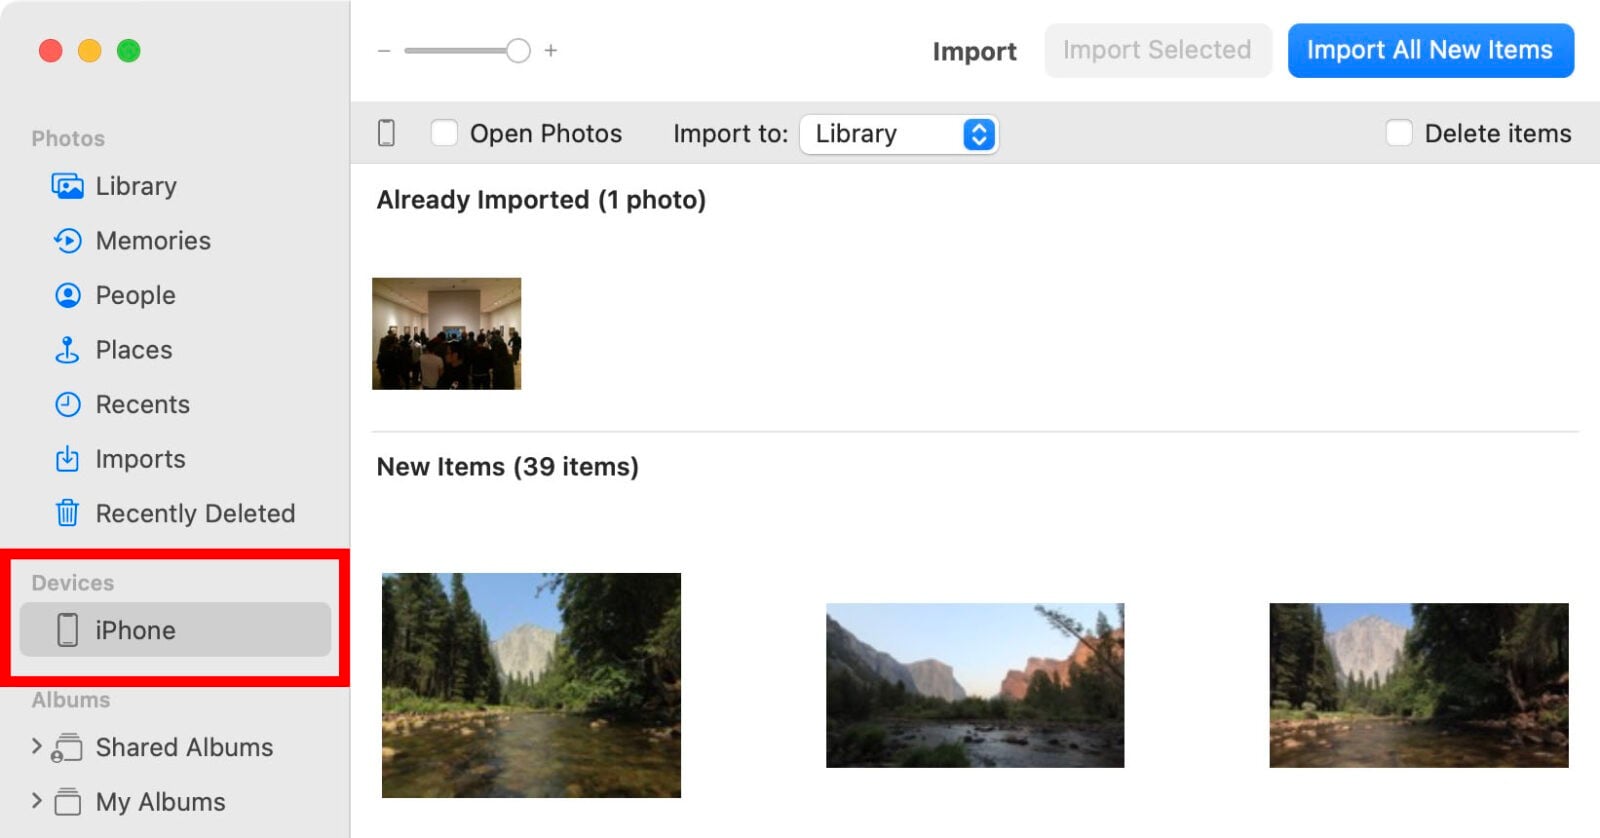
- Next, select your iPhone from the left sidebar. You should see this under Devices.

Note: If the app does not show your photos, make sure to unlock your iPhone. You might also see a prompt that asks you to trust this computer. Tap Trust to continue
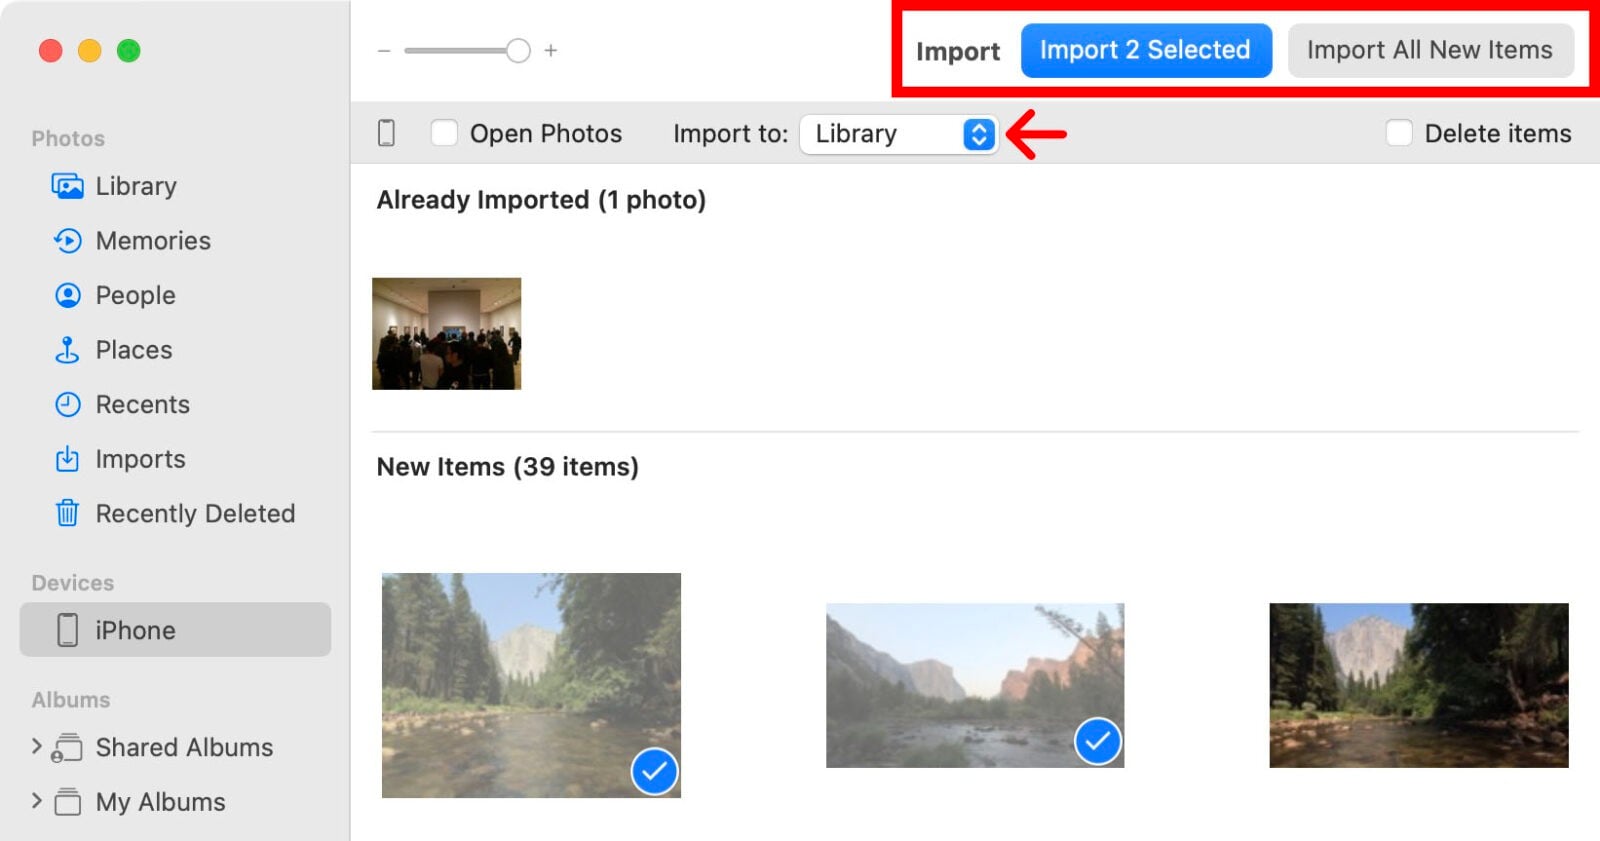
- Then select which photos you want to import or click Import All New Items. When you select individual photos, they will be highlighted and a blue checkmark will appear in the bottom-right corner. If you choose to import all new photos, it will sync any pictures that are not already in the Photos app.
Note: You can also select the drop-down menu next to Import to: and organize your photos in different albums.

- Finally, wait for the photos to be imported before disconnecting your device.
While importing your photos to the Photos app is a great way to save them, you can also transfer them directly into any folder on your Mac. Here’s how:
How to Transfer Photos From Your iPhone to a Folder on Your Mac
To transfer photos from your iPhone, connect it to a Mac using a USB cable. Then open theImage Capture app on your Mac and select your iPhone from the left sidebar. Finally, choose which photos you want to transfer and select Download or Download All.
- Connect your iPhone to a Mac with a USB Cable.
- Then open the Image Capture app on your Mac. This is a free application that comes pre-installed on all modern Macs. You can find it in your Applications folder.

- Next, select your iPhone in the left sidebar. You should see this under Devices in the left sidebar of the Image Capture app.

- Then select the photos you want to import. You can select multiple photos while holding down the Shift or Command keys on your keyboard. If you want to transfer all the photos from your iPhone to your Mac, you can skip this step.
- Finally, and click Download or Download All.
Note: Image Capture will save your photos to the Pictures folder on your Mac by default. You can choose to transfer your photos to a different folder by clicking the drop-down menu next to Import To and selecting Other.
You can also transfer your iPhone photos to your Mac without a USB by using AirDrop. Here’s how:
How to Transfer Photos From Your iPhone to a Mac Using AirDrop
To transfer photos from your iPhone to a Mac wirelessly, open the Photos app on your iPhone and select the photos you want to transfer. Then tap the share icon and select your Mac. Your photos will automatically be imported to the Downloads folder on your Mac.
Note: In order for these steps to work, you need to have AirDrop enabled on your iPhone and Mac. Check out our step-by-step guide on how to turn on AirDrop if you have any problems with the steps below.
- Open the Photos app on your iPhone.
- Then tap Select. You can find it in the top-right corner of your screen.
- Next, select the photos that you want to transfer.
- Then tap the Share button. This is the button with an arrow coming out of a square in the bottom-left corner of your screen.

- Then select AirDrop. You should see this among a row of applications. If you don’t see it, scroll to the right in that row.
- Next, select your Mac.
- Finally, wait for your photos to be transferred to the Downloads folder on your Mac.
Now that you know how to transfer your iPhone photos to a Mac, check out our step-by-step guide on how to delete all your photos to free up space on your iPhone.


