If you are wondering how to take all your family photos off your iPhone and put them on your computer, wonder no more. This step-by-step guide will show you how to transfer photos from an iPhone to a PC.
How To Transfer Photos From iPhone to PC Using a USB Cable
There are three ways to import your photos to a Windows PC with a USB Cable. One of the easiest ways to import your photos to a Windows PC is through the Photos app that comes preloaded on your computer. Here’s how to transfer your photos to a Windows PC using the Photos app:
How To Download iPhone Photos to a PC Using the Windows Photos App
- Using a USB cable, connect your iPhone to your PC.
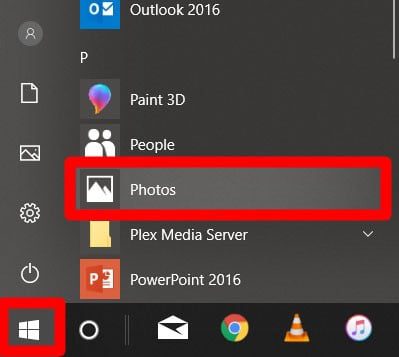
- Open the Photos app. This can be found by going into the Start Menu by clicking on the Windows icon on the very bottom left-hand side of your screen. Then scroll down the list of applications you have until you reach Photos.
- Click the “Import” button. If you’re using Windows 10, the import button will be in the upper right corner of the app. On Windows 8, the Import option will appear when you right-click anywhere in the Photos app.
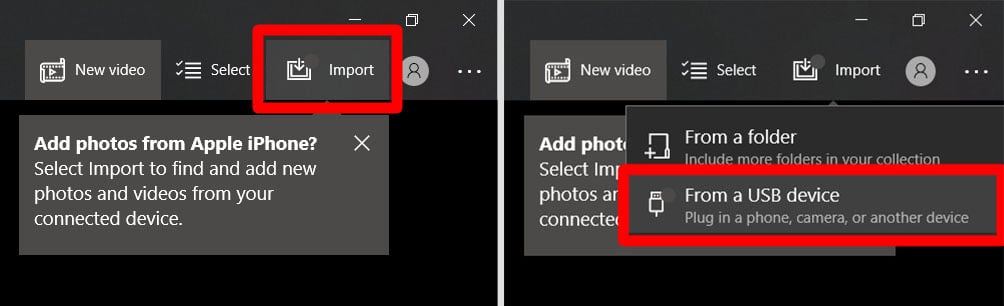
- Then select “import from a USB device” from the drop-down menu.
- Choose the photos you want to transfer and click “import selected.” You can select entire albums of photos by date, or select individual photos by clicking on the small checkmark in the upper right-hand corner of each image.

- Now you can find the photos you imported in your Pictures folder. You can find this folder under the file path: C:\Users\YOUR USERNAME\Pictures.
If you are using a PC with Windows 7, you won’t have access to the Photos app. Here’s how to download your photos to a Windows 7 PC using the AutoPlay app instead:
How To Download iPhone Photos to a PC Using Windows AutoPlay
- Connect your iPhone to your PC using a USB cable.
- An AutoPlay window should pop up automatically.
- Select the 4th option: Import photos and videos – Photos.
- Wait for your photos to be imported.
- You will find the imported photos in your Pictures folder. You can find this folder under the file path: C:\Users\YOUR USERNAME\Pictures.
How To Import iPhone Photos to PC Using File Explorer
- Connect your iPhone to your PC using a USB cable. If prompted, allow the iPhone to connect to your PC by entering a passcode.
- Open File Explorer. If you are using Windows 8 or Windows 10, you can easily open File Explorer by pressing the Windows Key + “E” at the same time.
- Click “This PC” in the sidebar. You will see your iPhone under Devices and Drives. If using Windows 7, open Windows Explorer. You will see your iPhone under “Computer.”
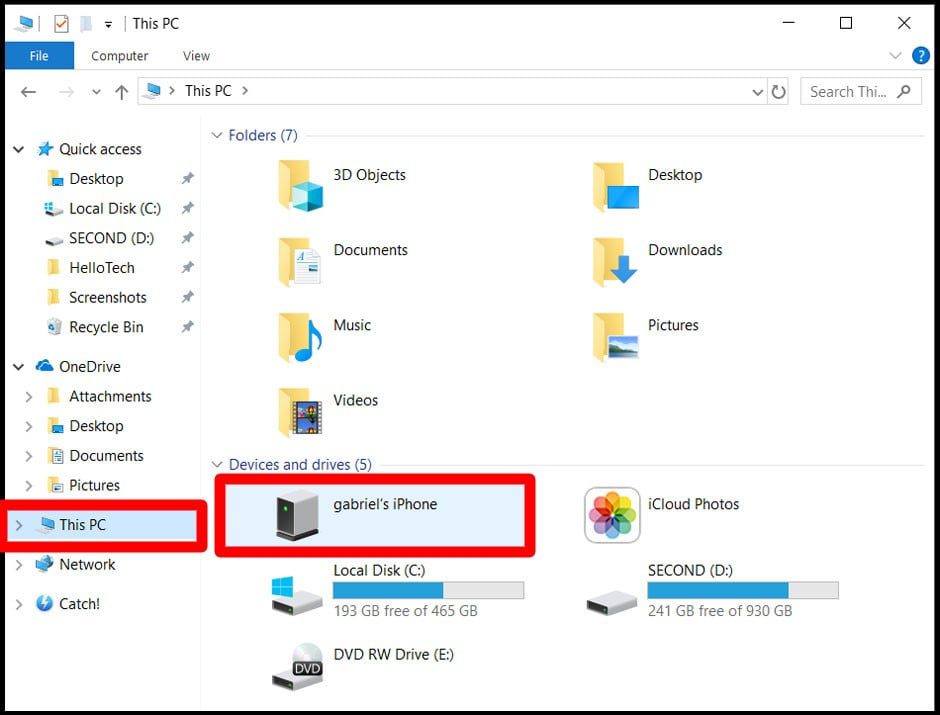
- Double click on the icon with your iPhone’s name.
- Then double click on Internal Storage > DCIM.
- Find the folders that contain the photos that you want to import.
- Finally, copy or drag the photos to the location that you want to keep them. If you want to keep your photos organized, it might be a good idea to move these photos to your Pictures folder.
Don’t have a USB cable handy? Find out how to import your photos wirelessly with iCloud by clicking this link.
