
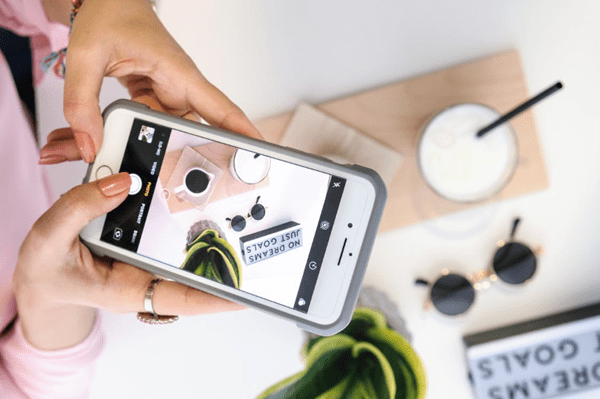
In this era of smartphones, many people rely on their phone cameras to capture life’s best moments.
Whether traveling or spending time with your loved ones, maximizing your smartphone’s camera functionality means clearer, better, more shareable memories. With advanced smartphone technologies, mobile cameras are now better equipped than ever to take professional-quality photos.
Follow these tips and tricks to help you capture the best photos using your smartphone.
Invest in a Good Smartphone
There exists a wide range of smartphones in the market, and each is designed to deliver a unique value proposition. The quality of smartphone cameras available has taken a massive leap from what it was three to five years ago; but, only some phones utilize the latest technologies and offer the highest resolution image capture.
The easiest trick for achieving the best photos using your smartphone is simple: invest in a device with an excellent camera. Make your life easy and utilize the technology that is available to you. The best smartphone manufacturers known for their cameras are Apple, Samsung, Google, and Huawei.
Maximize Natural Lighting
Lighting is a crucial component to consider if you want to take high-quality photographs. When using your smartphone camera, adjust your settings according to the natural light to get the best photos.
Some smartphones like the Samsung Galaxy S9 have very bright lenses. You can, therefore, maximize this feature when taking pictures in dim lighting.
If you are taking indoor photos, adjust your shot so that there is light on your subject. You can utilize light coming from a window, or any other natural light sources. No matter what the lighting conditions are, avoid using your smartphone’s LED flash.
Choose the Right Exposure
Today’s smartphone cameras are modern-day point-and-shoot wonders. However, if you’re into details, there are several camera apps that you can use to achieve manual control over every shot.
The exposure is one of the most basic settings you can tweak with your smartphone camera to adjust results. This helps to lighten or darken the subject, which will depend on the type of mood you want to create with each shot. By darkening a shot, you add a dramatic effect to the photo. By lightening it, you can showcase the details of your subject more prominently.
Note that this feature is not labeled the same way in all smartphone cameras or apps. Make sure that you experiment with these settings until you achieve your ideal result.
Experiment with HDR Mode
Nearly all smartphone cameras these days come with HDR mode. This feature combines multiple exposure settings to achieve better image quality. With this mode, you can adjust the different settings on brightness and shadows. This mode works best when you are taking photos of landscapes or city scenes. The combination of various subjects will look more striking in HDR mode due to the contrast that it can create.
With the advent of AI smartphones, the use of HDR mode has grown exponentially. It has also seen improvements in its ability to capture images at the highest quality. Google Pixel phones are an excellent example of that.
Use the Grid
Most smartphone cameras or apps offer the grid option. The grid helps you take beautifully composed photos by following the rule of thirds. The idea is to position the main subject of your photo at the intersection of the gridlines, as shown in the image below. By using the grid, you can improve your photography right away and capture pictures with more impact. You can also achieve better results in your photos, especially when taking photos of famous landmarks or landscapes.
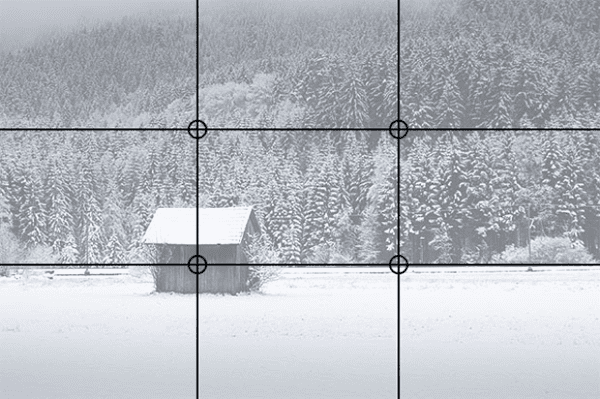
You can activate the grid quickly. Whether you are using an Android phone or an iPhone, simply go to your camera settings. You can easily find the grid option there. For advanced phones or those built for mobile photographers, chances are there exists several grids to choose from. These can include the regular grid, the Phi grid, and Fibonacci grids. Take your time to learn more about all of these grid options and employ them for better photographs.
Focal Peaking
This is one of the newer features available to modern smartphone cameras. The purpose of focal peaking as a feature is to make certain areas of a scene or subject visibly more focused. In other words, you can choose to highlight the central subject of each photo, making your subject more visible, clear, and detailed than the background. It adds a beautiful touch to your photography, and it is one of the best ways to achieve professional-quality photos.
Using focal peaking on most smartphones is easy. Usually, you tap on the subject of the photo on your screen before taking a picture. You will know that your chosen subject is in focus when you see that it is boxed or circled in on the screen.
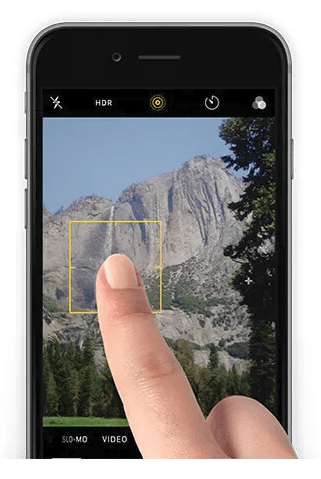
Note that in the absence of manually designating the subject of your photo, the camera may choose random subjects, thus, blurring your subject into the background. If you are using an iPhone, you can hold your finger down on a spot. This tells your camera to lock its focus on that area and not resume autofocus on parts of the background.
Additional Smartphone Photography Tips
On top of the ones listed above, here are some other photography tips to maximize your smartphone cameras:
Get rid of foggy lenses.
This is one of the simplest techniques that you can use to achieve better smartphone camera photos. By wiping off the lens, you can produce brighter and sharper images.
Capitalize on the Auto-fix option.
Most smartphone cameras and apps have this auto feature. This will automatically adjust the settings on the photo to enhance aesthetic quality. Save yourself from the hassle of figuring out individual settings.
Edit your photos.
The use of editing filters and features is one of the best tricks to achieve higher quality smartphone photos. One of the editing tools you can exploit is the S-curve, which adjusts brightness on specific areas of your photos. You can also calibrate sharpness and color, or crop the photo.
Do you enjoy taking photos on your smartphone? What other tips can you add to achieve professional-quality images with your smartphone?

