It’s important to regularly back up your Mac to protect all your personal data. Otherwise, you could lose all your family photos, work documents, and more when your hard drive fails or your computer crashes. Thankfully, all Mac computers these days make it easy to back up your files on a separate drive and restore them if anything happens to your computer. Here’s how to back up your Mac with Time Machine.
What Does Time Machine Back Up?
Time Machine backs up all the files on your computer, including apps, music, documents, photos, emails, and system files. When enabled, it will automatically back up your files on your Mac hourly, daily, or weekly.
Time Machine will check your computer for new, changed, and deleted files every hour to make new backups of your Mac. The application keeps a daily backup for the past month. It will also keep weekly backups as long as the storage device still has space. Once the storage device runs out of space, the oldest backups will be deleted.
Note: To use this application, you’ll need an external hard drive formatted for macOS. If you want to know more about how to format your hard drive for Mac computers, check out our step-by-step guide here.
How to Back Up a Mac with Time Machine
- Connect an external hard drive to your Mac.
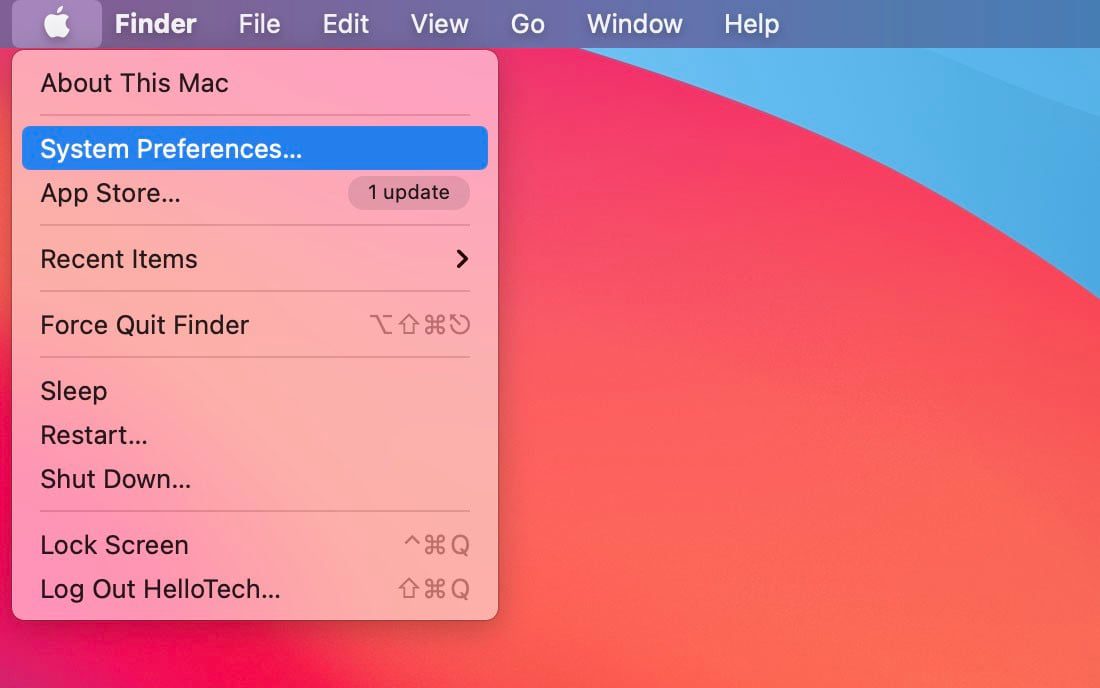
- Then click the Apple icon in menu bar. You will see this in the top-left corner of your screen.
- Next, select System Preferences.
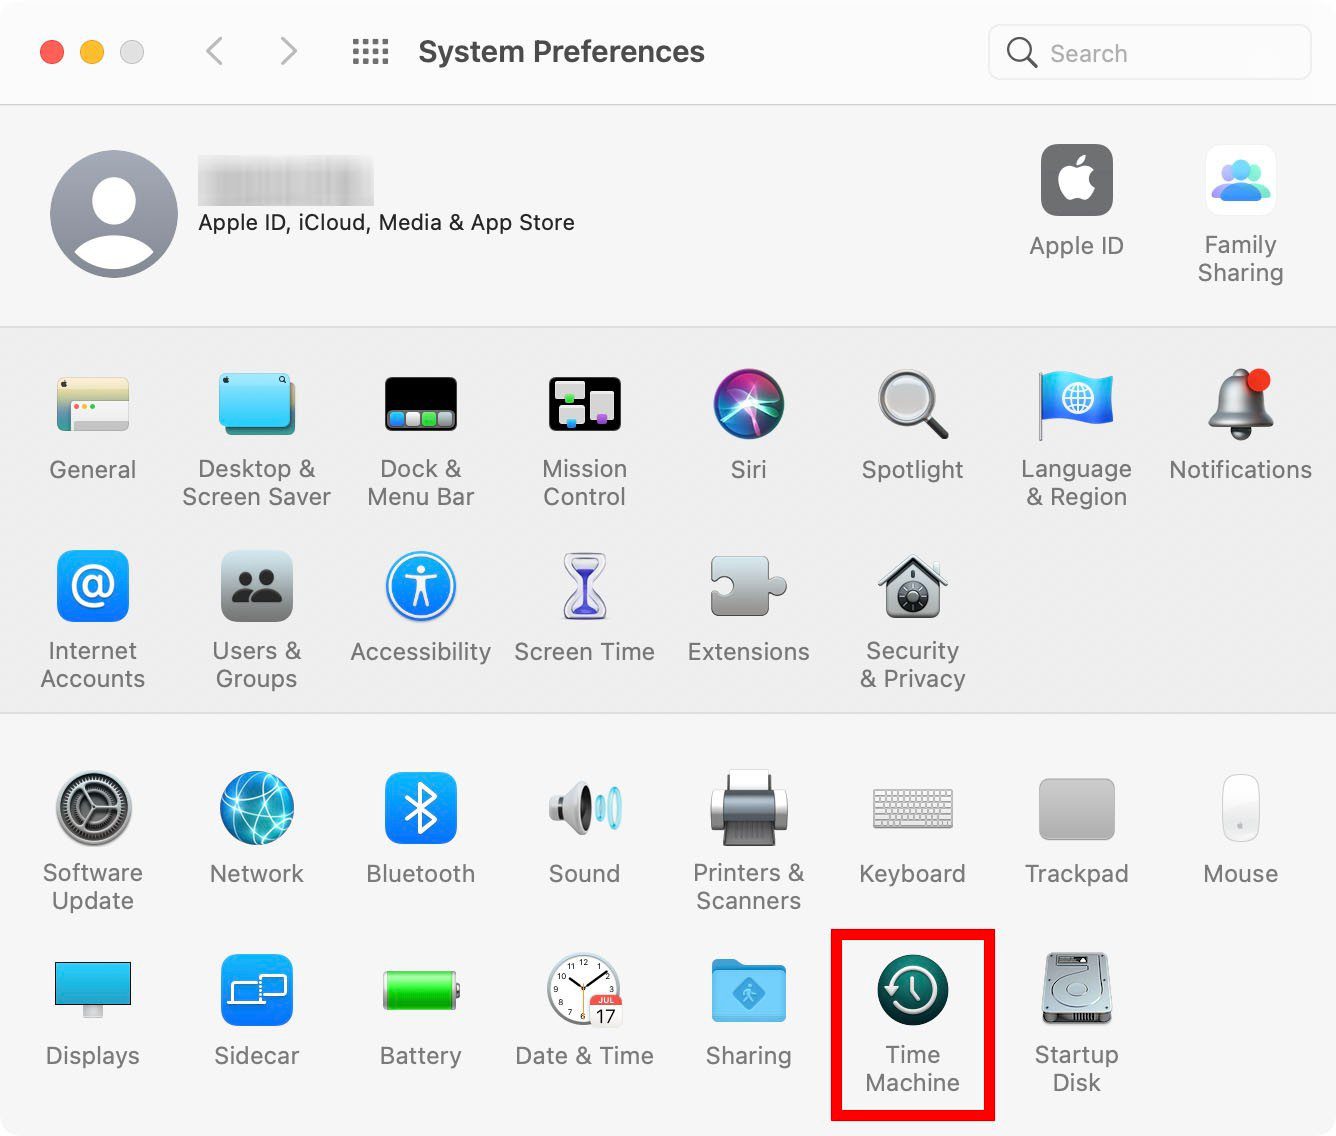
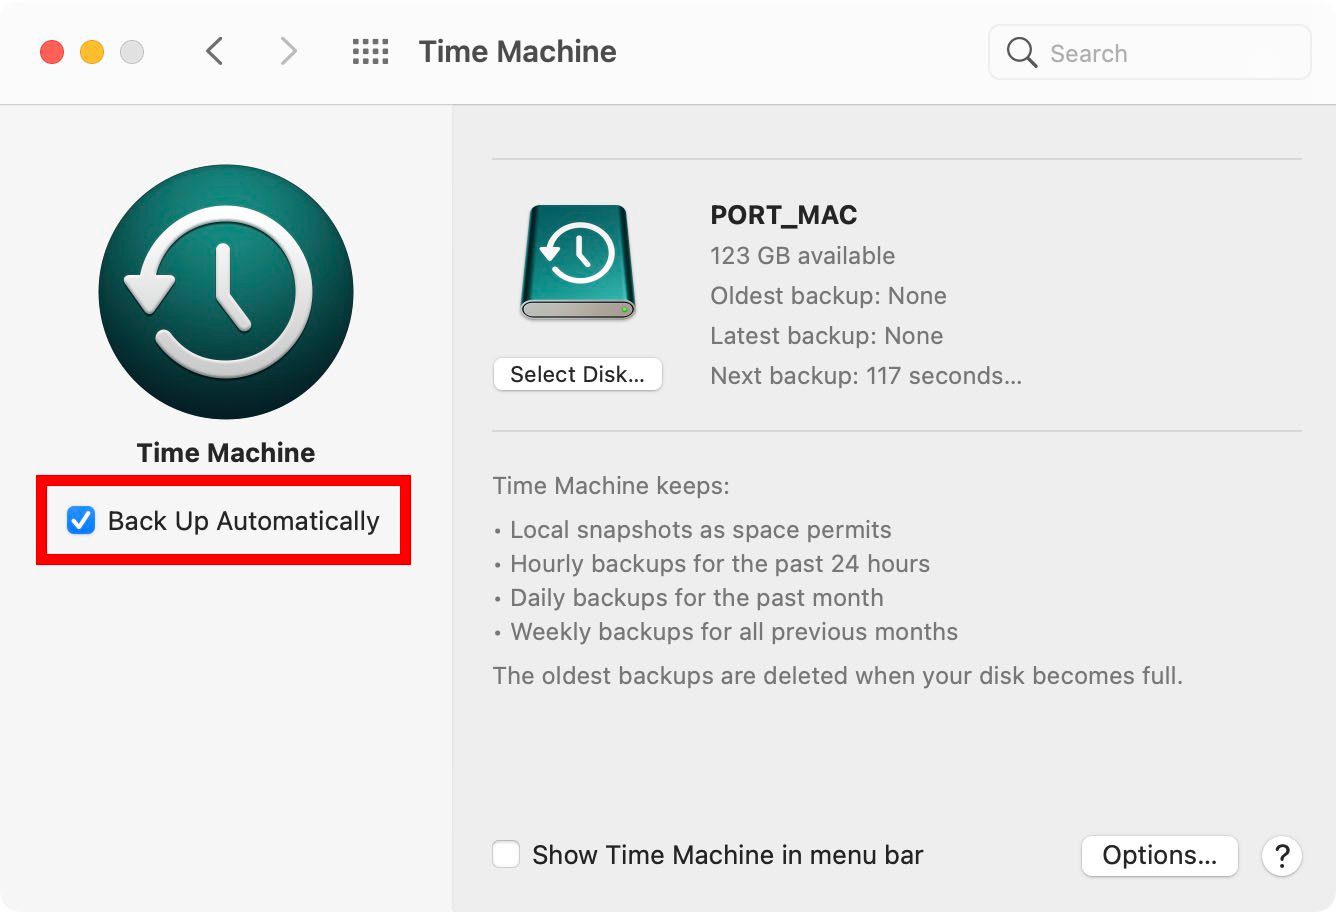
- Then click Time Machine.
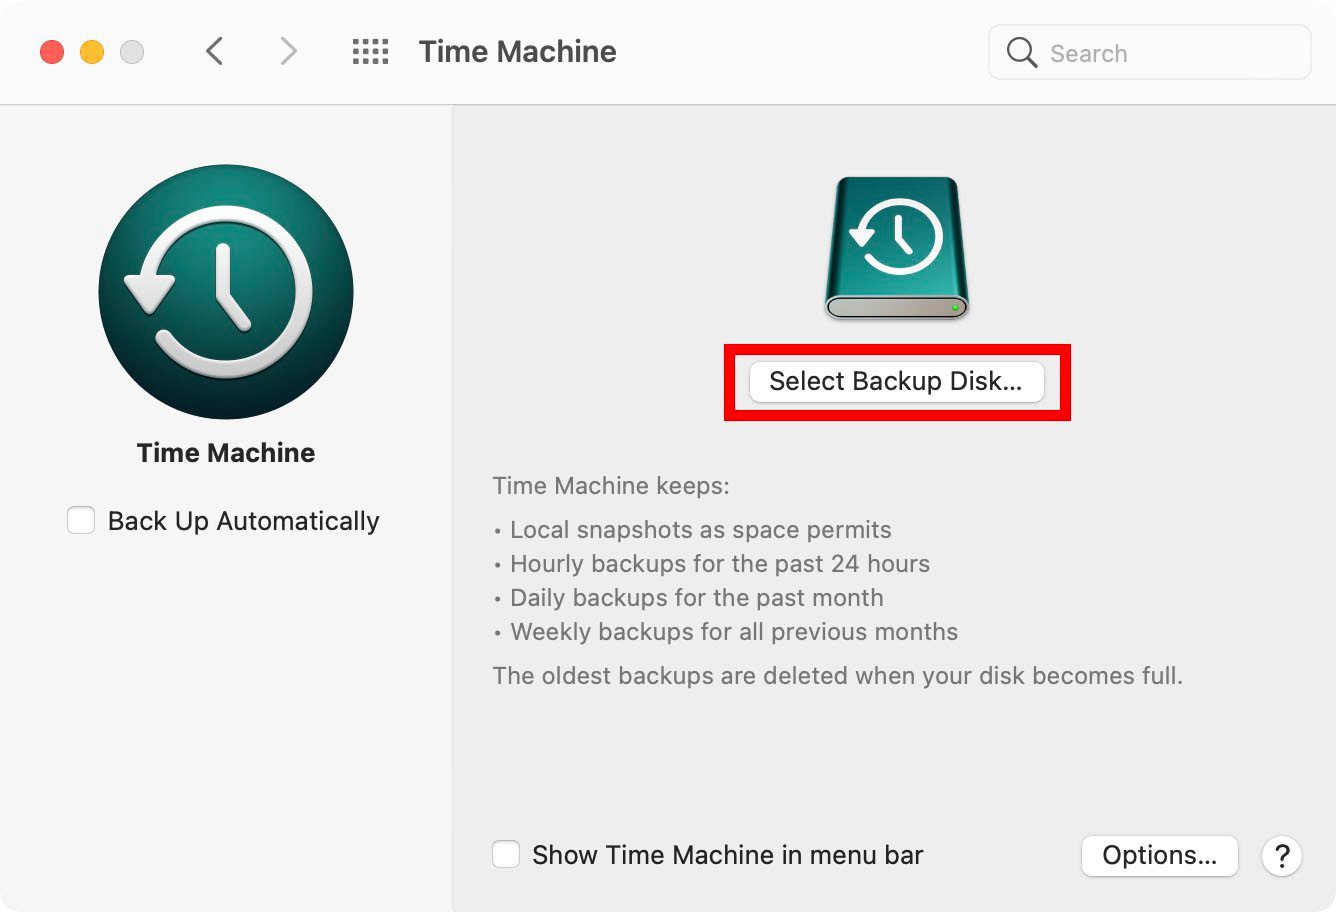
- Next, click Select Backup Disk.
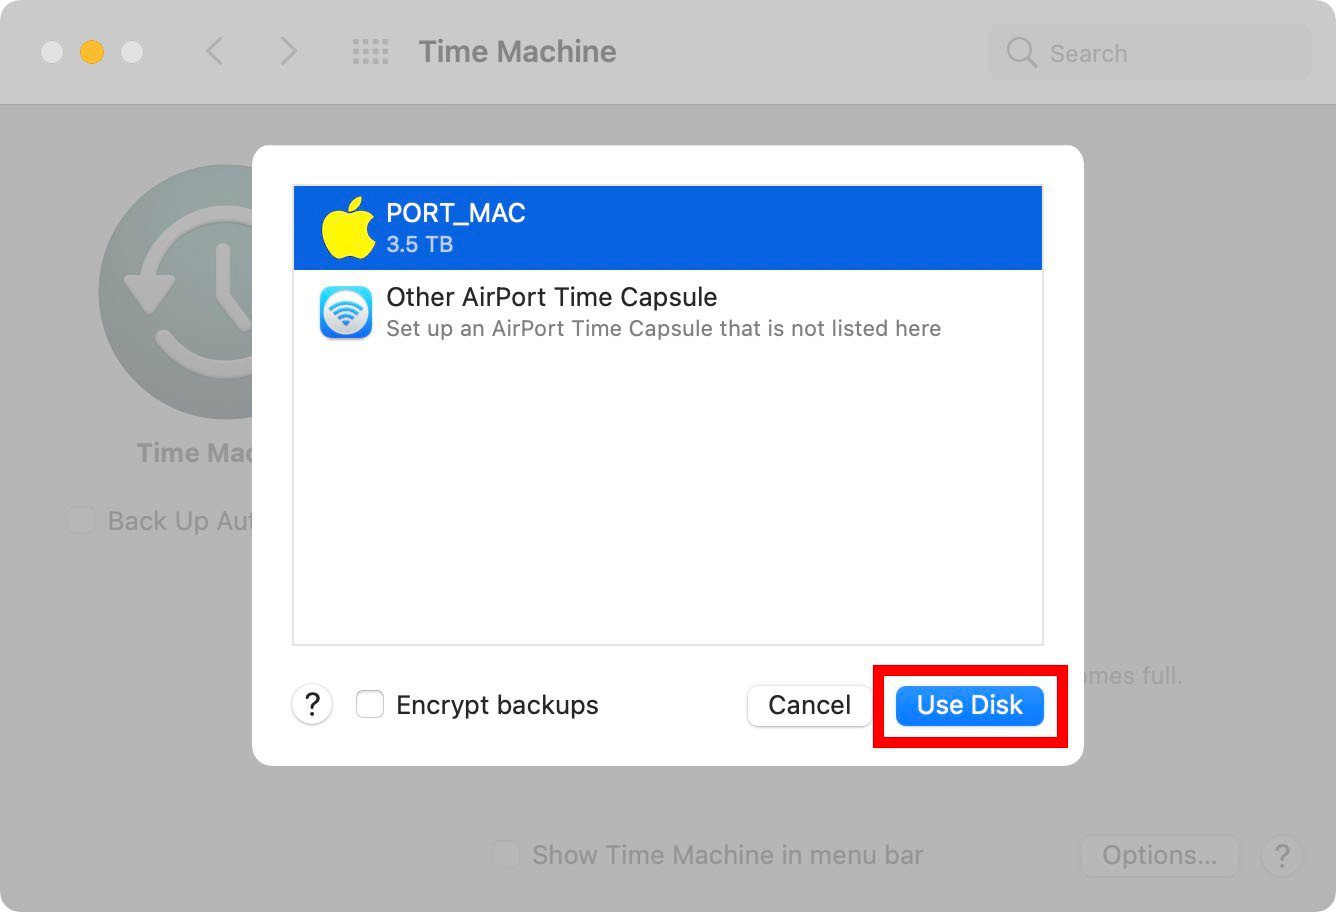
- Then select a drive and click Use Disk.
- Finally, check the box next to Back Up Automatically. This should start backing up your Mac immediately.
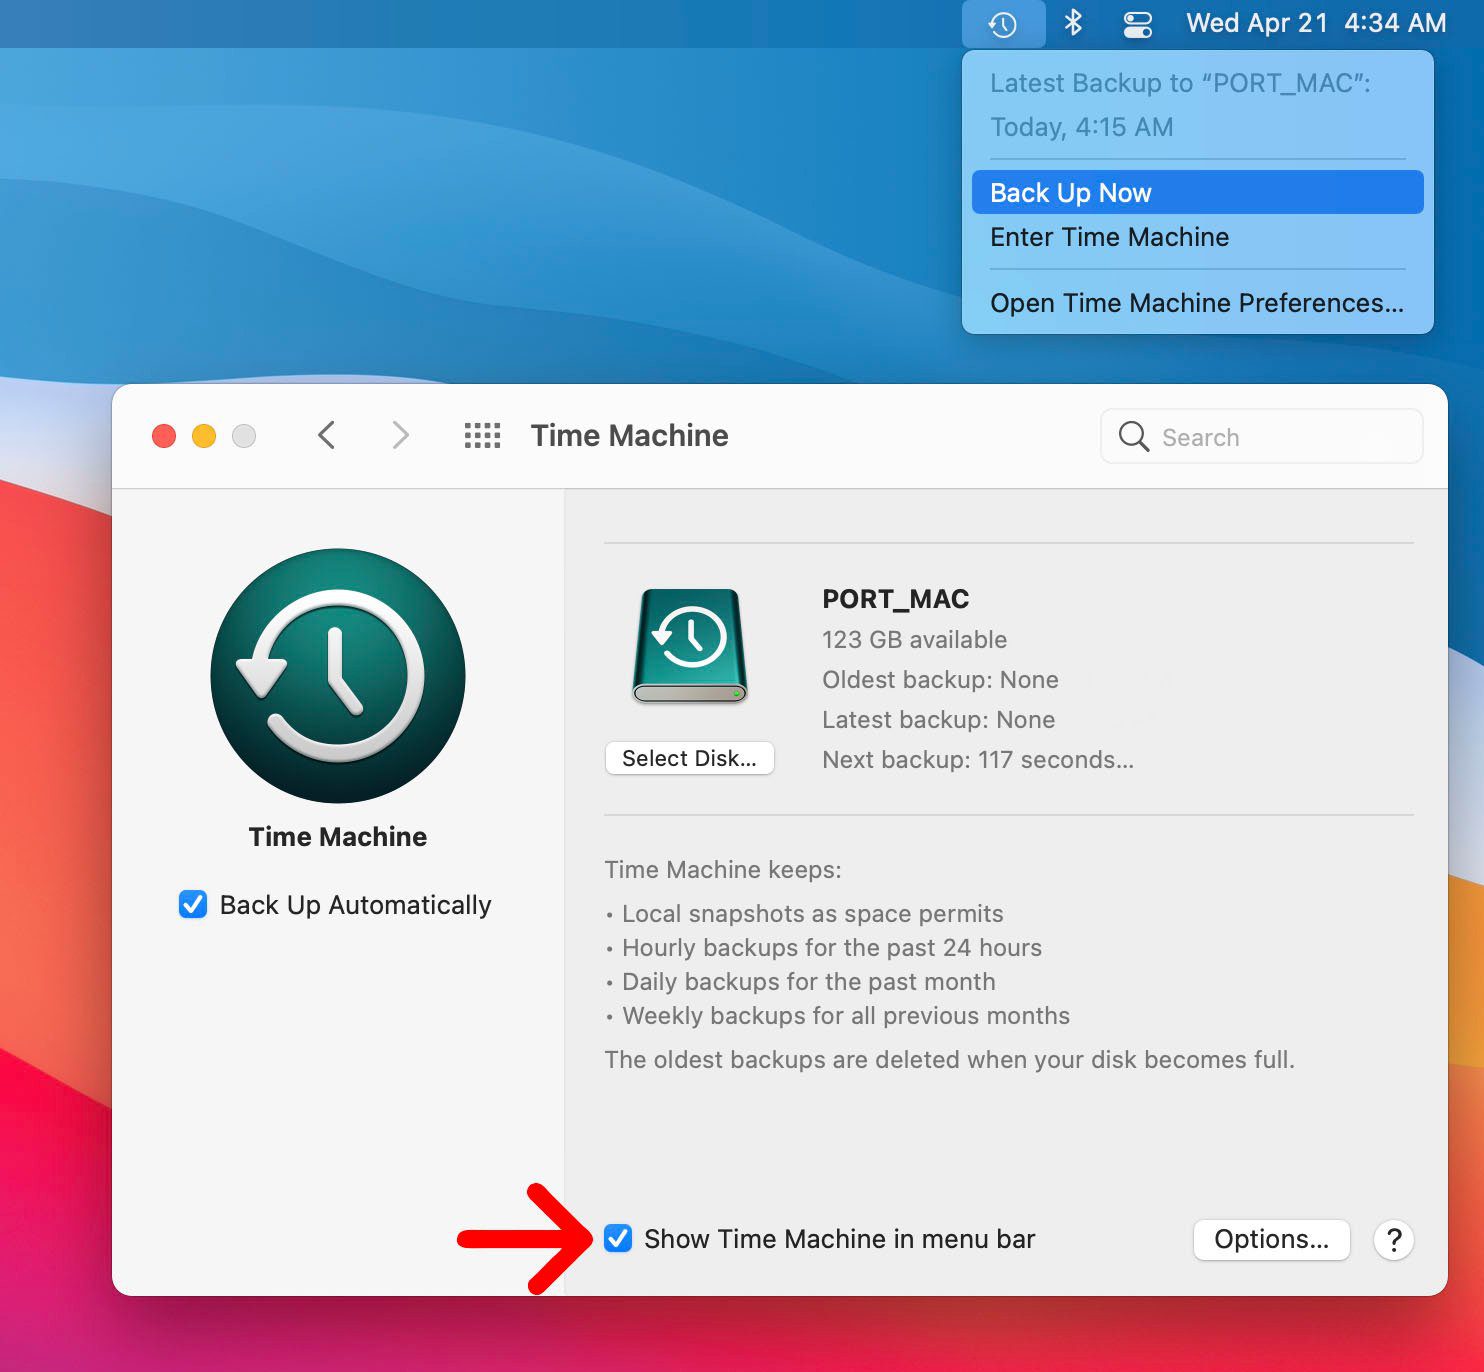
If your Mac doesn’t start to back up immediately, you can start the process manually. To do this, click the box next to Show Time Machine in menu bar. Then click the Time Machine icon in your menu bar and select Back Up Now.
If you don’t want to back up every single file or you don’t have room on your drive, you can also choose to back up select files. Here’s how:
How to Back Up Select Files to Time Machine
- Click the Apple Icon in the top-left corner of your screen.
- Then select System Preferences.
- Next, click Time Machine.
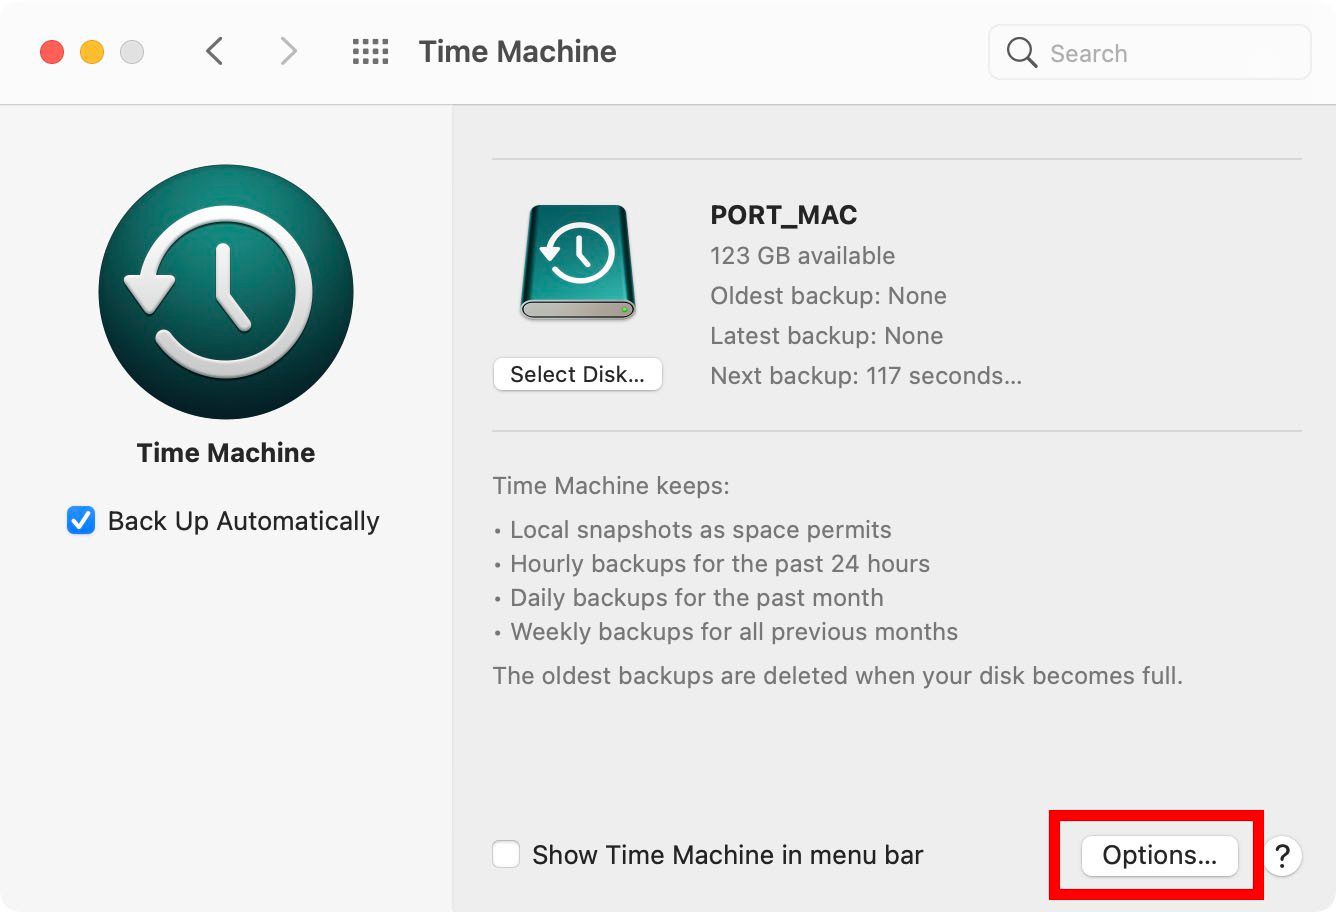
- Then click Options. You will see this in the bottom-right corner of the window.
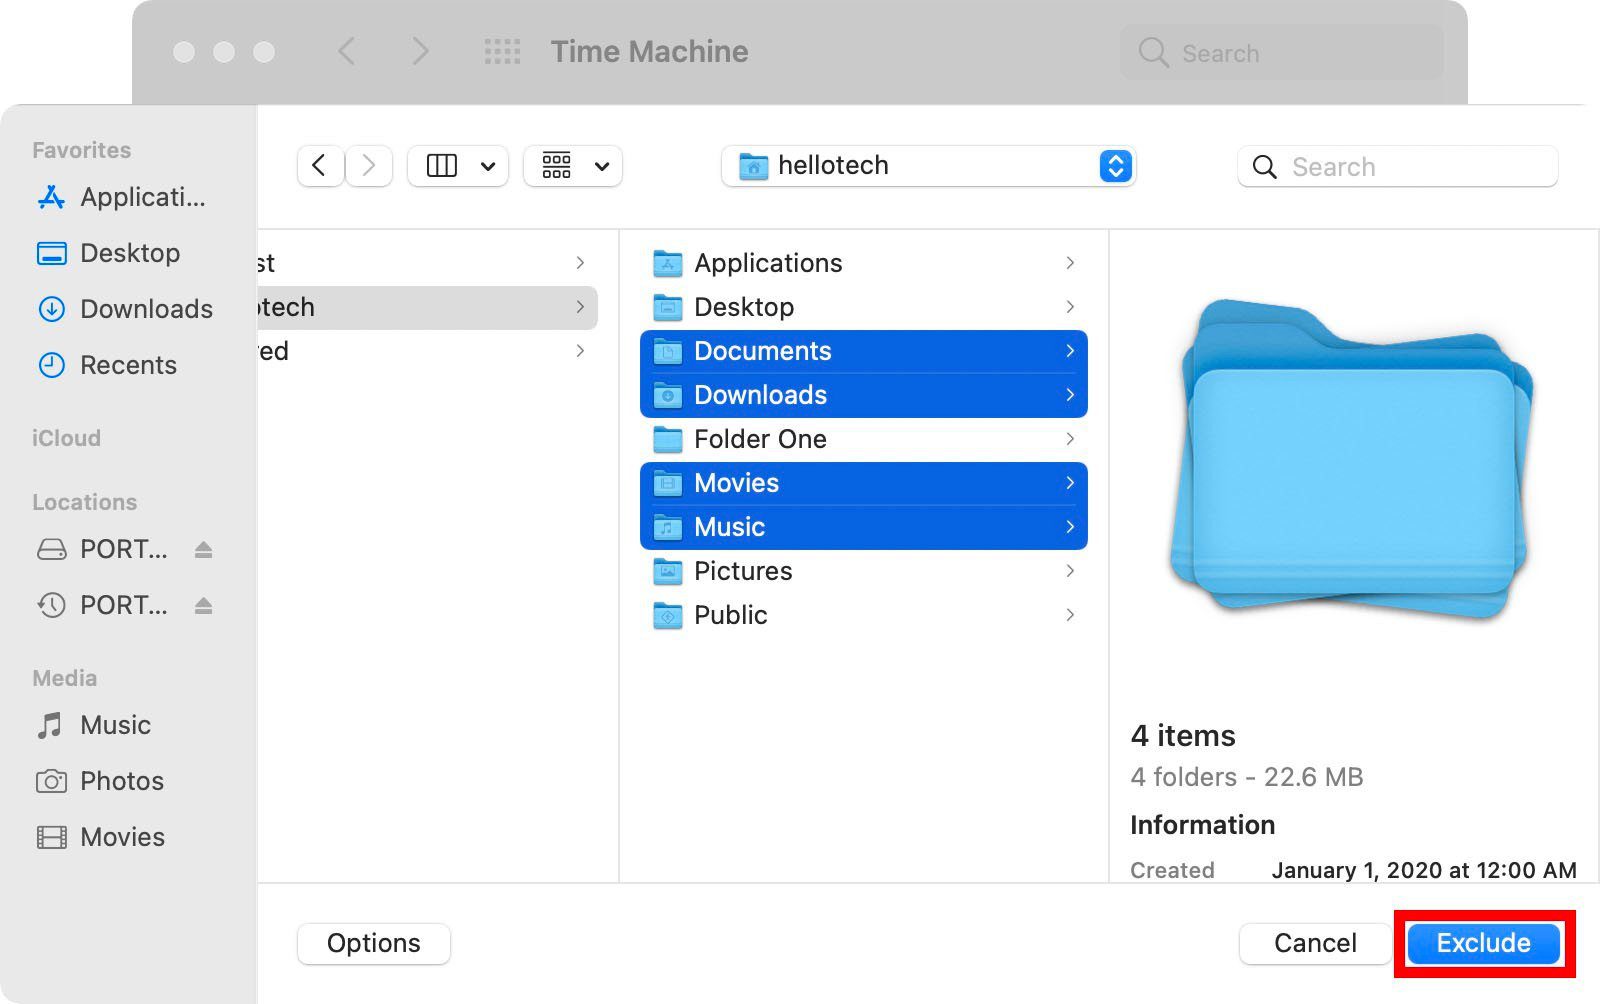
- Next, click the “+” button.
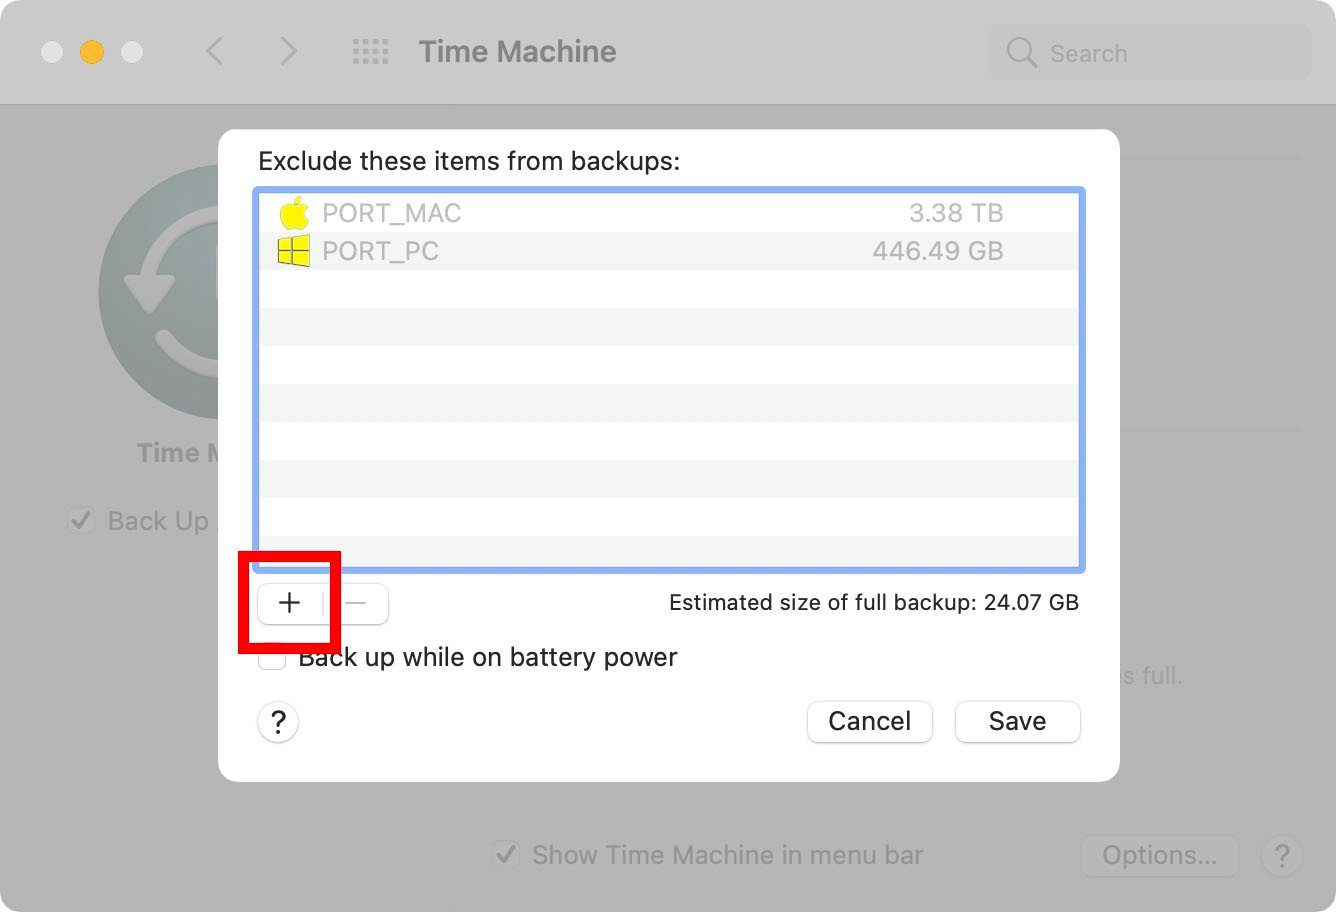
- Then choose the files or folders you want to exclude in your backup. You can select applications, files, and folders to exclude. You can select multiple items at once by holding the Command key on your keyboard.
- Then click Exclude.
- Finally, click the Save button.
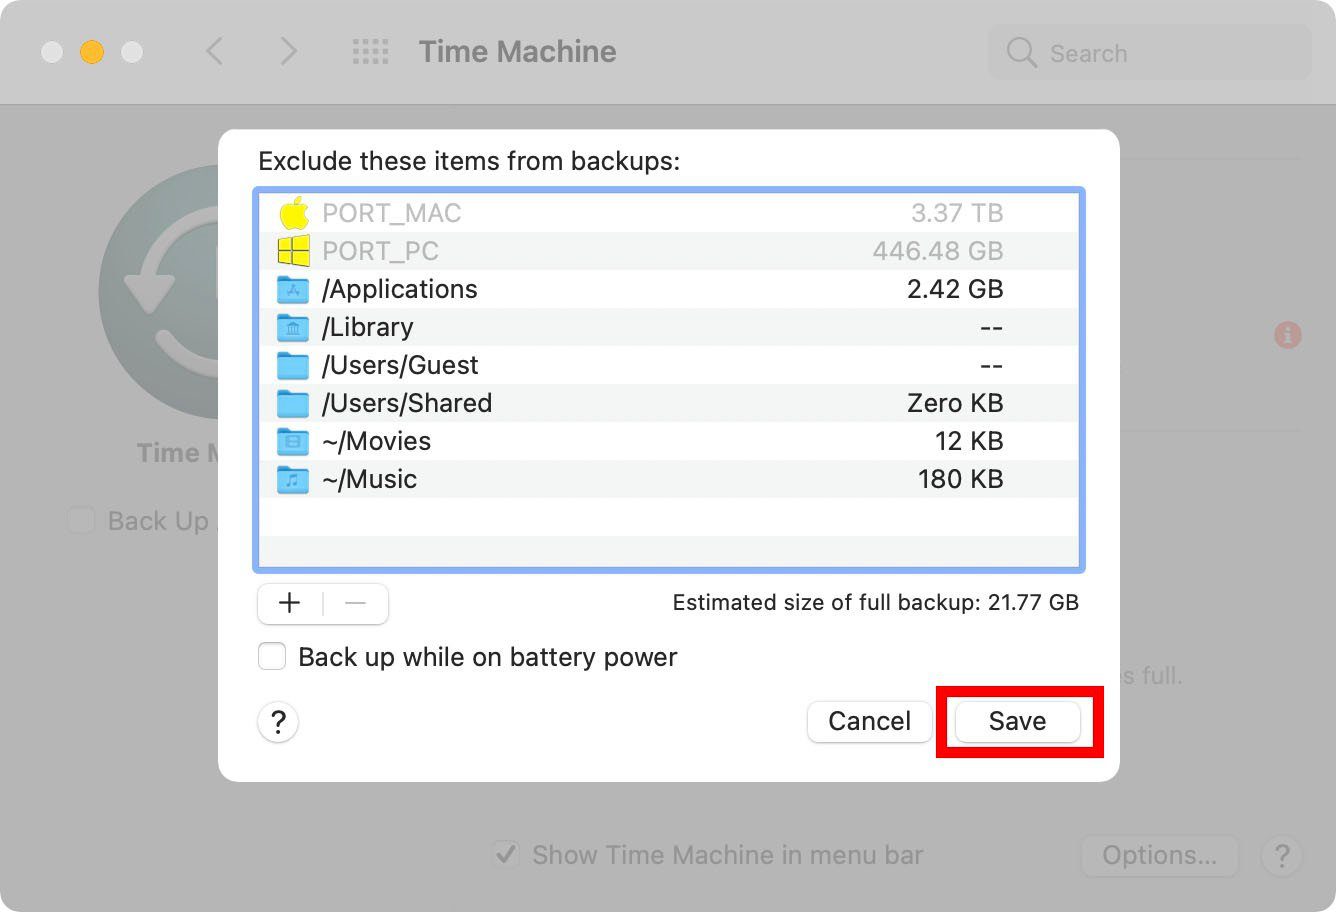
The files you don’t want to back up will now be excluded from your backup.
Now that you know how to back up your files, check out our step-by-step guide on how to restore from Time Machine here.
