If you have set Time Machine up on your Mac, you’ll never have to worry about losing your files again. The Time Machine app is a built-in backup application on your computer that can recover individual files, restore your Mac to an earlier version, or set up a new Mac. Here’s how to restore with Time Machine.
Note: You can only restore files that have been backed up with Time Machine first. If you want to know how to back up your Mac with Time Machine, check out our guide here.
How to Restore Files with Time Machine
If you accidentally deleted files or folders, here’s how to restore them with Time Machine.
- Make sure your Time Machine backup disk is connected to your computer.
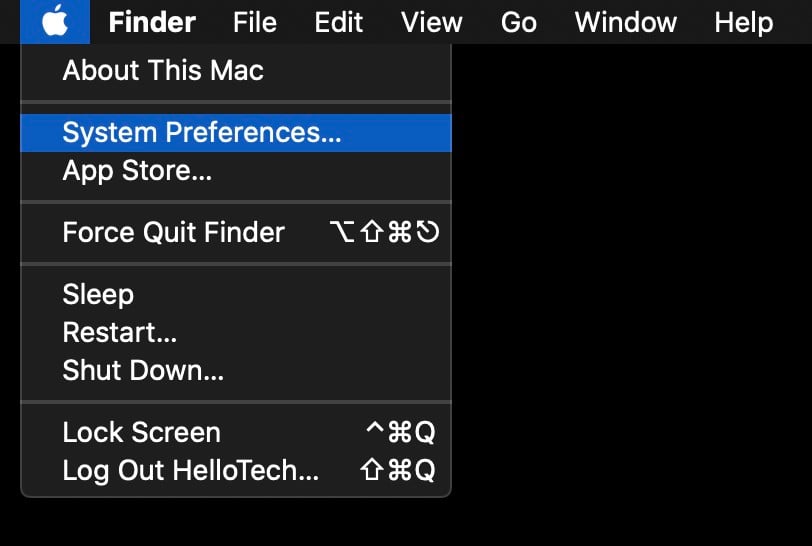
- Click the Apple logo in the top-left corner of your screen.
- Then click System Preferences.
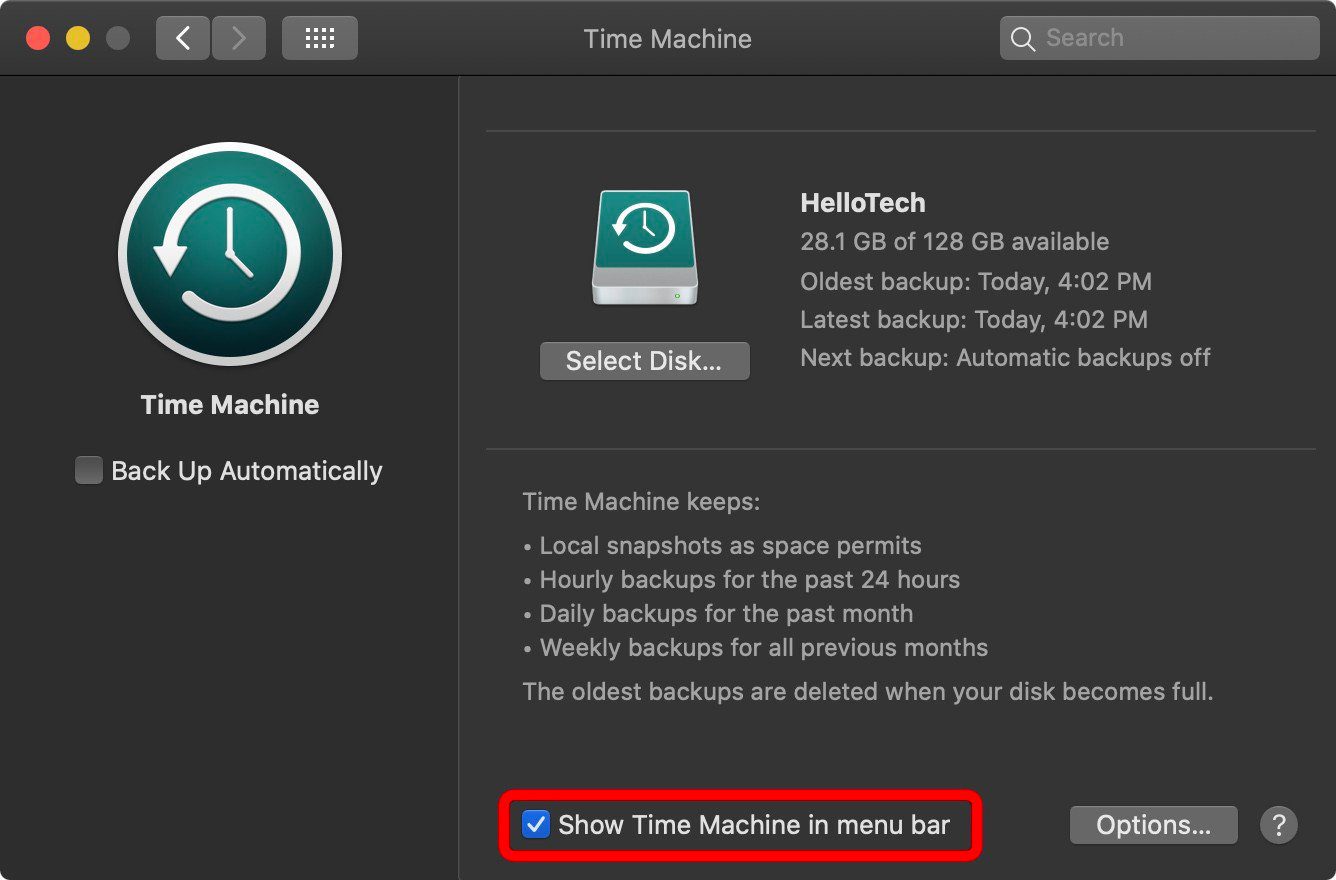
- Click the Time Machine icon. The icon looks like a curving arrow pointing downward that surrounds a clock face. Clicking this will open Time Machine preferences.

- Check the box next to “Show Time Machine in menu bar.” The Time Machine icon will now be in the menu bar.
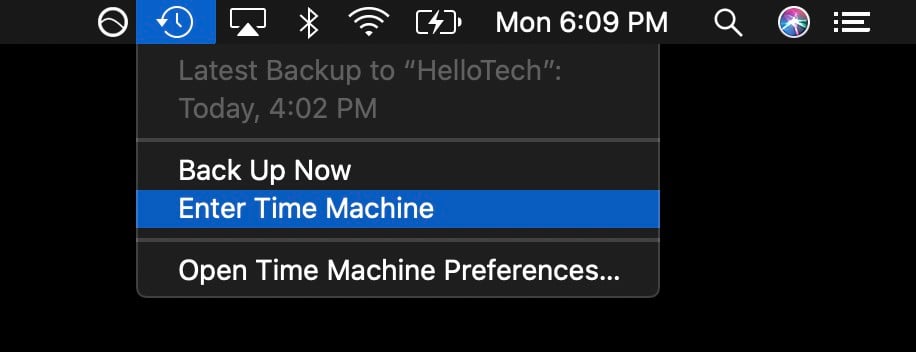
- Click the Time Machine icon in the menu bar. This looks like a clock with an arrow pointing counterclockwise.
- Then select Enter Time Machine. This will bring up a screen with all of your old Time Machine backups.
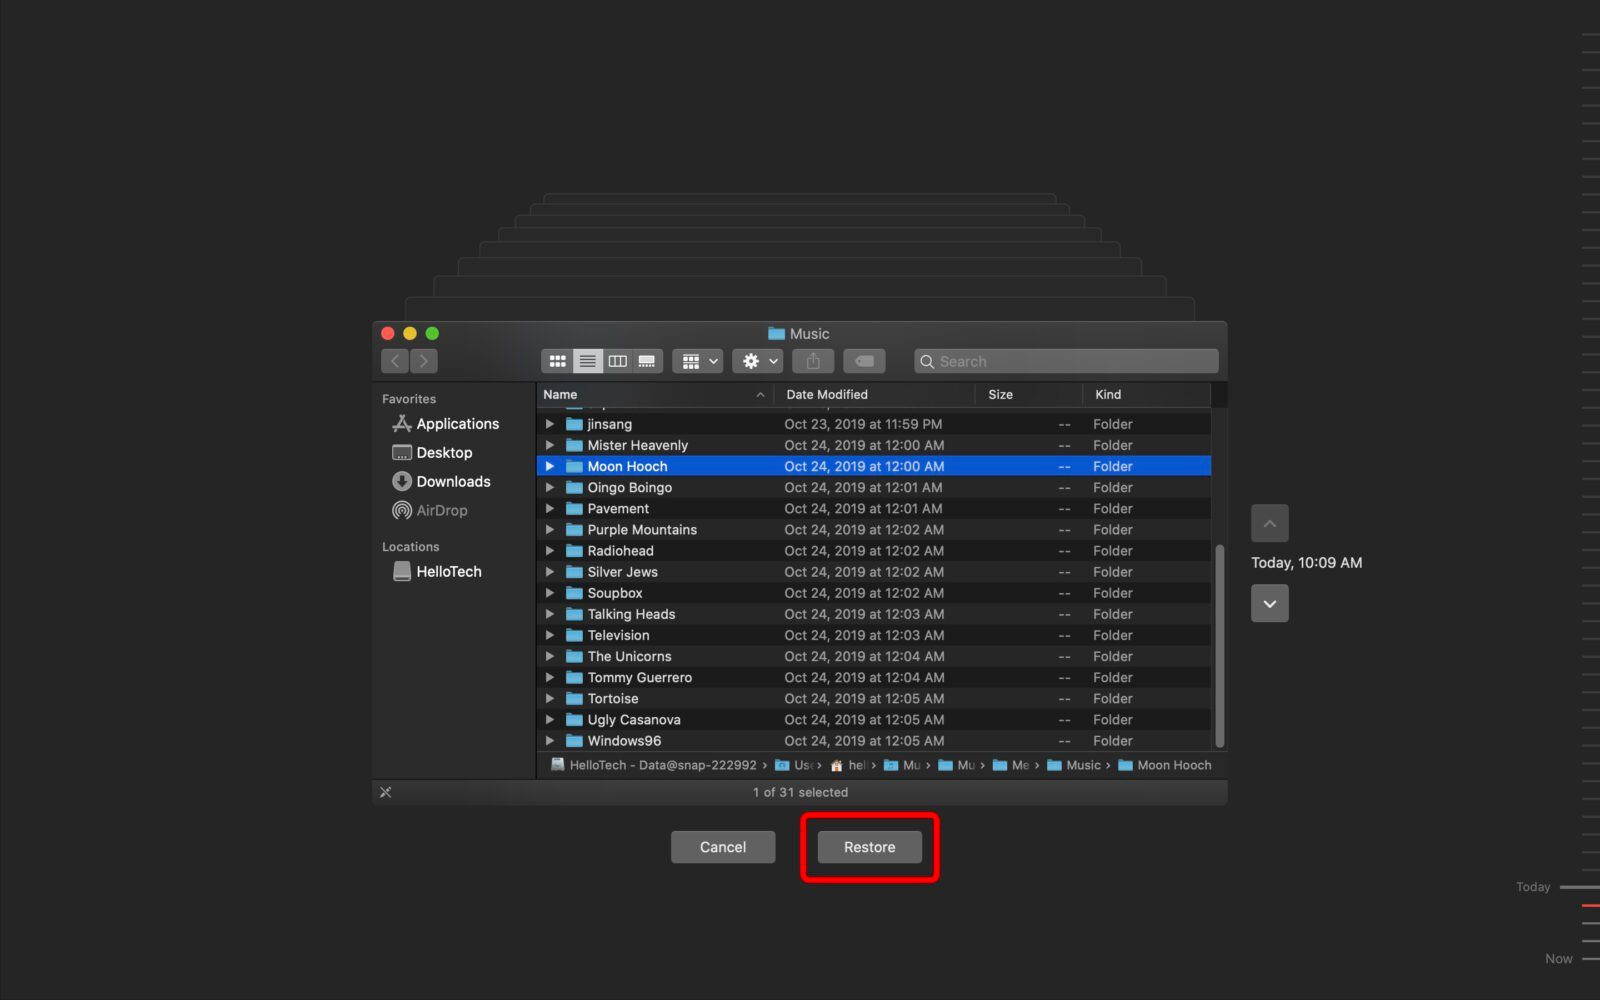
- Find the file or folder you want to restore. You will see all your previous saves stacked on top of one another. The farther back they are, the longer it has been since that save was made. You can also see when the backup was made by looking at the timeline in the bottom-right corner. You can use the space bar to preview the file to make sure it’s the correct one.
- Finally, click Restore. This will restore the item and copy the file back to its original location.
How to Restore macOS with Time Machine
If you’re installing a new hard drive or your Mac broke down on you, you may want to fully restore your macOS in recovery mode, including all the applications and files. Here are the steps to do that with Time Machine:
- Make sure your Time Machine backup disk is connected to your computer.
- Restart your Mac.
- While the system is turning on, hold down the Command + R keys. This will start your Mac in recovery mode.
- Release the keys when you see the Apple logo on your screen. Then wait for the computer to boot into recovery mode. You will know it is done when you see the disk utility menu.
- Then select Restore from Time Machine backup, and click Continue.
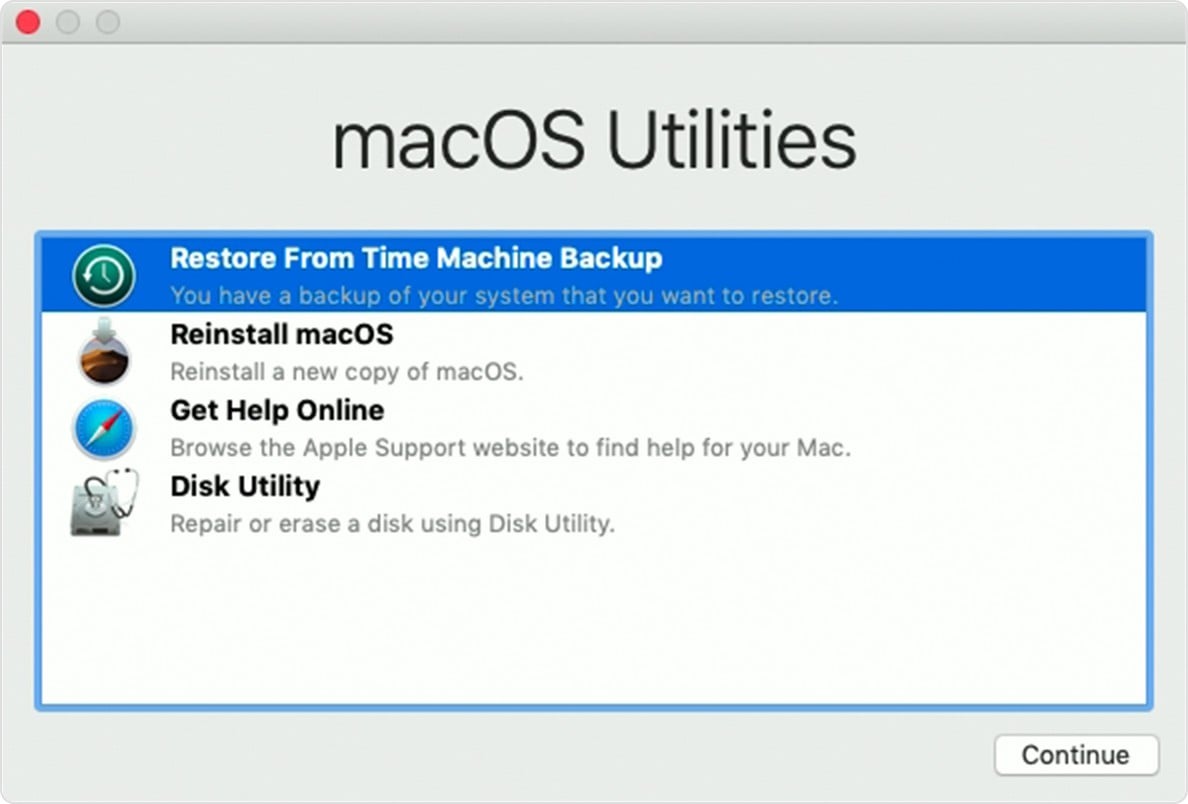
- On the Restore from Time Machine page, click Continue.
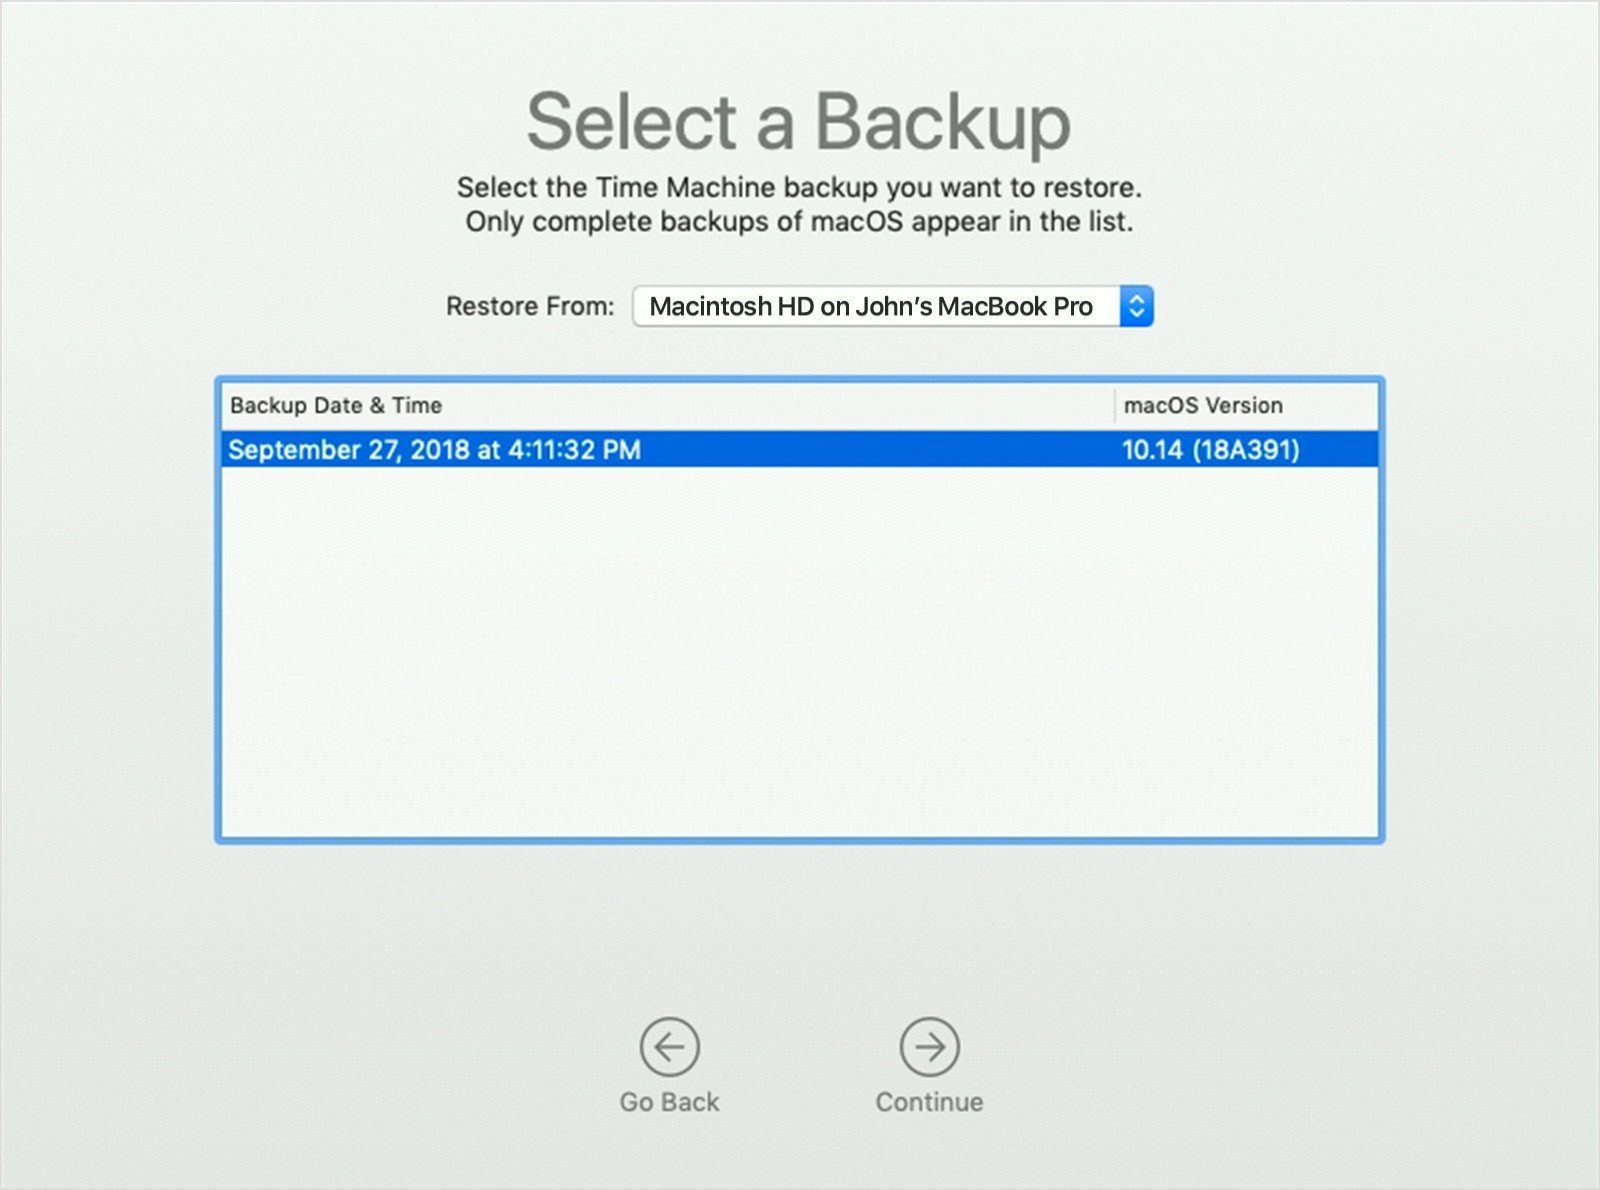
- Select your Time Machine backup disk as the restore source, then click Continue. If your disk is encrypted, a prompt will appear to unlock it. Enter the administrator password you used when setting up Time Machine, then click Continue.

- Select a backup by date, then click Continue.
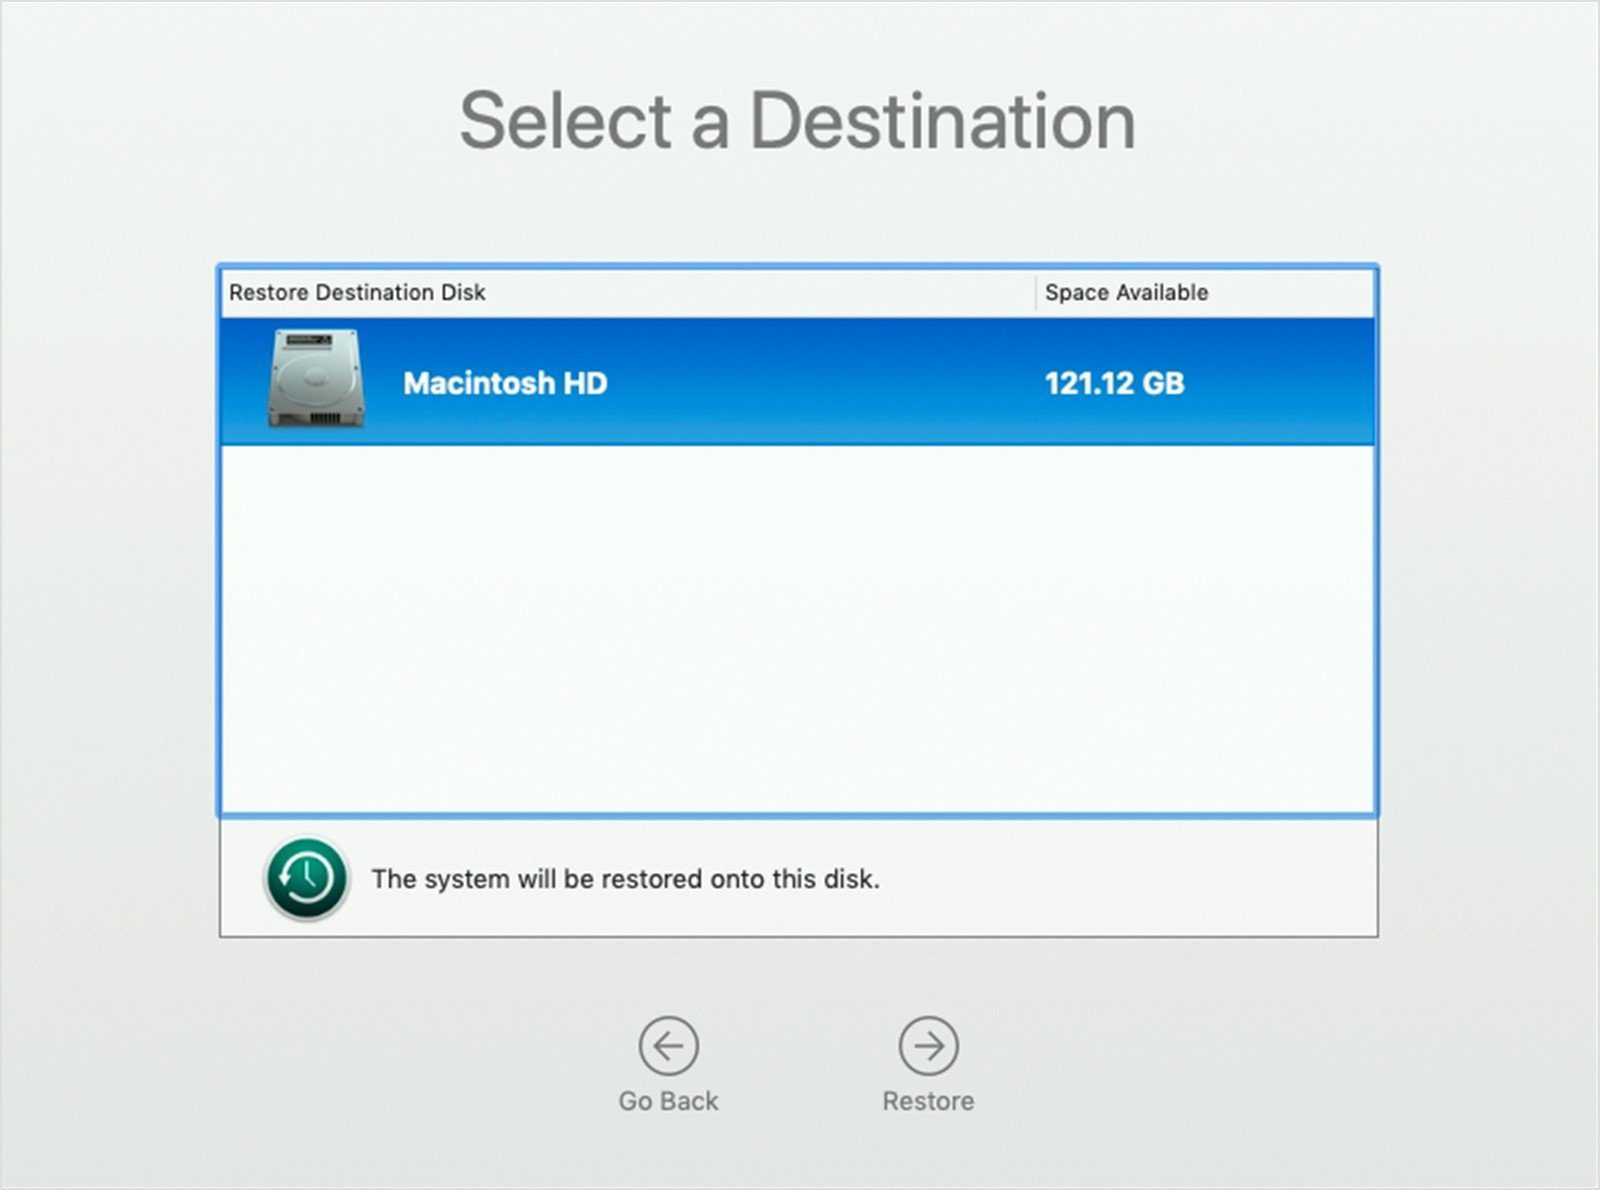
- Select the hard disk on your Mac that will receive the backup contents and click Restore. If your Mac has FileVault turned on, you’ll be asked to unlock the disk. To do this, enter the administrator password, then click Restore.
- When done, restart your Mac.
How to Delete Time Machine Backups
While backing up is very important, there may be multiple copies of data in your backup from different points in time. In this case, it is better to free up space and delete old Time Machine copies to make way for new ones. Here’s how to delete Time Machine backups:
- Make sure your Time Machine backup disk is connected to your computer.
- Click on the Time Machine icon in the menu bar.
- Then select Enter Time Machine.
- Browse through the backups and find the ones you want to delete.
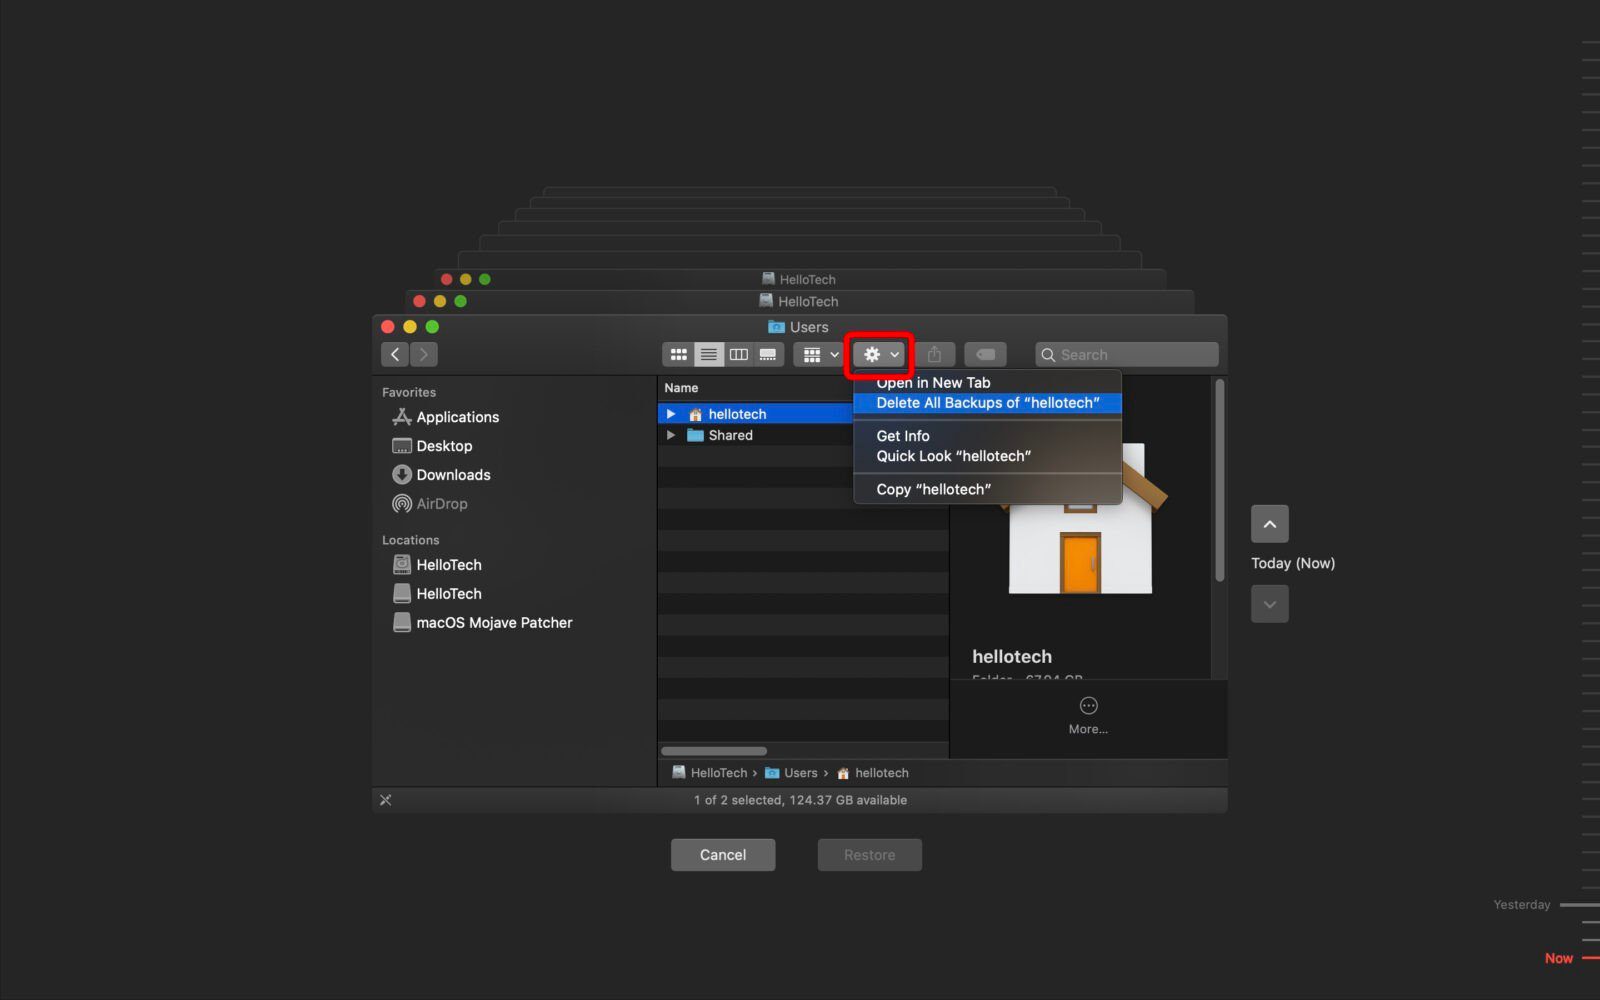
- Click on the gear icon.
- Then select Delete All Backups.
- Type in your administrator name and password.
There are a variety of external storage devices that are compatible with Time Machine for backup purposes. If you’re confused about which one you should go for, you should check out our article on the difference between HDD and SSD.
