If you take a lot of screenshots on a Mac, you might end up with a cluttered desktop. This is because Macs automatically save your screenshots on the desktop. They are also saved as PNG files instead of the more widely used JPEG format. If you want to know how to change where screenshots are saved on a Mac, and the format they are saved in, just follow the steps below:
Where Do Screenshots Go on a Mac?
When you use keyboard shortcuts like Command + Shift + 3, your screenshots are automatically saved to the desktop. You can also right-click the floating thumbnail, which lets you save the screenshot to Documents or Clipboard.
How to Change Where Screenshots are Saved on a Mac
There are two ways to change the default screenshot save directory on a Mac, depending on your operating system. The easier way is through the Screenshot app in macOS Mojave. For mac OS High Sierra or earlier, you have to use Terminal, an app for entering command prompts to control your Mac. Below are the steps for each operating system.
How to Change Where Screenshots are Saved in macOS Mojave or Later
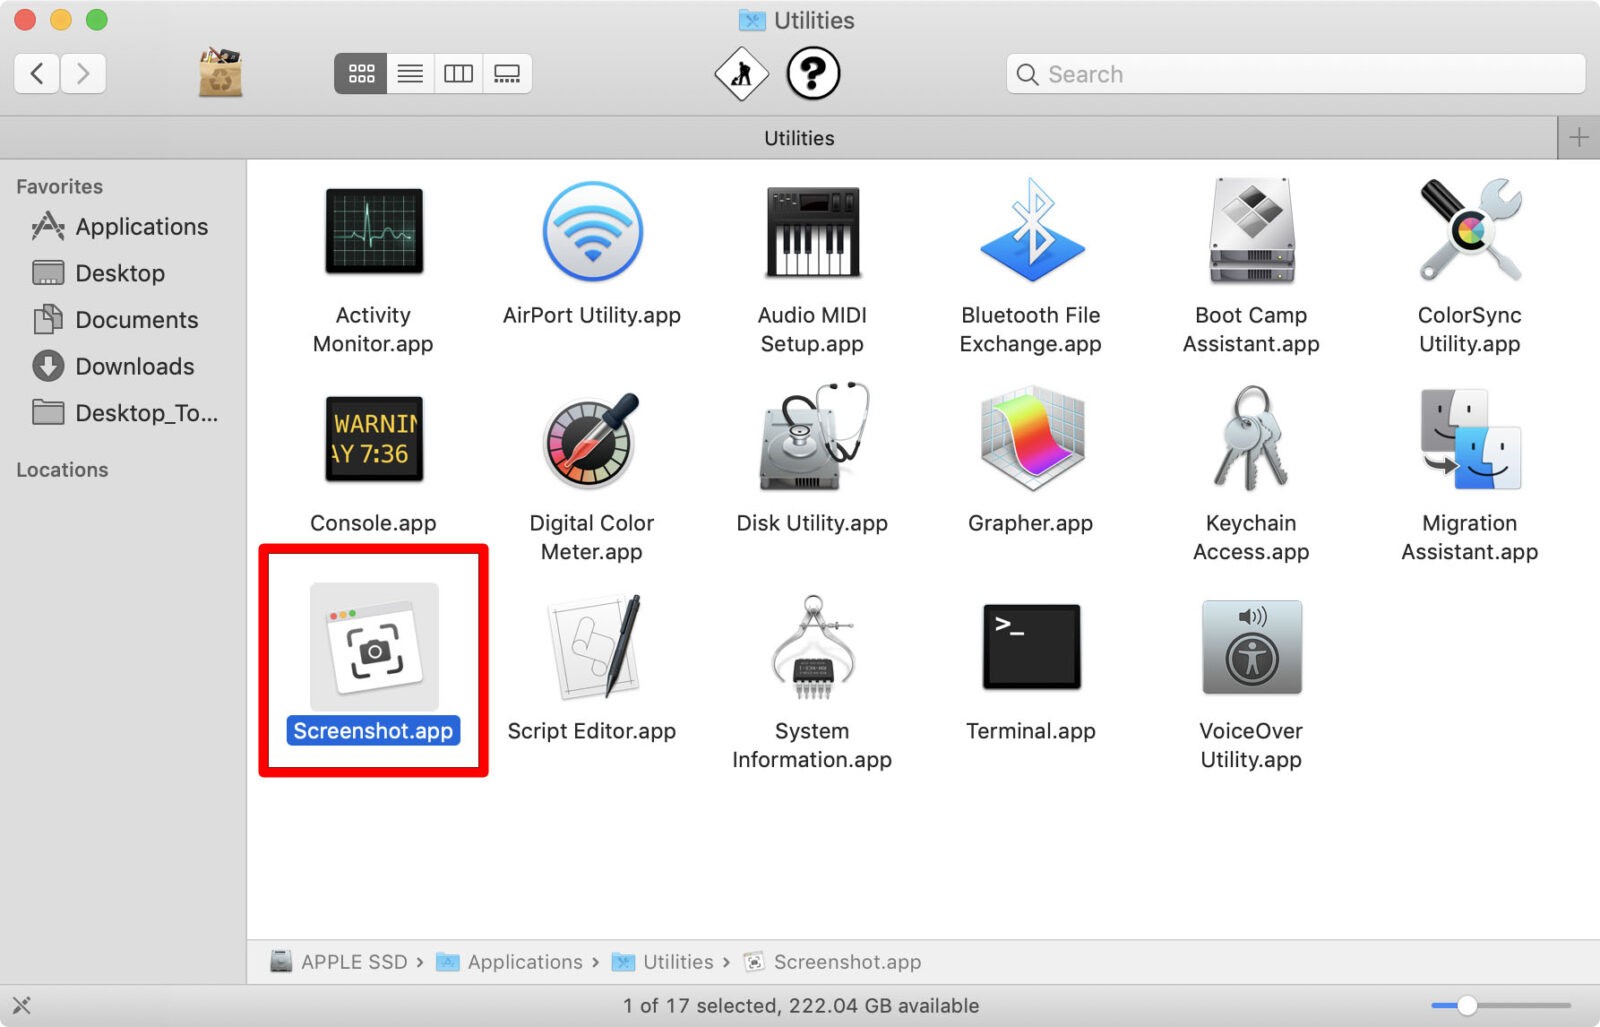
- Go to the Utilities folder and open the Screenshot app. You can also open the Screenshot app by pressing Command + Shift + 5.
- Click Options.The top tile of the menu will show your Save to options:
- Desktop – This is the default setting which saves the screenshot with the following time format: Screen Shot [date] at [time].
- Documents – This will save the screenshot to your Documents folder with the time and date as the file name.
- Clipboard – This will allow you to paste the screenshot to another app which can edit or view images.
- Mail – This lets you compose a new email in the Mail app with the screenshot attached.
- Messages – This will attach the screenshot to a message which you can send to a contact.
- Preview – This will launch Preview, a photo editing app. Your Mac will temporarily name the image file as Untitled until you change it to a different file name.
- Other Location – This will allow you to navigate outside of the locations previously listed to a folder of your choice. You can save to an existing folder or create a new one.
- Choose a Save To option. Your Mac will remember the last one you have selected and will apply this to subsequent screenshots.

How to Change the Default Screenshot Save Location in macOS High Sierra or Earlier
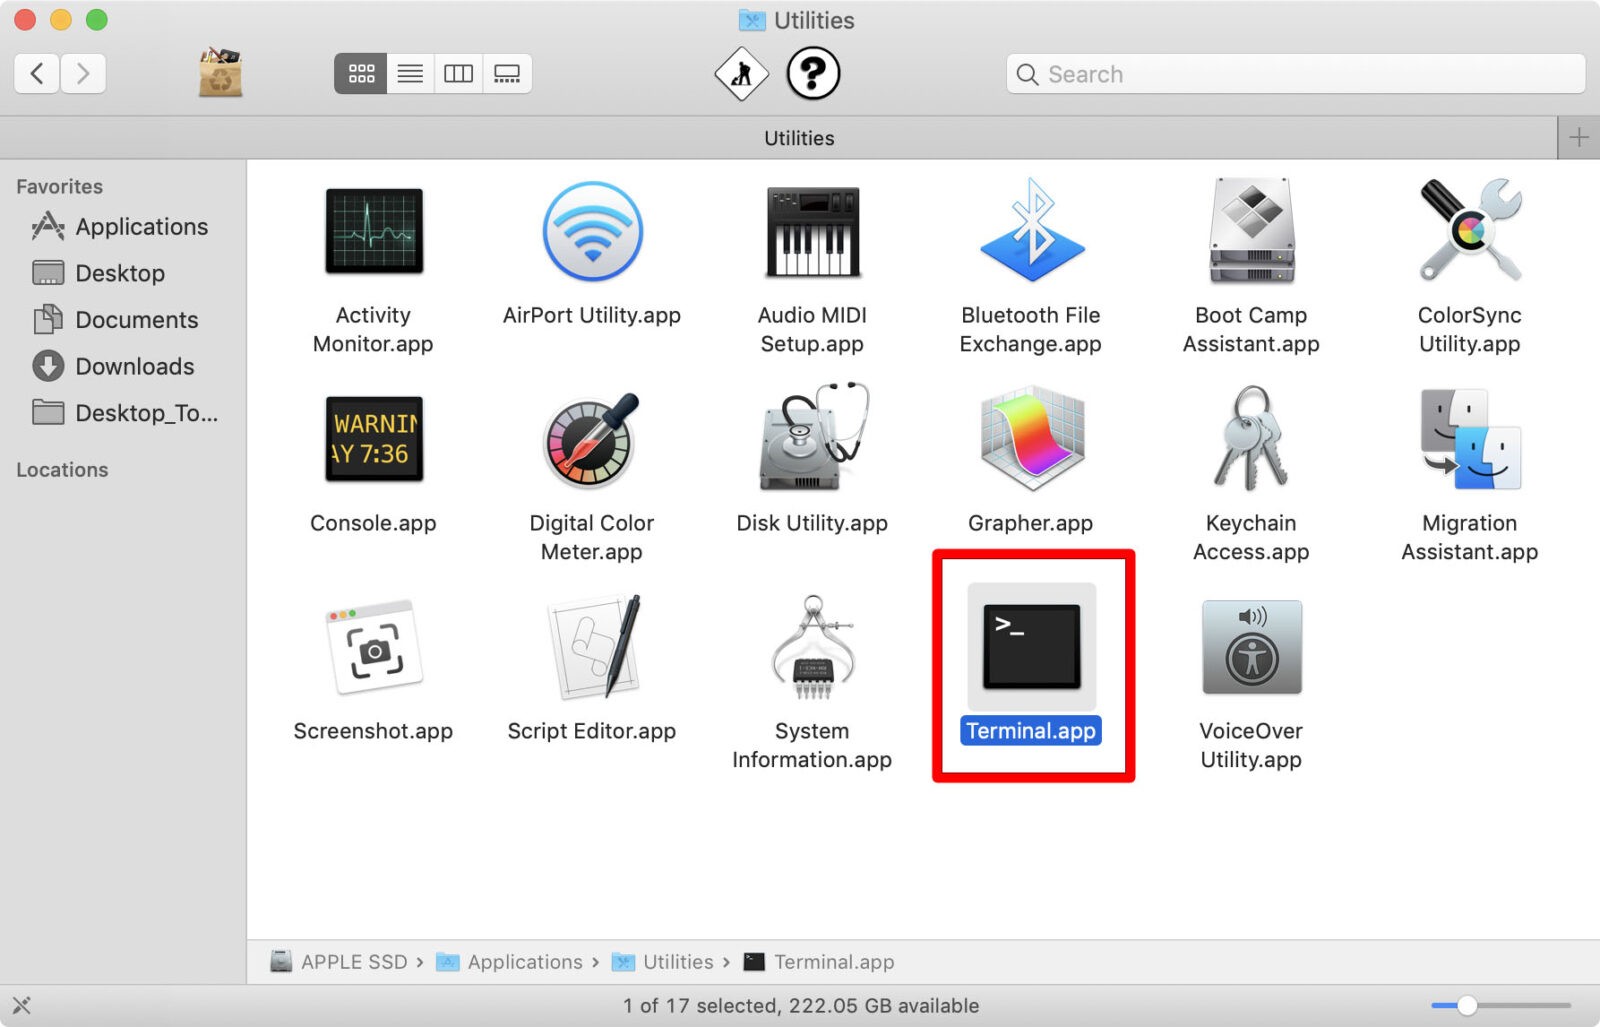
- Open Terminal. You can find the Terminal app in the Utilities folder.
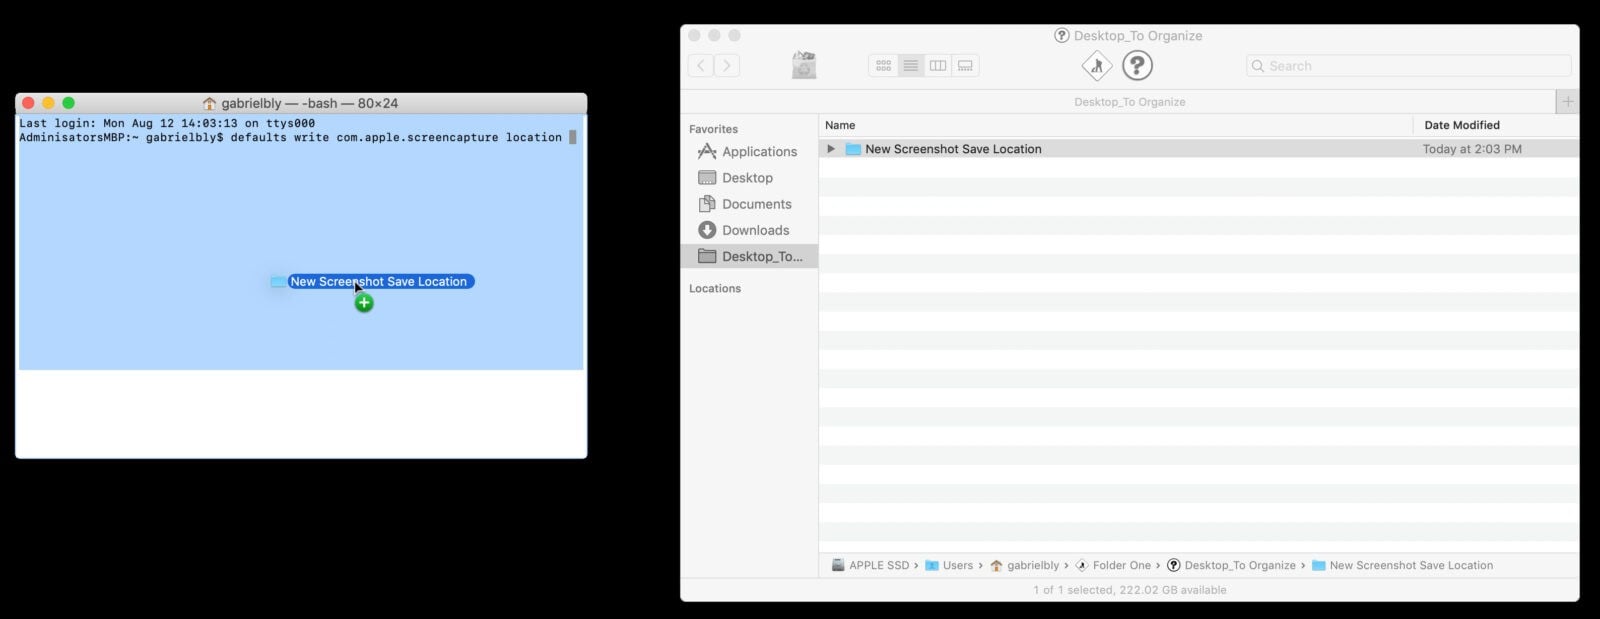
- Type the following command, followed by a space:
defaults write com.apple.screencapture location
- Drag the folder you want to save to into the Terminal command box. You will see that the file path will now be inserted as another command line in Terminal.
- Press Enter on your keyboard.
- Then type the following command:
killall SystemUIServer
- Press Enter or Return. The next time you take a screenshot, it will be saved to the new folder you have created instead of the desktop.
How to Change a Screenshot to JPG and Other File Formats
By default, Macs save screenshots as PNG files, which are usually larger than JPG files. Both can be used for social media, but JPGs are more universally accepted. To save a screenshot as a JPG, use the Terminal to override the default format setting.
- Open Terminal.
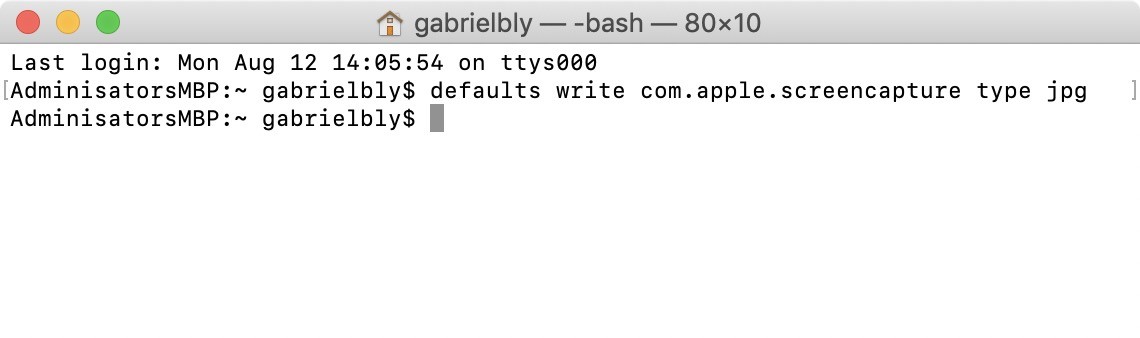
- Type the following command, followed by a space:
defaults write com.apple.screencapture type jpg
defaults write com.apple.screencapture type pdf
defaults write com.apple.screencapture type tiff
defaults write com.apple.screencapture type gif
- Hit Enter. The command will be saved to Terminal.
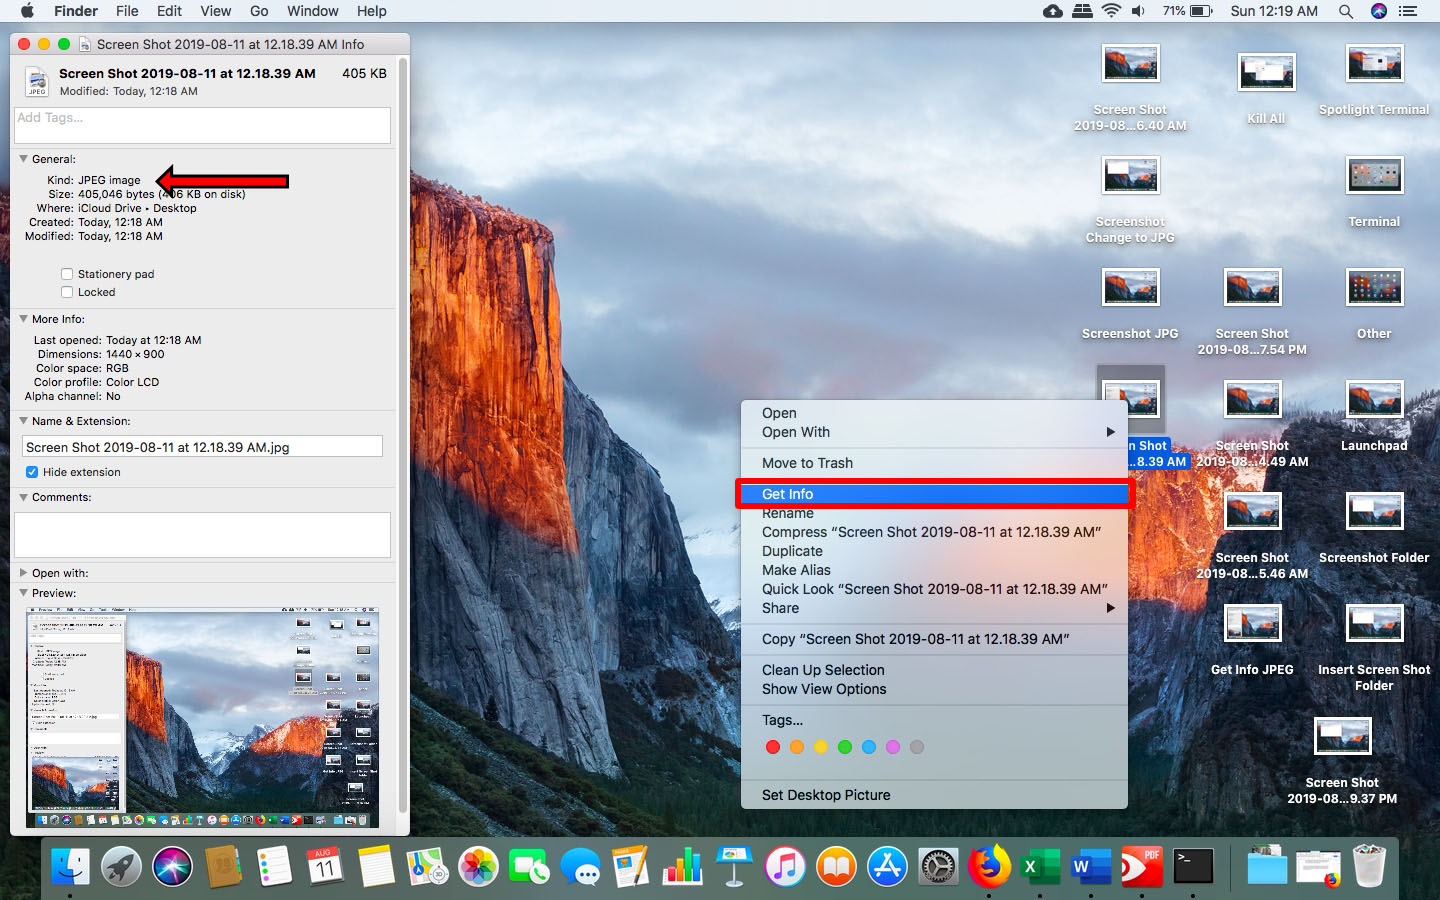
- Test to see if the default option has been changed. Take a screenshot then right-click on the image. Choose Get Info from the contextual menu, then check what is written under “Kind” in the General section.
Once you know how to change the default screenshot settings on your Mac, you’ll be able to customize and improve the way you work with screenshots. Taking a screenshot on a Mac also takes some getting used to, especially for Windows users who are used to hitting the Print Screen key. If you need to improve your screenshot skills, check out our article about how to take a screenshot on a Mac.