If you upgraded to Windows 10, but you don’t like it, don’t worry. You can always downgrade to a previous version of Windows.
There are several reasons why you would want to downgrade your Windows 10 laptop or PC to a previous version of Windows. Perhaps you are not able to run certain apps on Windows 10 or you simply liked Windows 8 or Windows 7 better. No matter what your reason for downgrading is, we are here to make the process of downgrading easy.
How to Downgrade from Windows 10 if You Upgraded from an Older Windows Version
This method will only work if you upgraded to Windows 10 from an older version of Windows. You will not be able to downgrade your computer if it never had a previous version of Windows installed.
When you upgrade, Microsoft will give you 10 days to downgrade to your original version in most cases (some users may be able to downgrade within 30 days). Here are the steps to downgrade Windows 10 within the 30-day rollback period:
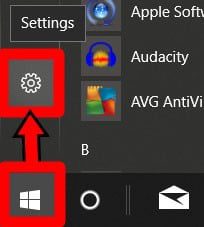
- Select the Start button and open Settings. You can find Settings under the Windows start menu, which is located on the bottom left-hand corner of your screen. Once you click it, you will see the Settings button (shaped like a gear icon) just above it.
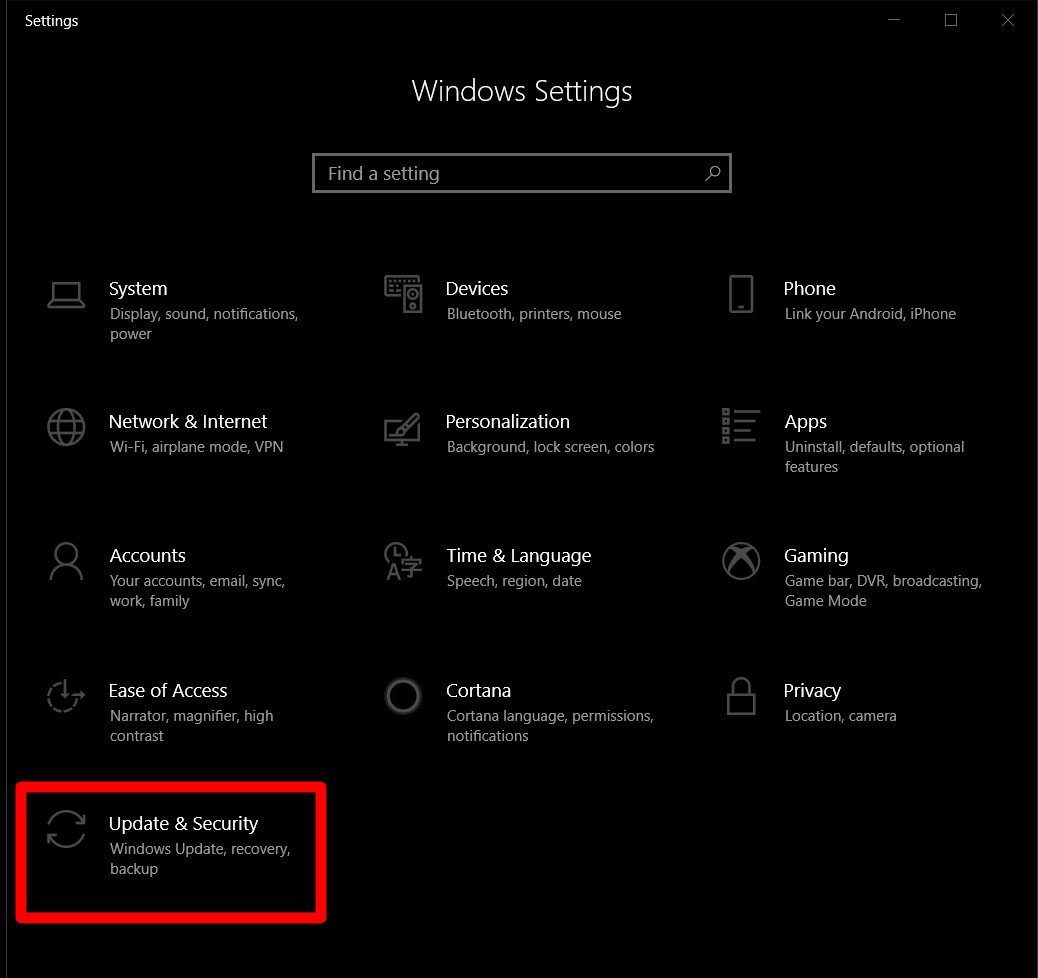
- In Settings, select Update & Security.
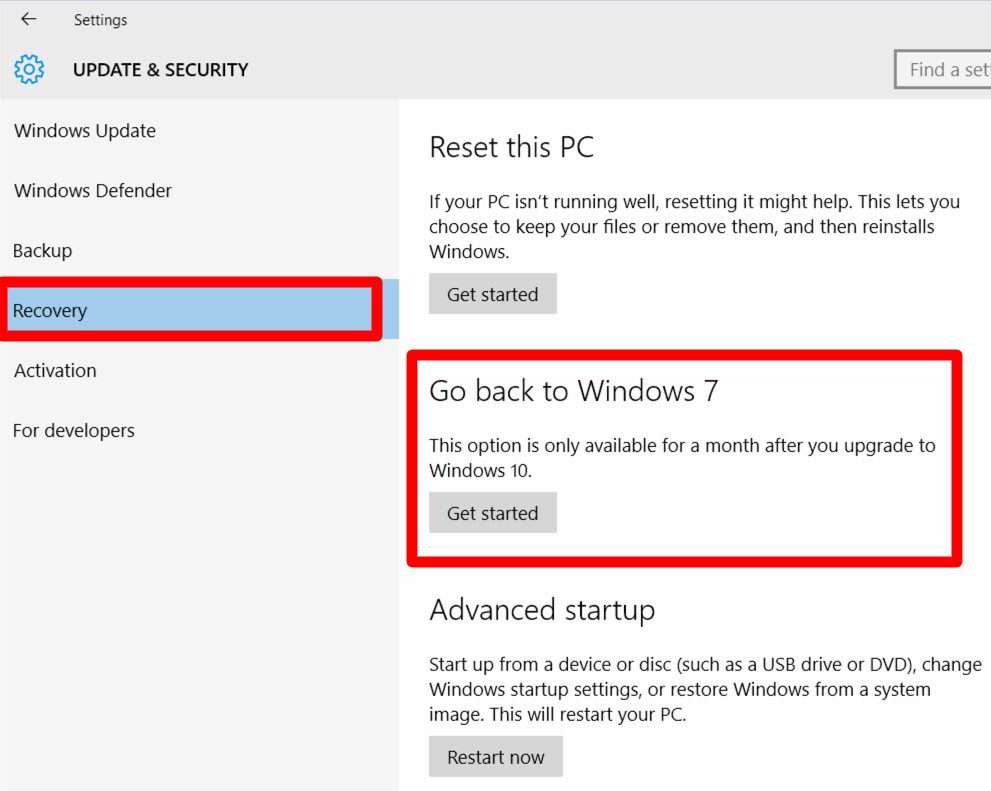
- Select Recovery from the left side-bar.
- Then click “Get Started” under “Go back to Windows 7” (or Windows 8.1).
- Select a reason why you are downgrading. The next panel will show you several reasons for downgrading. Select the box that applies. You can also write your own reasons under the “tell us more” box.
- Pay attention to the reminders in the succeeding panels. Click Next after each panel to continue.
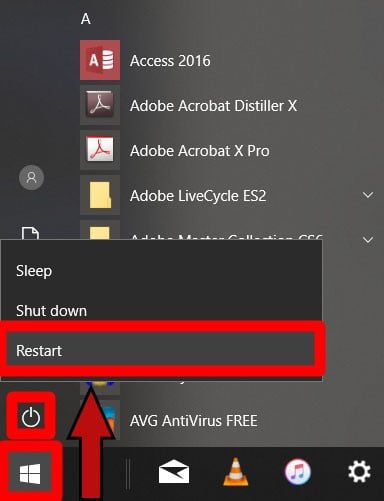
- Once the process is complete, your PC will restart several times. Don’t worry, this is normal.
- When the process is complete, you will be prompted to log in to your previous Windows account. Log in and reinstall your favorite apps, recover your files, and enjoy your downgraded Windows 10 laptop or PC.
How to Downgrade from Windows 10 if the Rollback Period has Ended
If you upgraded to Windows 10 more than 30 days ago, follow the steps below to downgrade to Windows 8:
- Insert the Windows 8 CD into your disk drive. If you are booting from an OS on a USB flash drive, make sure that it is fully plugged in when you restart.
- Click on Restart in the start menu while holding the Shift key. Click on the Windows logo on the bottom left-hand corner of your screen. This will bring up the Start Menu. Click the restart option while holding down the Shift key. This will restart your device in the Advanced Startup Menu.
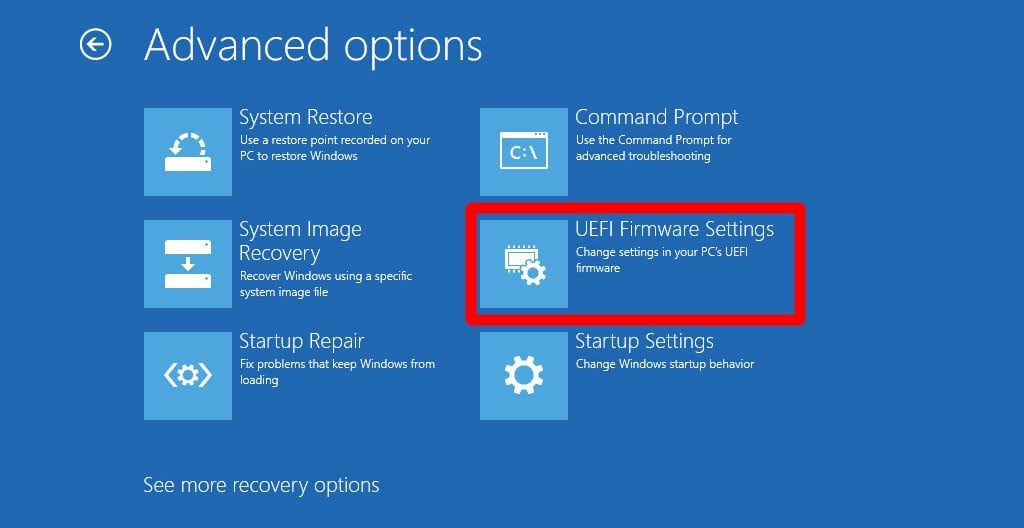
- Click on Troubleshoot > Advanced Options > UEFI Firmware Settings, then select restart. This will restart your computer in BIOS Setup Utility.
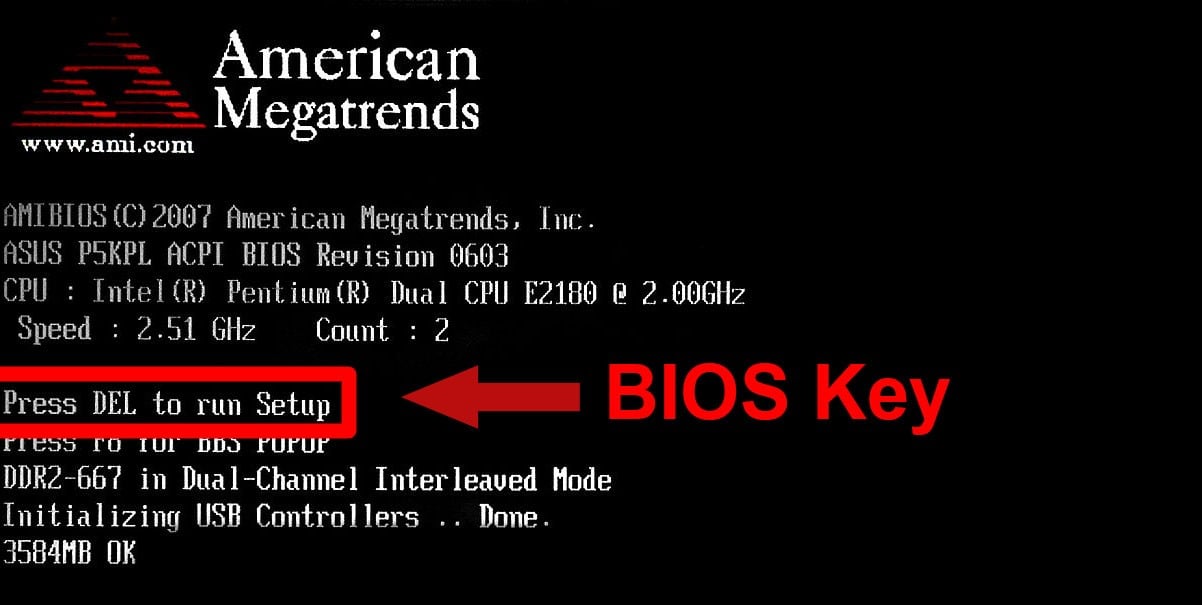
There are several ways to access the BIOS Setup Utility, you can also press the BIOS key rapidly while the computer is restarting. The BIOS key is typically one the function keys (F1 or F2), the ESC key, or the DEL key.
If you are not certain what your BIOS key is, you can find it when you restart your computer regularly. As the computer is restarting, look for text that says something like “Press DEL to run Setup.” If your computer does not display this text, you can also find your BIOS key in the user’s manual.
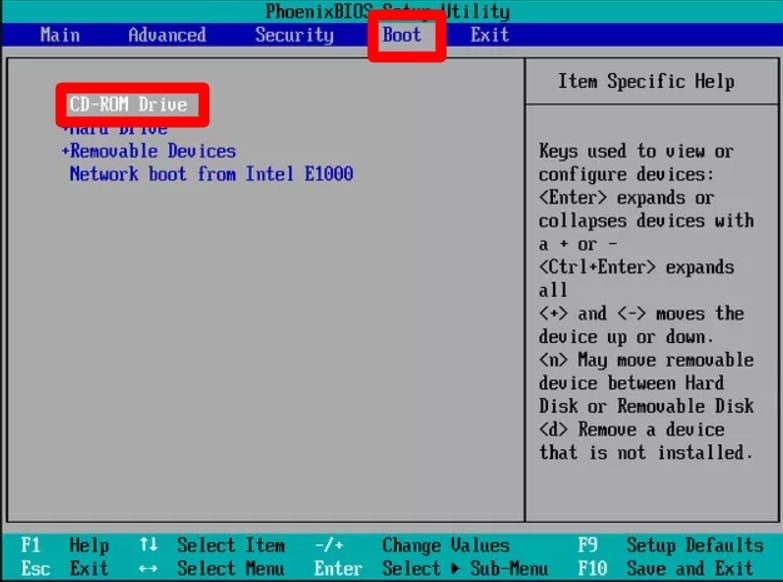
- In the BIOS Setup Utility, go to Boot and then move the CD-ROM Drive to the top of the list. You should see a list of instructions on the BIOS screen that will tell you how to navigate. When you get to the Boot tab, these instructions will tell you how to move an item up or down the list. By moving the CD-ROM drive to the top of the list, Windows will boot from your CD before it tries to boot from your hard drive.
If you’re installing from a USB drive, select Removable Devices. Follow the instructions to begin your Windows 8 clean install. You will be prompted to select the time, language, and keyboard setting. Click Next after.
- Save and exit BIOS to restart your device.
- When your computer restarts, enter your Windows product key. This is the product key that came with the Windows CD. You may also have it in your email when you registered for your Microsoft account.
- Agree to the license terms and click Next.
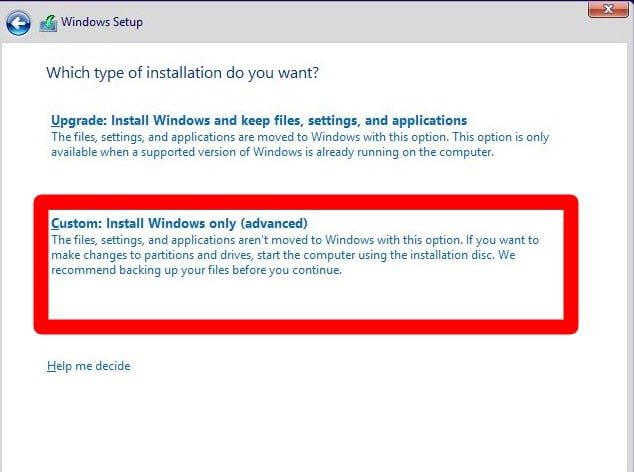
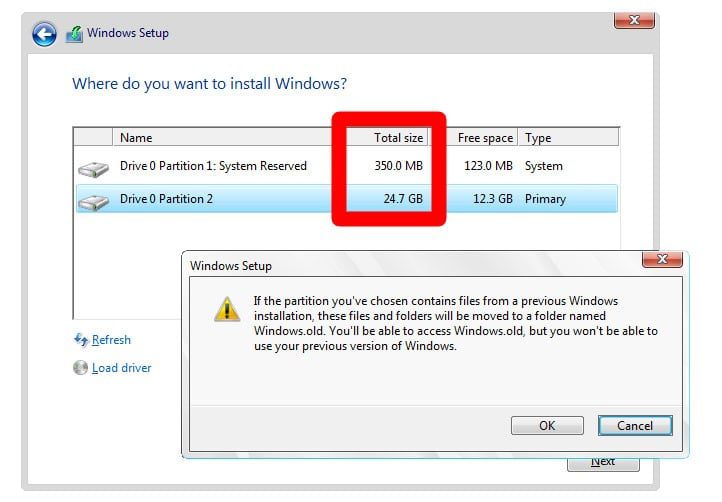
- Then select Custom: “Install Windows Only” from the options given.
- Select the primary drive and click Next. Your primary drive is most likely the largest drive. You can see the sizes of each drive in this window. Make sure to install Windows on the correct drive. Message – DANGER (inside Lists)
This will begin your Windows 8 install process. Wait until the process is complete. Your computer will reboot several times.
- Wait until you see the Windows 8 Basics Wizard screen. You can customize your Windows 8 or you can also go for Microsoft’s express settings.
- Sign in to your computer when prompted. Wait until your Windows 8 finalizes your settings and prepares your start screen. When this is done, you have successfully downgraded your Windows 10 to Windows 8.
Before you decide to downgrade from Windows 10, check out our article on Microsoft ending support for Windows 7.
