Installing a Nest Learning Thermostat will make your life a whole lot easier, but it can be complicated to set up correctly. If you recently got this smart thermostat, here’s everything you need to know about how to install your Nest Learning Thermostat and start using it today.
Before you install your Nest Learning Thermostat:
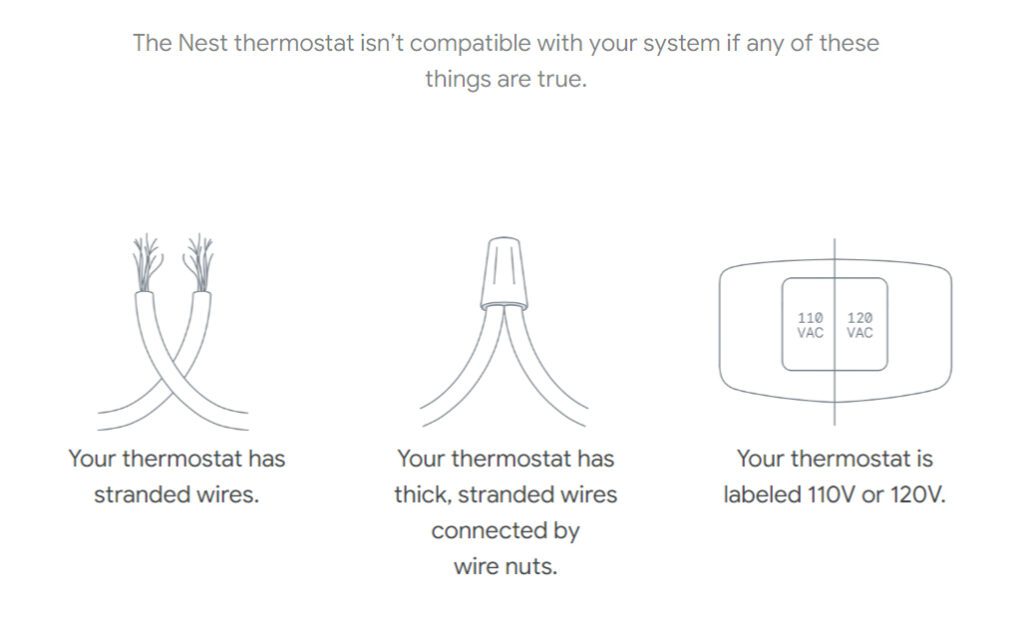
In order to install a smart thermostat in your home, it needs to be compatible with your current heating and cooling system. The Nest Learning Thermostat will not work in your home if you have a high-voltage HVAC (heating, ventilation, and air conditioning) system.
You can tell if your thermostat is compatible by removing the faceplate of your current thermostat and looking for voltage labels. If your current thermostat says 110V (volts), 120V, or 240V, it will not be compatible. You can also tell if your thermostat is not compatible if you have thick, stranded wires or wires with end caps.
To ensure your system can work with a Nest Learning Thermostat, use Google’s Compatibility Checker here.
If you ever feel confused or frustrated while installing your Nest Learning Thermostat, you can always contact HelloTech. We have thousands of professional technicians across the country who can come to your home and install your smart thermostat for you as soon as today.
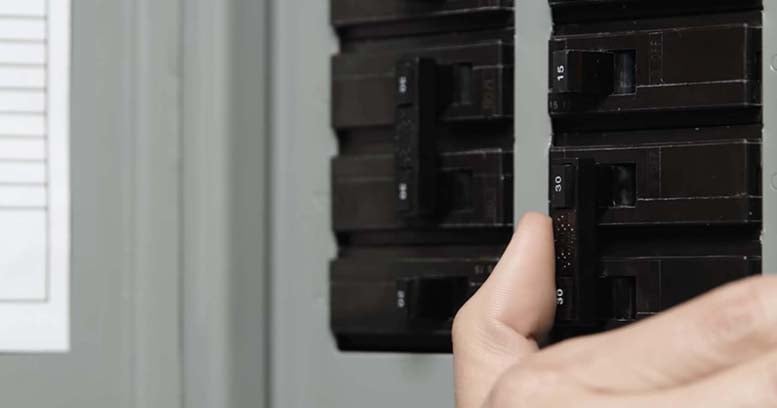
- Turn off the power to your HVAC system. You can usually do this by flipping a switch at your circuit breaker or fuse box labeled “heating,” “furnace,” or something similar. However, some systems will need to be turned off with a switch near your furnace.
- Remove the faceplate from your old thermostat. Most thermostats will easily pop off, but you might also need to unscrew yours with a regular screwdriver (not included in the box). This will expose your current thermostat’s wiring.
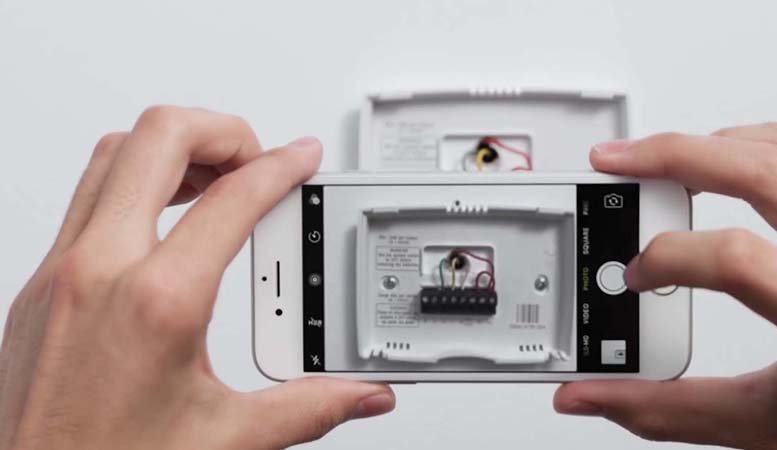
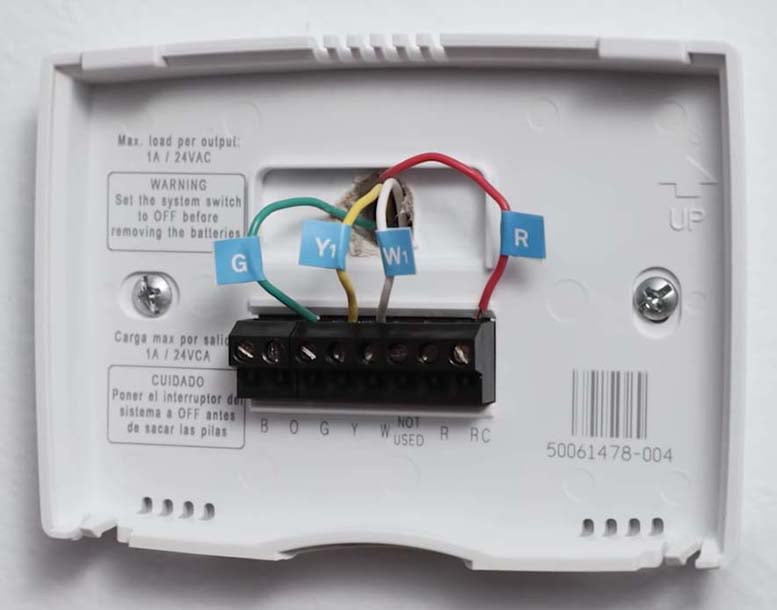
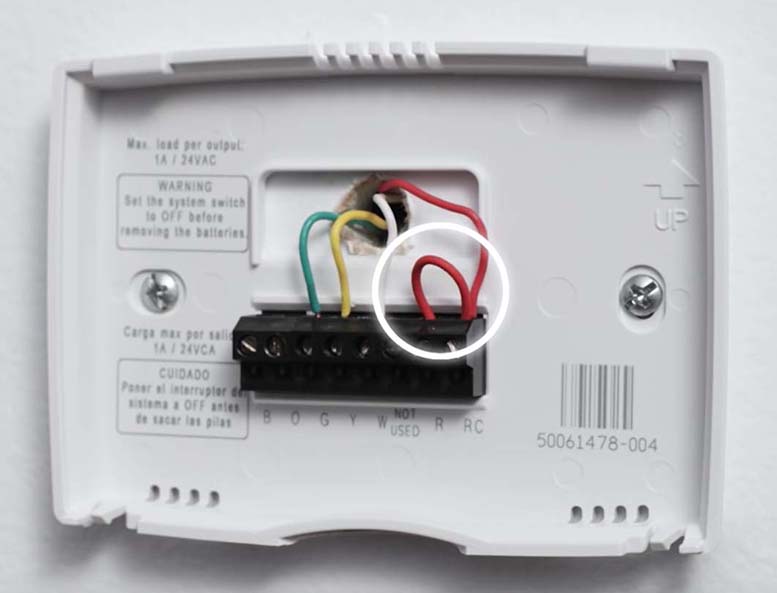
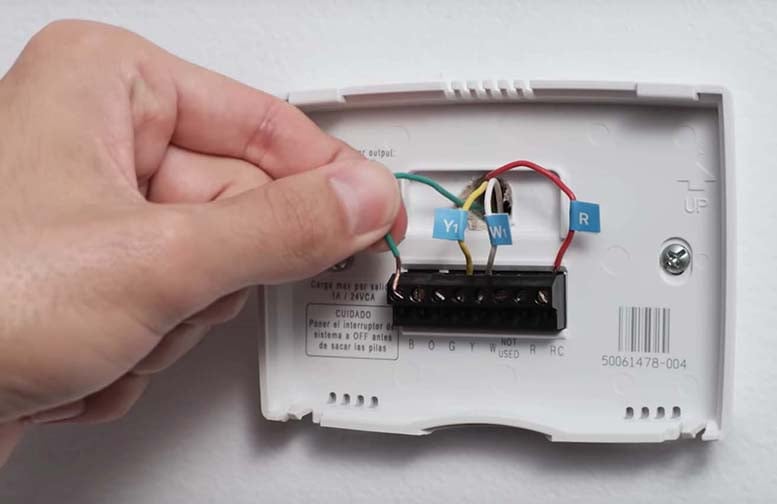
- Label your wires. Using the labels that came with your smart thermostat, wrap them around your wires, so you don’t get them mixed up. Make sure you use the label that corresponds with the port the wire is connected to. For example, if you have a wire going into a port labeled “G,” then attach the “G” label to that wire.
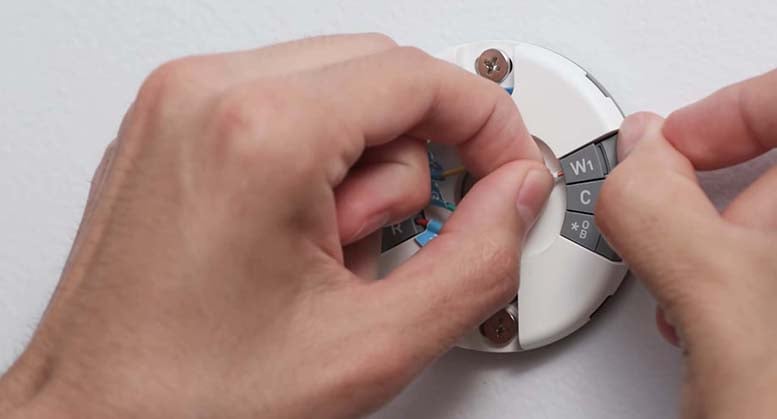
- Disconnect the wires from your old thermostat. Some wires will need to be unscrewed, while others will release when you push a button.
- Then remove your old thermostat from the wall. Be careful not to let any of your wires fall back into the hole in the wall when removing the backplate.
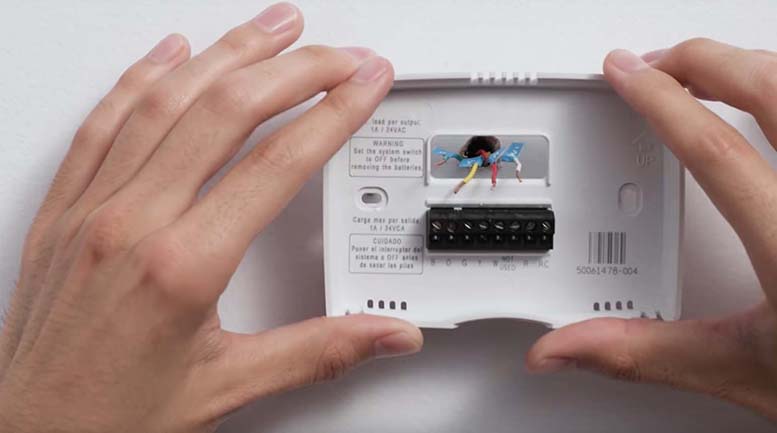
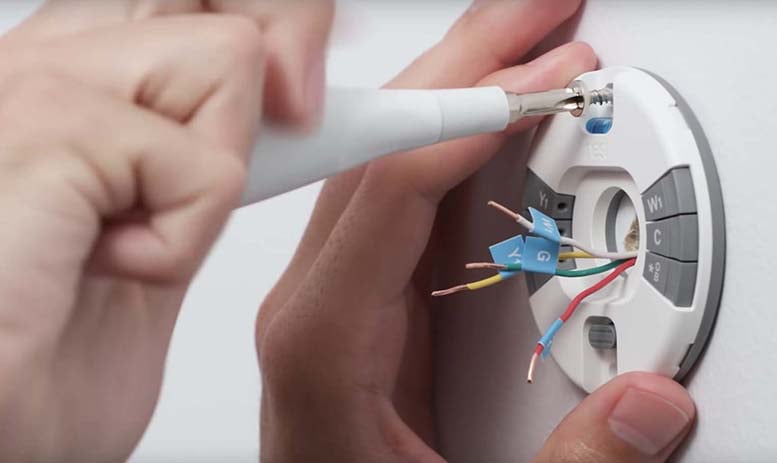
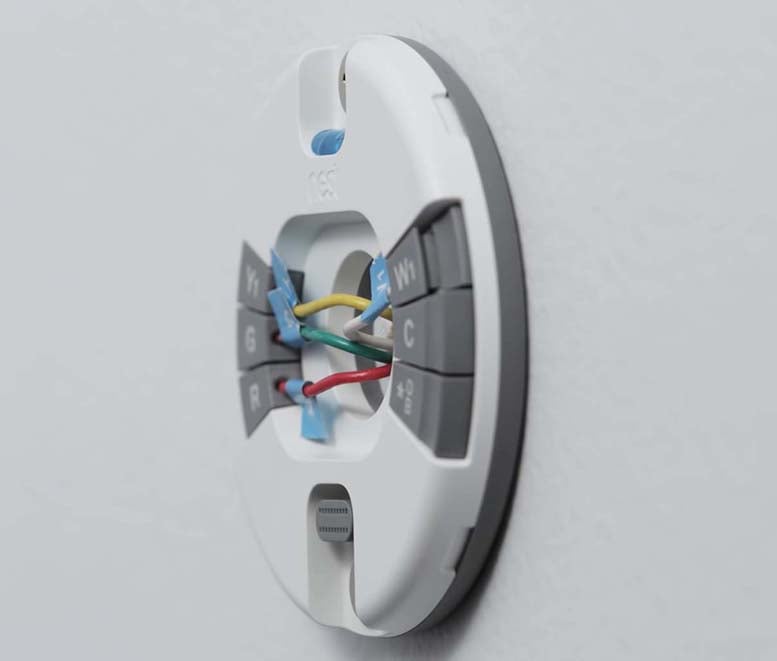
- Install the Nest Learning Thermostat’s base plate on the wall. As you attach the base plate to your wall, pass the wires through the center of the plate. Then attach the top of the base to the wall using the provided screws before the bottom. And don’t forget to use the built-in level to make sure it is straight.
- Connect the wires to the Nest Thermostat. On the Nest Thermostat’s base, you’ll find connector buttons with ports. Just press down these buttons and then insert the labeled wires into the corresponding ports. Finally, release the buttons and make sure the connector button stays down after you’ve inserted the wires.
- Attach the Nest display on the Nest Thermostat’s base. Just press the display onto the base until it clicks into place. Make sure you are connecting your device right-side-up, with the Nest logo at the top.
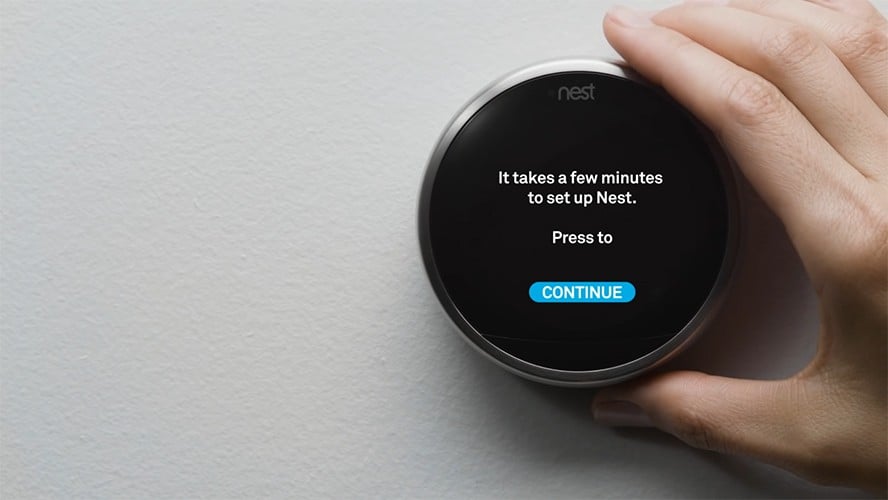
- Turn the power back on. Switch the circuit breaker back on. Once you’re done, your Nest Thermostat will automatically turn on.
- Finally, follow the on-screen instructions to finish setting up your Nest Learning Thermostat. You will have to choose a language, connect it to WiFi, and answer a few basic questions. You can make selections by pressing on the bottom of the device itself.
In order to control your Nest Learning Thermostat from your smartphone and use other smart features like automation, you will have to log in to your Nest account or create a new one at home.nest.com. You will also need to download the Nest app from the Apple App Store or Google Play Store.
If you have any problems installing your Nest Learning Thermostat, or you just have questions, HelloTech can answer them. You can call us at 1-833-599-5711 to talk to a real person or visit our smart thermostat support page, and we can send a technician to your home as soon as today.
HelloTech editors choose the products and services we write about. When you buy through our links, we may earn a commission.