If you are running Mojave, you can screenshot a whole screen, capture a window, capture only a section, or record a video of the screen. Here’s how to screenshot on a Mac running Mojave.
How to Screenshot the Whole Screen in macOS Mojave
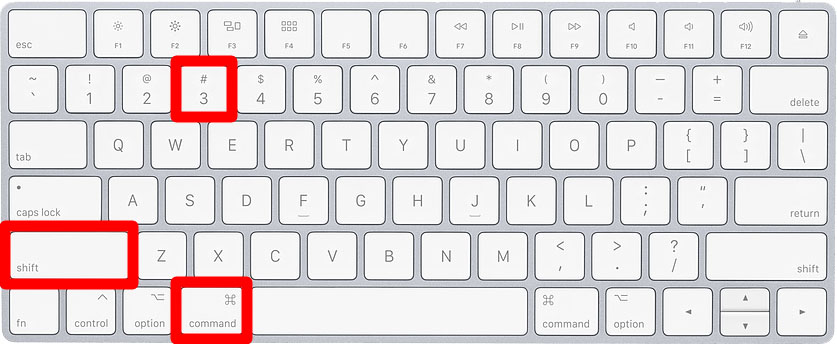
- Press Command + Shift + 5.
- Click the 1st icon in the menu that pops up. The screenshot menu will be at the bottom of your screen.
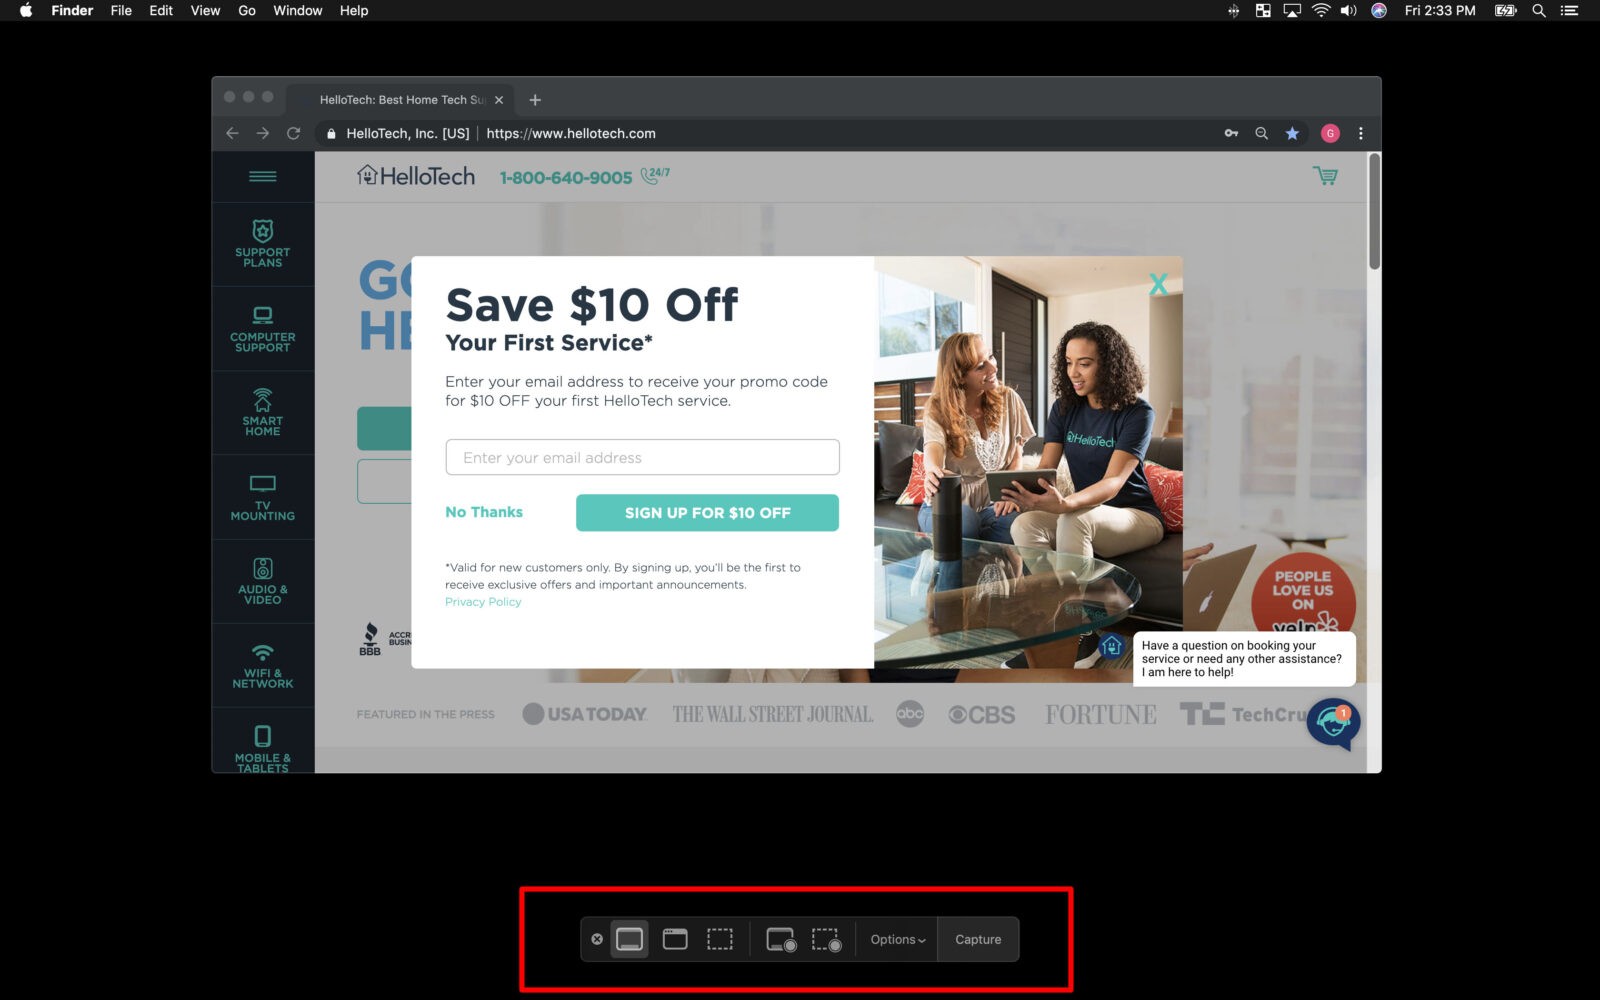
Click the 1st icon after the “X” button on the left. This action will turn the pointer into a camera.

- Click the mouse or trackpad to capture the screen. Alternatively, you can also click “Capture” on the right-hand side of the screenshot menu.
- A thumbnail of your image will appear in the bottom right corner of the screen. You can click the thumbnail to make changes to the image, or you can swipe it off the screen to save it faster.
- Your image will be saved to the desktop after a few seconds.
How to Capture a Window in macOS Mojave
- Press Shift + Command + 5.
- Click the 2nd icon in the menu that pops up. This action will turn the pointer into a camera.

- Click the window you want to capture. It doesn’t matter if the window you are capturing is behind another window.

- A thumbnail of your capture will appear briefly in the bottom right corner of your screen. You can then choose to markup, share, save, or take other actions from this thumbnail.
- Your image will be saved to the desktop after a few seconds.
If you don’t wish to screenshot the shadow as well, do the following instead:
- Press Command + Shift + 5.
- Click the 2nd icon in the menu that pops up.
- Your pointer will appear like a cross with a circle in the middle. When you see this cross icon, hold down Alt/Option and then press Space bar + Alt. This action will turn the pointer into a camera.
- Click your trackpad or mouse button to screenshot the window without shadow.
- A thumbnail of your capture will appear briefly in the bottom right corner of the screen. You can then choose to markup, share, save, or take other actions from this thumbnail.
- Your image will be saved to the desktop after a few seconds.
How to Take a Screenshot of a Section in macOS Mojave
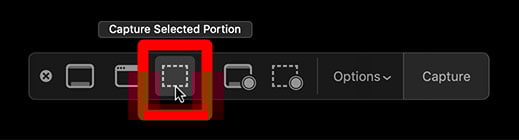
- Press Shift + Command + 5.
- Click the 3rd icon in the menu that pops up. Once you click this, your screen will dim, except for a section that is highlighted in a box.
- Use your mouse to drag the box around the section of your screen that you want to capture.

- Click Enter to take the screenshot. Or you can click Capture in the onscreen controls.
- A thumbnail of your capture will appear briefly in the bottom right corner of the screen. You can then choose to markup, share, save, or take other actions from this thumbnail.
- Your image will be saved to the desktop after a few seconds.
How to Capture Timed Screenshots in Mojave
- Press Shift + Command + 5.
- Click Options in the screenshot menu.
- Choose 5 or 10 seconds from the Timer options.

- Choose the type of captures that you want to capture. You can choose between the entire screen, a selected area, or a single window.
- A timer will start after you choose the kind of screenshot. The screenshot will be taken when the timer reaches zero.
The Options menu also lets you show or hide the mouse pointer, or change where to save your screenshot.
Now that you know how to screenshot on macOS Mojave, find out how to record your Mac screen here.