Whether you have friends or family visiting, it’s always a good idea to set up a guest WiFi network. Otherwise, anyone who signs in to your WiFi network will have access to your devices and personal information. Even if you trust your guests with your WiFi password, they could accidentally spread malware or viruses to your network. To help you protect your privacy, here’s how to set up a guest network on your WiFi router.
Before You Begin:
Before you can set up a guest network, you will need to log in to your WiFi router. In order to log in to your router, you’ll need to know your router’s IP address. Here’s how to find it on a Windows or Mac computer.
Read More: How to find your router’s IP address on Windows, Mac, iPhone, and Android
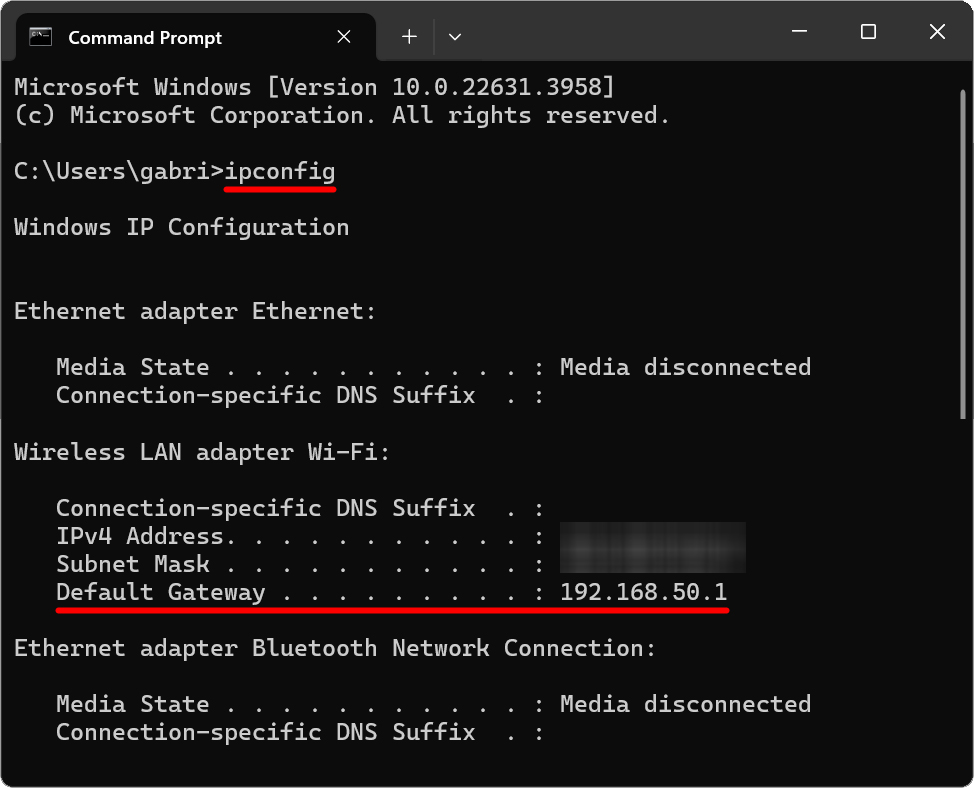
- How to find your router’s IP address on a Windows 10/11 PC: Press the Windows + R keys on your keyboard at the same time. Then type “CMD” into the Run box and hit Enter. Next, type “ipconfig” into the command prompt window and hit enter. Finally, you can find your router’s IP address next to Default Gateway.
- How to find your router’s IP address on a Mac: Click the Apple logo in the top-left corner of your screen and select System Settings. Then select Wi-Fi from the left sidebar and click the Details button next to your WiFi network. Finally, you will see your router’s IP address next to Router.

- For older Macs: Click the Apple logo in the top-left corner of your screen and select System Preferences. Then click Network, select Wi-Fi in the left sidebar, and click Advanced in the lower-right corner. Finally, open the TCP/IP tab, and you will see your router’s IP address next to Router.
How to Set Up a Guest Network
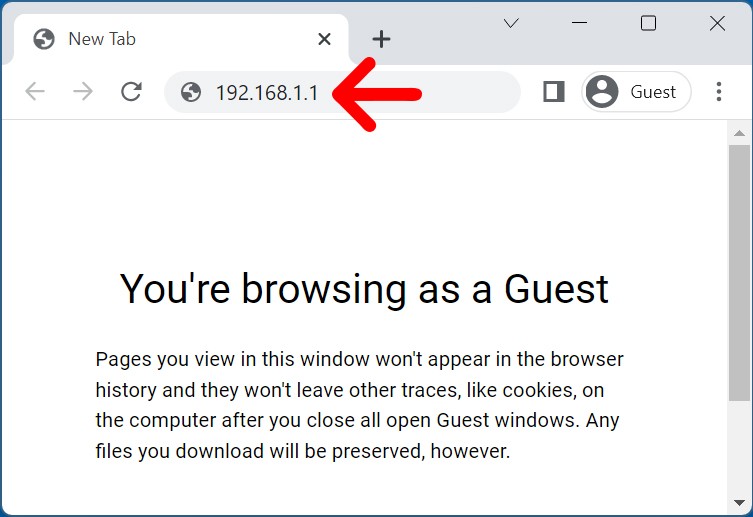
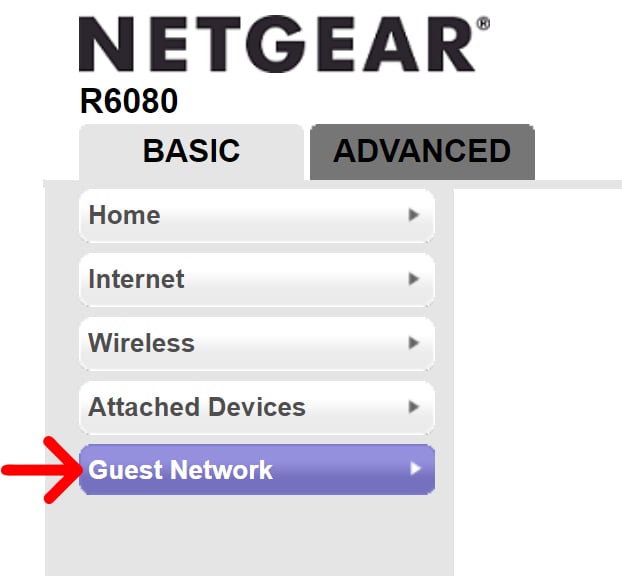
To set up a guest network, open any web browser and type your WiFi router’s IP address into the address bar. Then log in to your router and select the “Guest Network” settings. Next, select a WiFi band, enter a network name, choose your security protocol, and enter a password. Finally, click Apply or Save.
- Open a web browser. You can use Chrome, Safari, Edge, or any other web browser you want. While it is easier to use a computer, you can also use a smartphone or tablet to set up a guest network.
- Then, type your router’s IP address into the Address Bar. This is the same place where you would enter a website URL.
- Next, enter your router’s login info. In most cases, the default username will be “admin” or left blank, and the password will be “admin,” “password,” or left blank.
Read More: How to find your router’s password

- Then, click Guest Network. If you can’t find a guest network button, check under “WiFi,” “Wireless Settings,” or “Advanced.”
- Next, select Enable Guest Network under 2.4GHz, 5GHz, or 6GHz. Depending on your router, you might not see all of these options. The difference between these networks is that the 2.4GHz is the slowest, but it has the longest range, while the 5GHz and 6GHz networks are much faster, but they have a shorter range.
- Then, you can choose a network name. You might also see this under SSID (service set identifier).

- Next, choose the guest network’s security settings. If you set up a guest WiFi network with “Open Access,” anyone will be able to log in without a password. In most cases, you’ll want to choose WPA2 or WP3 “Personal.” If you don’t know which router security option you should choose, check out our guide here.
- Then, you can change the guest WiFi password. Some routers will fill in your network name and password by default, but it is recommended that you change them manually.
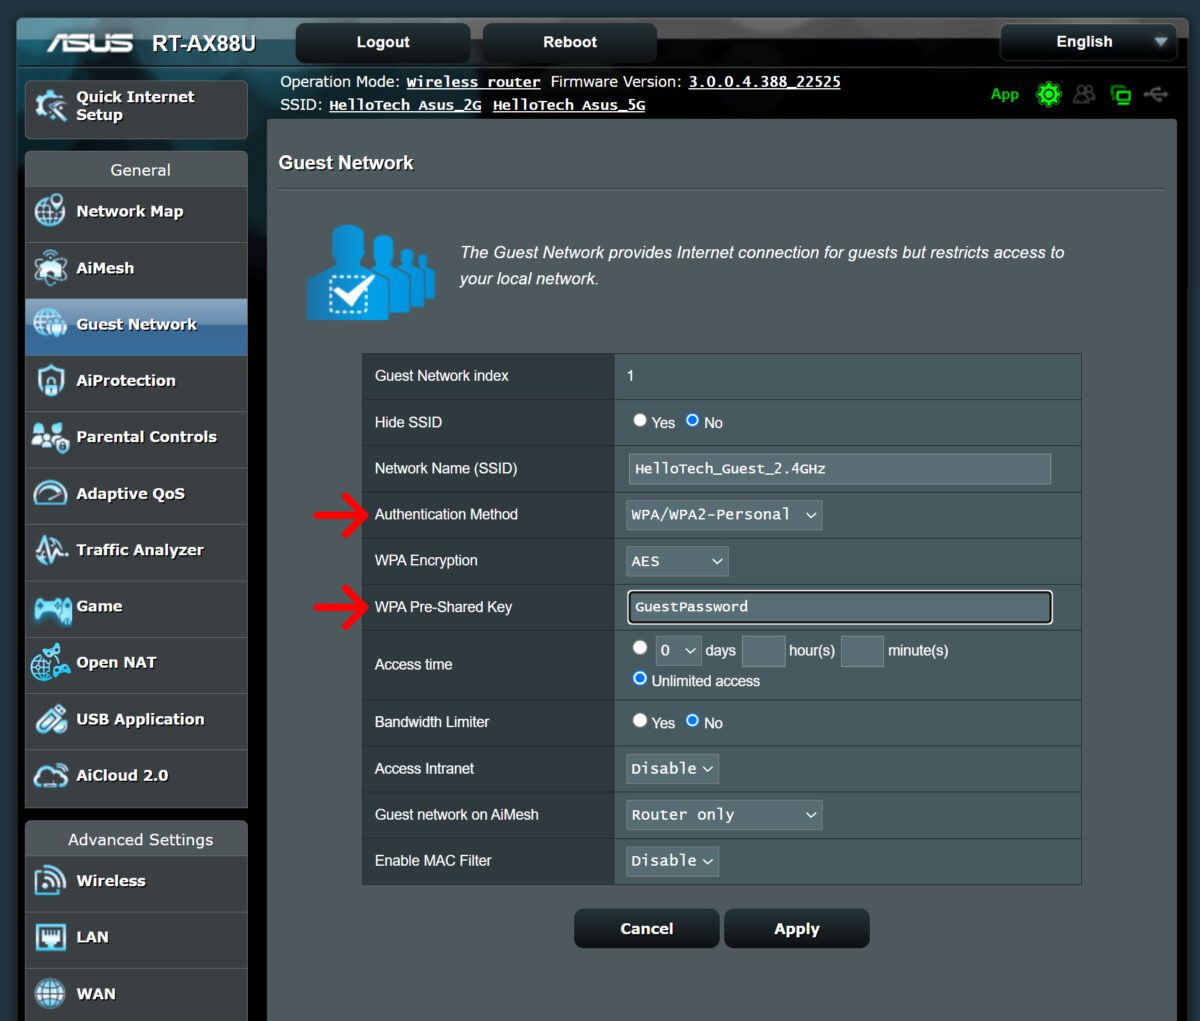
- Finally, click Save or Apply. You can now share the WiFi name and password with your guests.