A Ring Video Doorbell lets you see who’s at the door even before you answer. This smart device will send a notification to your smartphone every time someone rings your doorbell or sets off the built-in motion detector. Then you can talk and listen to your visitors with the two-way audio system. However, your Ring Video Doorbell isn’t a plug-and-play device, and hooking it up is a multi-step process. Here’s how to install a 2nd-generation Ring Video Doorbell and get it to work the first time.
How to Install a 2nd-Generation Ring Video Doorbell
To install a Ring Video Doorbell, you first have to charge the battery and set up the Ring app. Then turn off the power and test the video. Next, install the mounting bracket and connect the doorbell wires. Finally, attach the doorbell to the bracket.
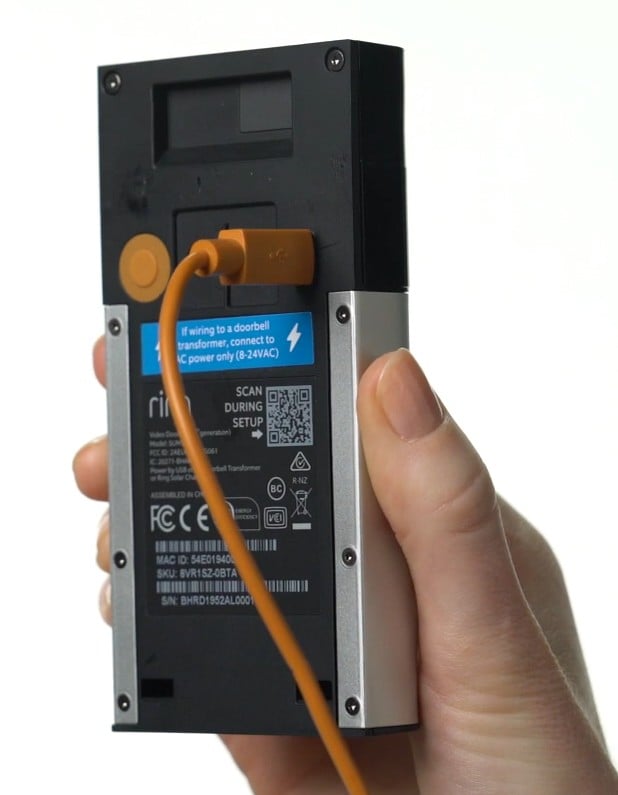
- Charge your Ring Video Doorbell. Unbox your Ring doorbell and plug the provided orange cable into the back of the device. Then plug the other end into a power source. You can also use any other micro USB cable you already have. You will know when your battery is fully charged when you see the circular light on the front of the device glow solid blue.
- Then download the Ring app and set up your account. You can download the Ring app from the Apple App Store or the Google Play Store. Then follow the on-screen instructions to set up your device. If you need more detailed information on this process, check out our step-by-step guide on how to set up your Ring Video Doorbell account.
- Next, prepare your installation tools. If you are installing your Ring Video Doorbell on brick, concrete, or stucco surfaces, you will need to have a pencil and a power drill ready.
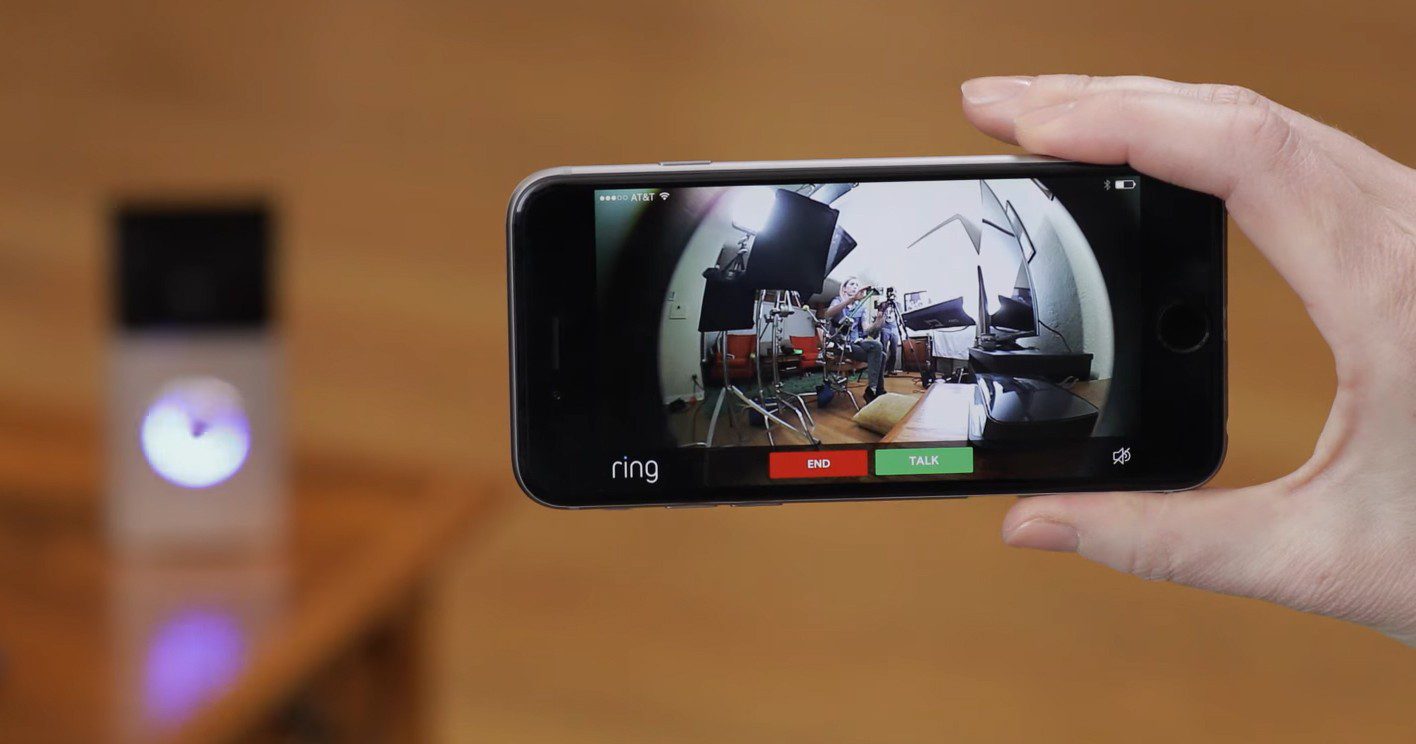
- Test your Ring’s camera. Once your Ring Video Doorbell is charged, stand close to your router and press the doorbell’s front button to test the live video. You should see a live video feed on your smartphone. Then repeat the test outside, close to where you will install your Ring Video Doorbell.
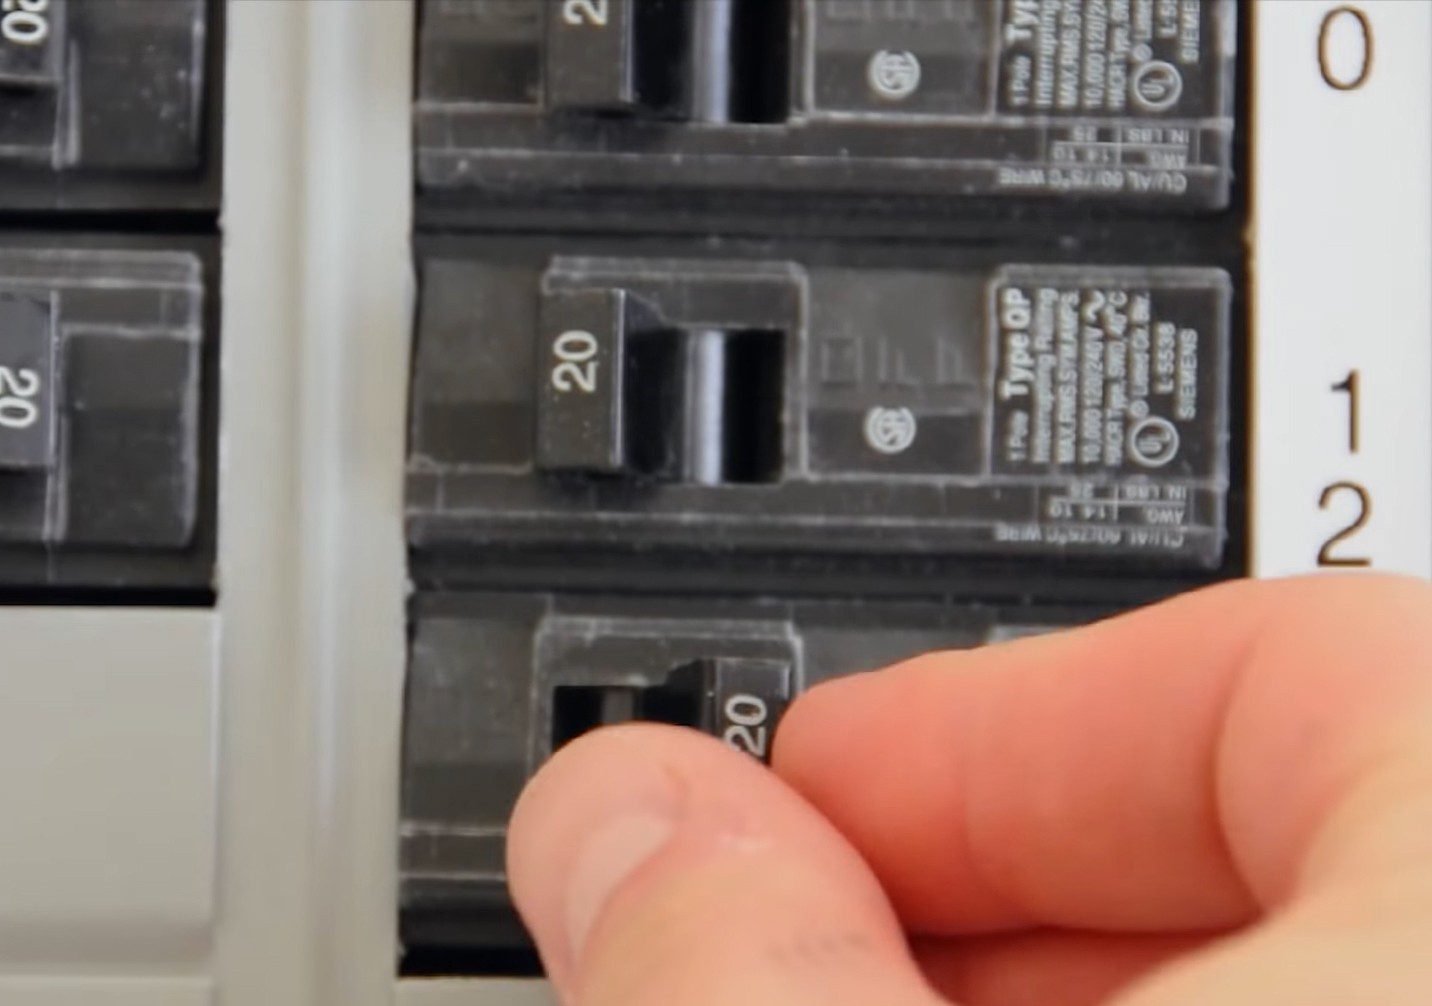
- Then turn the power to your existing doorbell off. You will only need to cut off the power supply to your doorbell from the circuit breaker if you are replacing an existing doorbell. This will ensure that you don’t electrocute yourself when you are installing your Ring Video Doorbell. If you don’t know which breaker goes to your doorbell, you can switch them off one-by-one until your doorbell doesn’t work anymore.
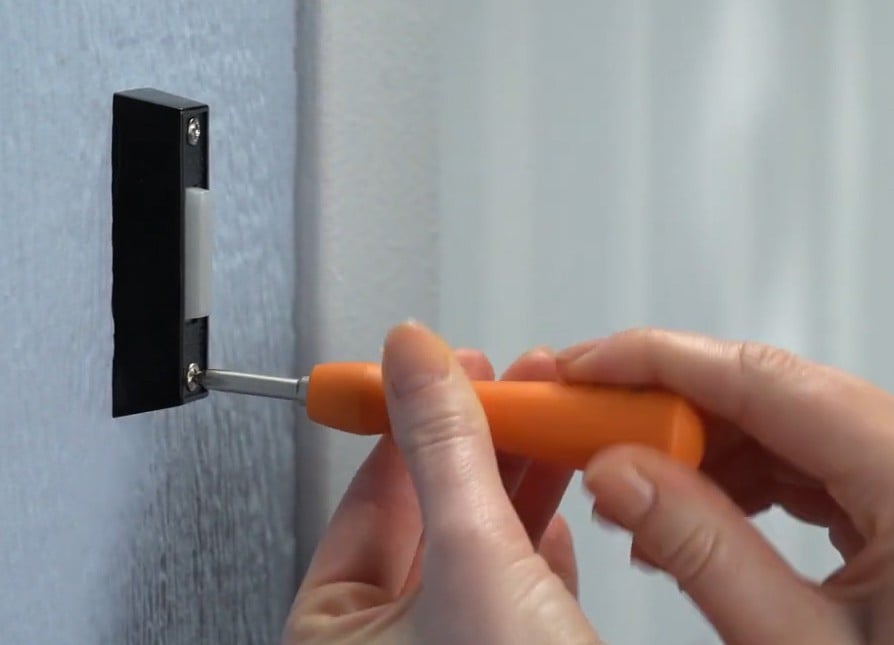
- Next, remove your old doorbell. If you are replacing an existing doorbell, you can use the screwdriver provided to unscrew your existing doorbell from the wall. Then detach the wires from your existing doorbell and leave them hanging out.
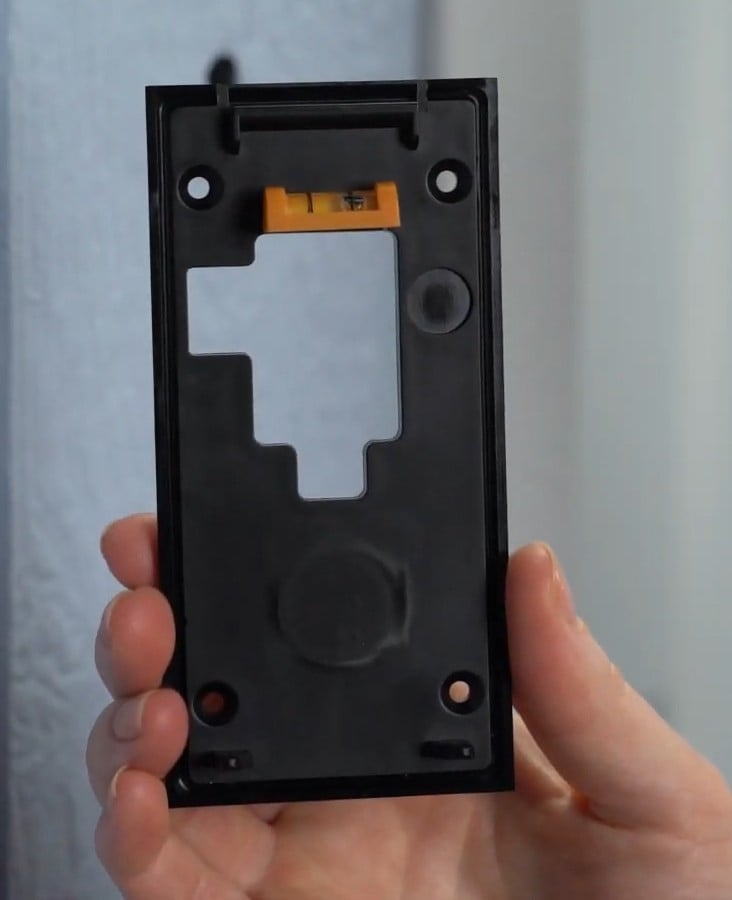
- Then remove the bracket from the back of your Ring Video Doorbell. There will be a thin black mounting bracket attached to the back of your Ring Video Doorbell. All you have to do to remove it is gently pull on the back of your device. It should snap off without much force.

- Insert the provided level into the bracket. You will be provided with a small orange level that has three lines and an air bubble. You can insert this at the top of your bracket, just above the large hole in the middle.
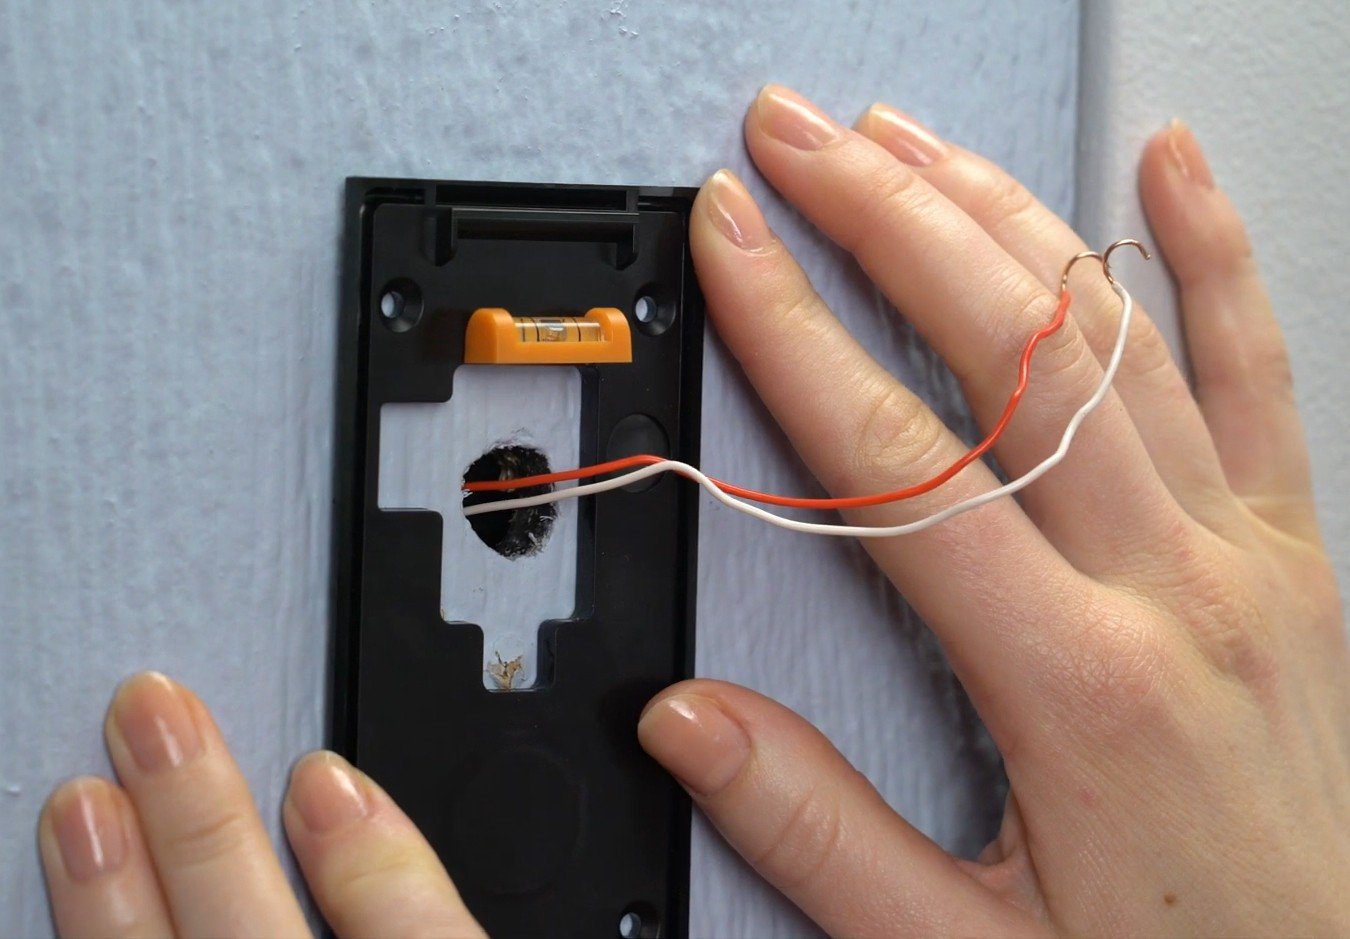
- Then run your doorbell’s wires through the hole in the middle of the bracket. Hold the mounting bracket against the wall and run your existing doorbell wires through the rectangular hole in the middle of the bracket. Ensure that the bubble on the level is centered between the two lines.
- Next, use a pencil to mark each corner of the mounting bracket.

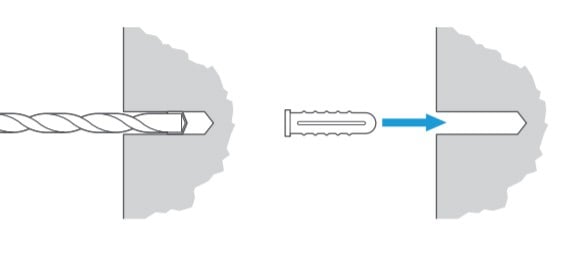
- Next, drill holes for the anchors. Use the provided drill bit to drill holes where you marked the four corners of the bracket with your pencil. Once done, push the provided plastic anchors into the holes you drilled. If they do not slide in easily, you can also hammer them in gently.
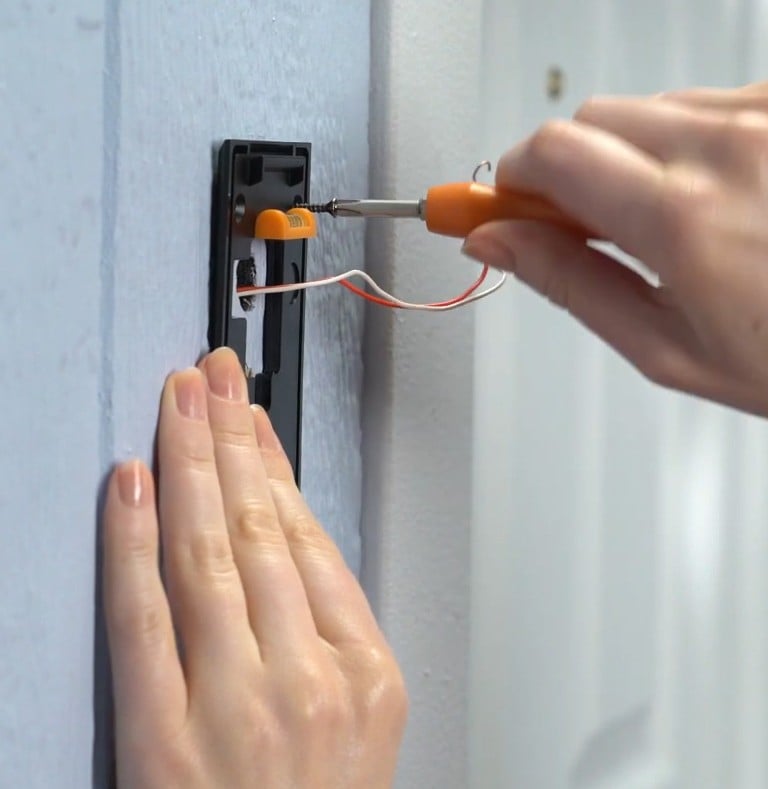
- Then screw the bracket onto your wall or surface. With the Phillips head side of your screwdriver, screw the mounting bracket in place. Once done, you can remove the orange level.
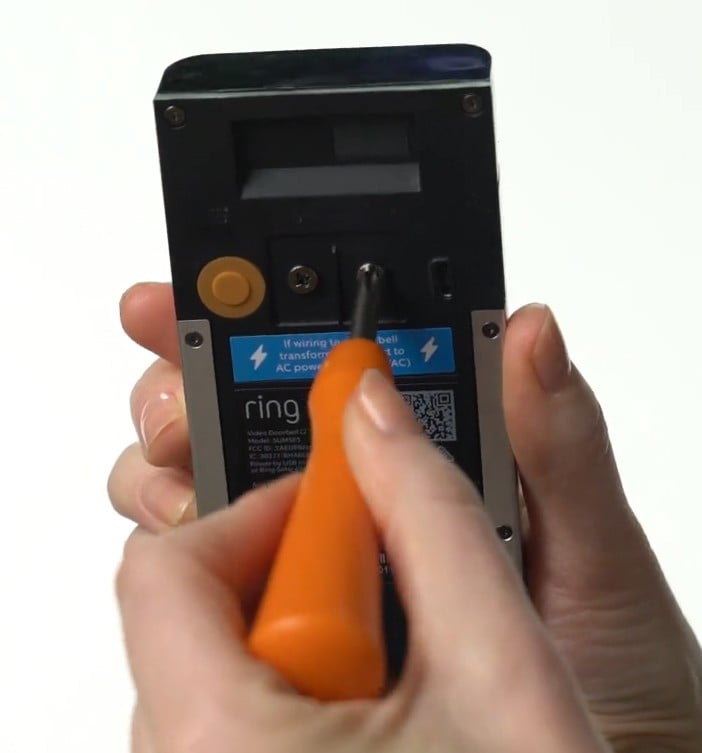
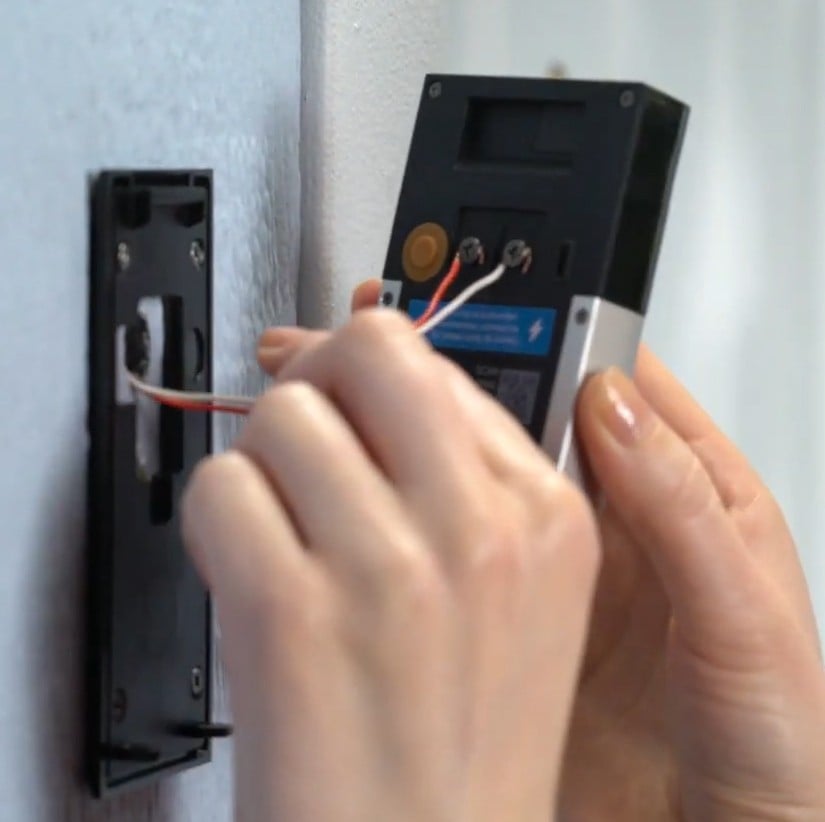
- Loosen the screws on the back of your Ring Video Doorbell. Use the provided screwdriver to loosen the two screws on the back of your Ring Video Doorbell. You do not want to remove these screws, just give them one full turn each. You only need to have enough space to wrap your existing doorbell’s wires around the screws.
- Next, wrap your existing doorbell’s wires around the screws on your device. It doesn’t matter which wire you wrap around each screw, just make sure the exposed parts of your wires are not touching each other. To make things easier, it helps to bend your existing doorbell’s wires into a hook before wrapping them around your screws.
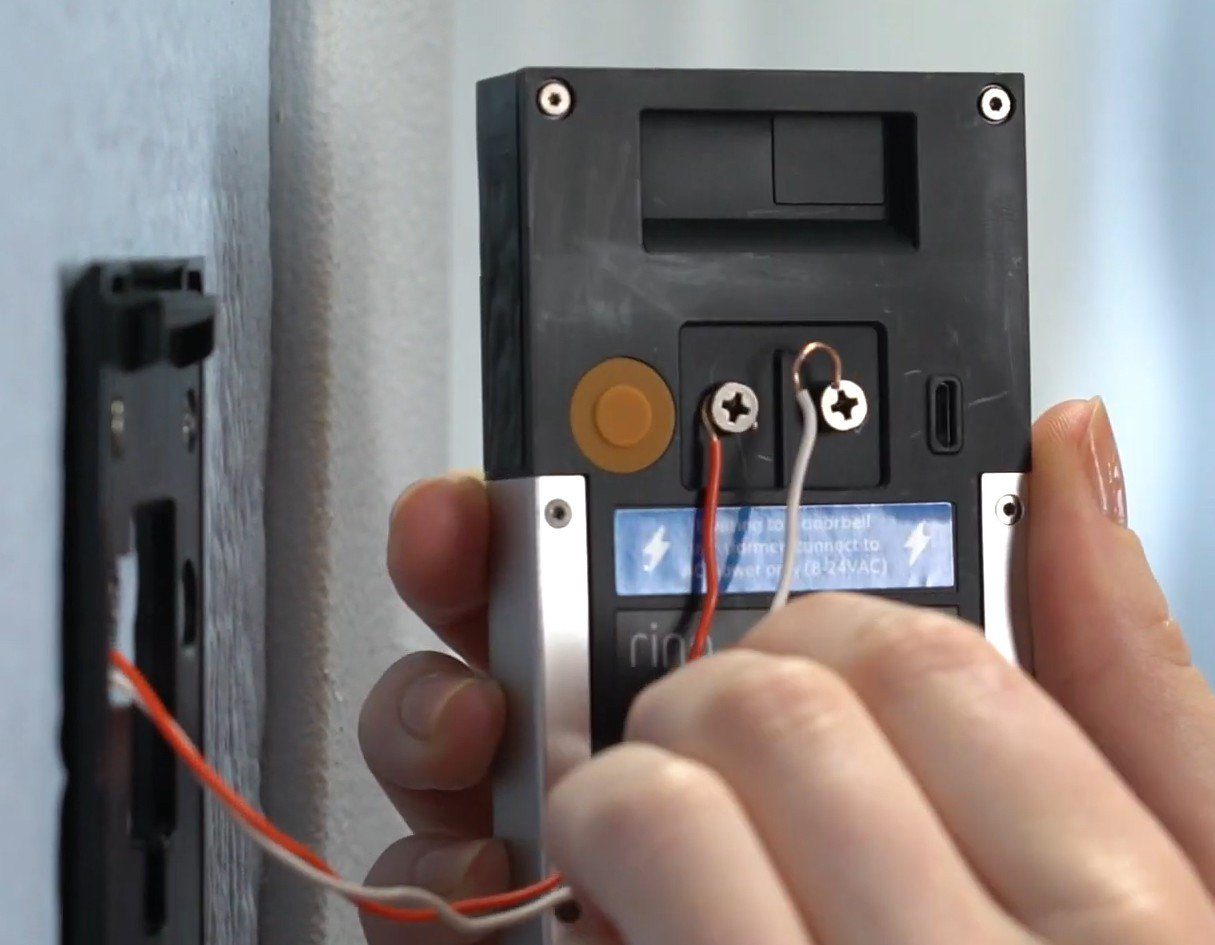
- Then tighten the screws.
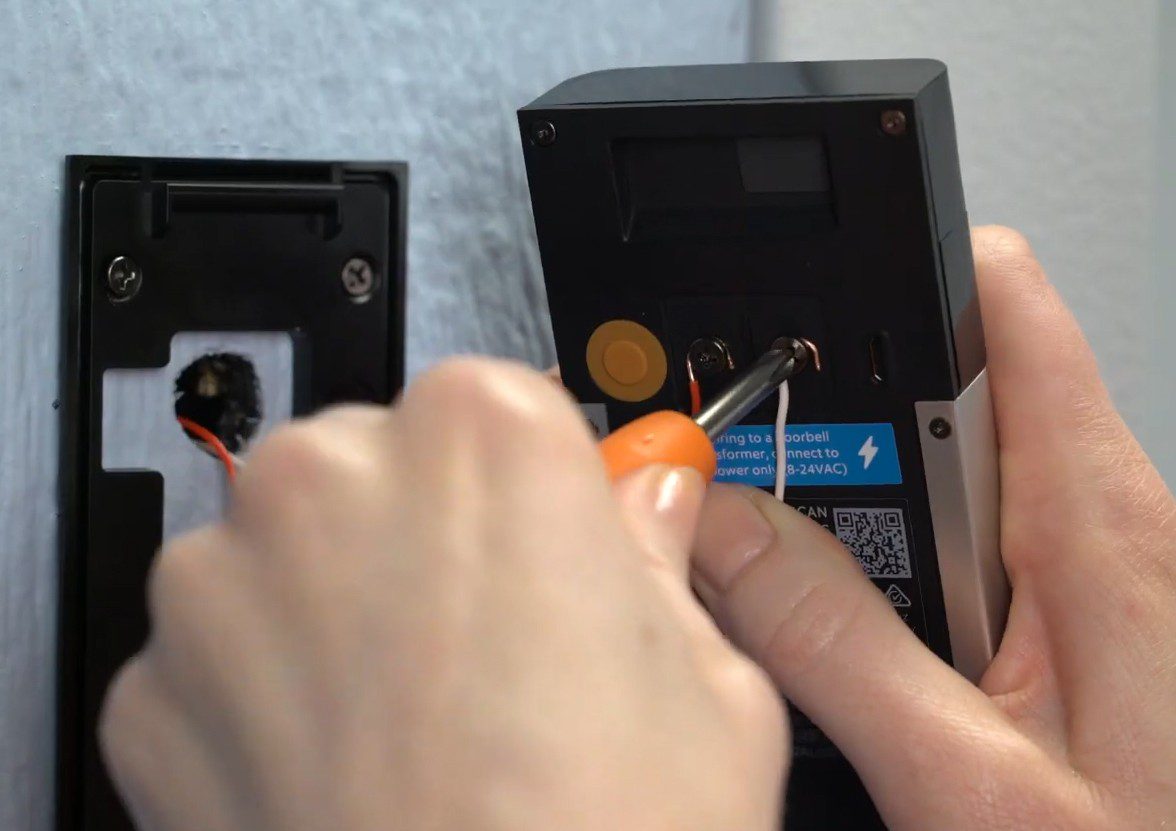
- Next, tug on your wires to make sure they are firmly in place.
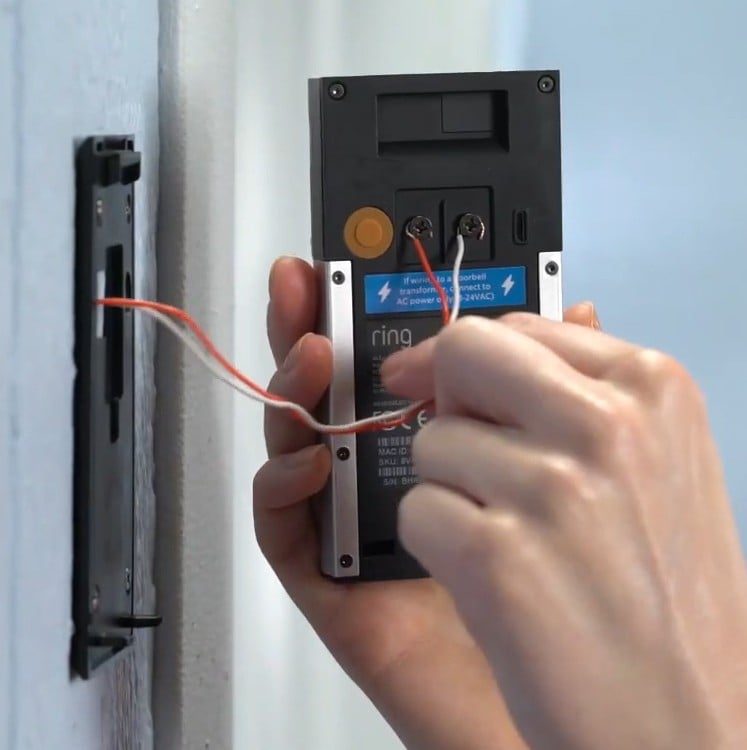
- Next, feed your wires back into your wall. Gently push your wires back into the wall as you move your Ring Video Doorbell closer to the bracket.
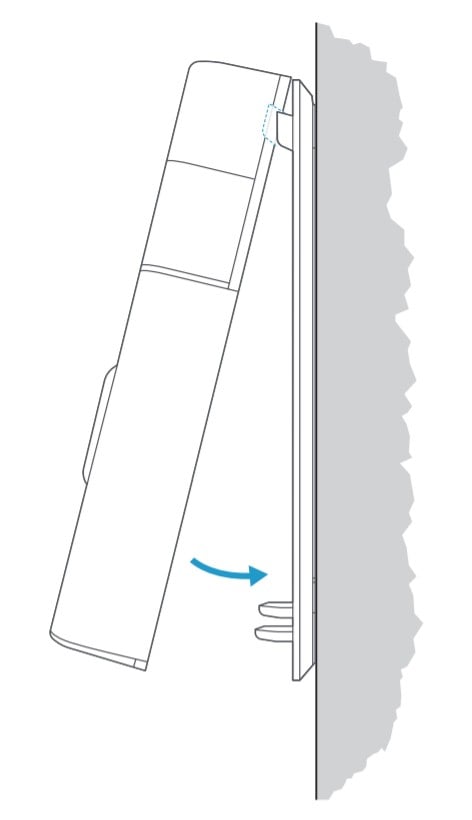
- Then place the top of your Ring Video Doorbell onto the bracket and swing it into place. As you feed your wires into the wall, place the top of your device onto the catch on top of the mounting bracket. When that is in place, you can gently swing the bottom of the device into place, so it is flush against the bracket.
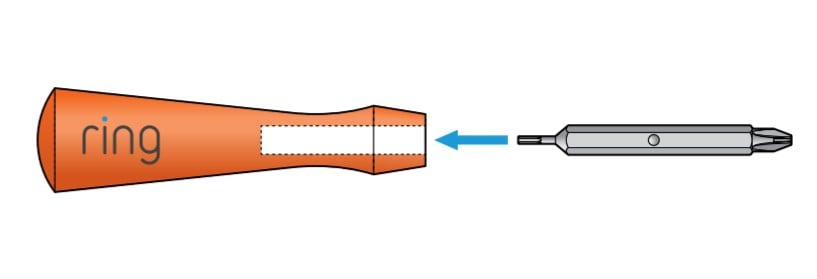
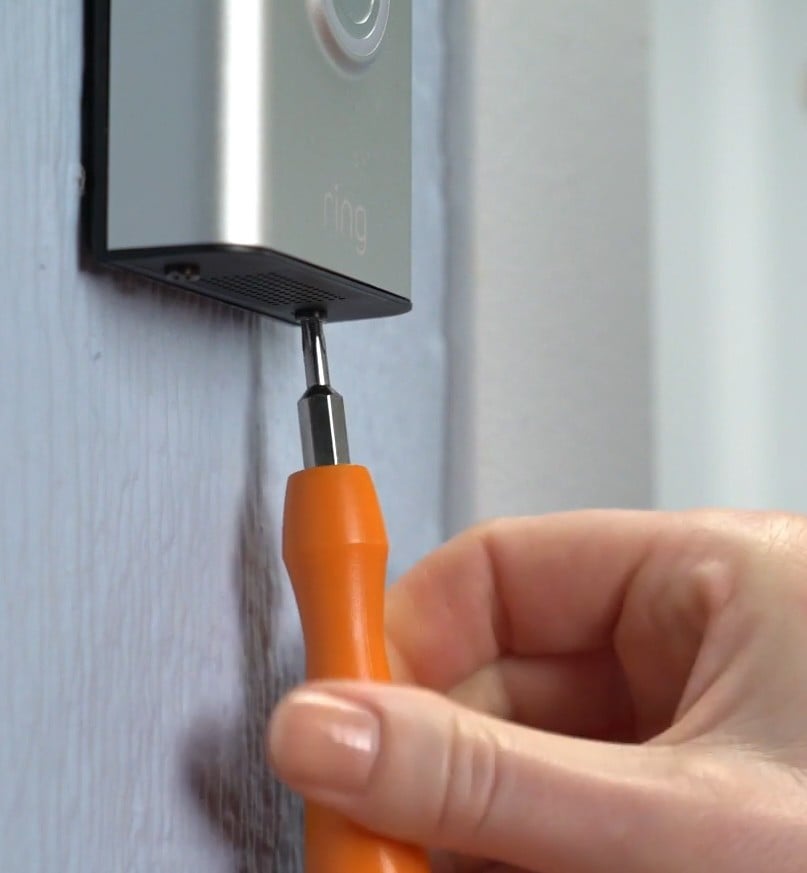
- Next, tighten the screws on the bottom of your Ring Video Doorbell. Use the star-shaped head of the provided screwdriver to screw the security screws on the bottom of the device.
- Finally, turn the power to your Ring Video Doorbell back on and test your device. If you replaced an existing doorbell, you will have to turn the power back on at the breaker. The circular light in front should glow a soft solid white when you press the doorbell.
Now that you know how to install your 2nd-generation Ring Video Doorbell, check out our article on the best smart locks to let your visitors in or lock your door when you’re away.

HelloTech editors choose the products and services we write about. When you buy through our links, we may earn a commission.
