
We receive a lot of emails every day. In fact, a 2018 study showed that people receive an average of 97 emails per day! With all the emails you get from your boss, clients, co-workers, friends, family, and spammers, it’s no wonder your inbox is a bit of a mess. If you’re looking to get your emails in order, here’s how to organize your Gmail inbox, so you can easily find your important emails and filter out irrelevant ones.
Move the Most Important Emails to the Top of Your Inbox
Gmail has a feature that arranges the emails in your inbox, so the more relevant ones are shown first. To make your important emails raise to the top of your inbox, first, click the gear-shaped icon in the top-right corner of your Gmail window. Then select Settings from the drop-down menu.

Next, select the Inbox tab at the top of the window. Then select Inbox type and choose one of the six inbox types from the drop-down menu. Finally, scroll down to the bottom of the page and click Save Changes.

Default shows you the most recent emails first. This can work if you don’t receive a lot of emails every day. However, your most urgent emails will get buried under the most recent and less important ones.
Important first moves emails that Gmail marked important to the top. You might have noticed that there are emails with yellow tags next to the sender. When you use this inbox setting, all your emails that have yellow tags will be moved to the top of your inbox.

Your inbox will then be split into two sections: Important and Everything else. Your emails will be arranged by date in each section, so you might get new emails that you won’t see unless you scroll down to the Everything else section. However, you can quickly minimize and expand either of these sections by clicking the arrow button (^) to the left of the inbox section’s name.
Gmail decides which emails are marked important using several signals, including how often you email a person, which emails you open and reply to, keywords that are in the emails you read, and which emails you star, archive, or delete.
You can click the importance button to mark or unmark an email as important. You can also “teach” Gmail which emails to tag as important. Simply go to Settings > Inbox > Importance markers. Then make sure to check the circle next to Use my past actions to predict which messages are important to me and scroll down and click Save Changes.
Unread first shows you emails you haven’t opened first. This inbox setting can serve as a to-do list, where your opened and finished items are automatically moved to a section below.
If you read an email, and you don’t want it to go to the Read list, you can also select an email and click the Mark as unread button at the top of your window.
Starred first moves emails that you have starred to the top of your inbox. You can star an email by clicking the star icon to the left of the yellow importance to let Google know that email is important to you.

This is similar to the Important first inbox type, except you can control which emails move to the top of your inbox yourself. And, unlike the Importance first inbox type, Gmail will never mark any of your emails as starred without your direct input.
Priority Inbox moves the emails you’re most likely to interact with to the top of your inbox. Gmail analyzes your activity and organizes your inbox accordingly, showing you the emails from senders and subjects you most likely reply to first, based on your past actions.
Multiple Inboxes is a new feature that Google recently added. This setting splits your inbox in half, and it gives you multiple types of inboxes of your choosing on the right side of your window.
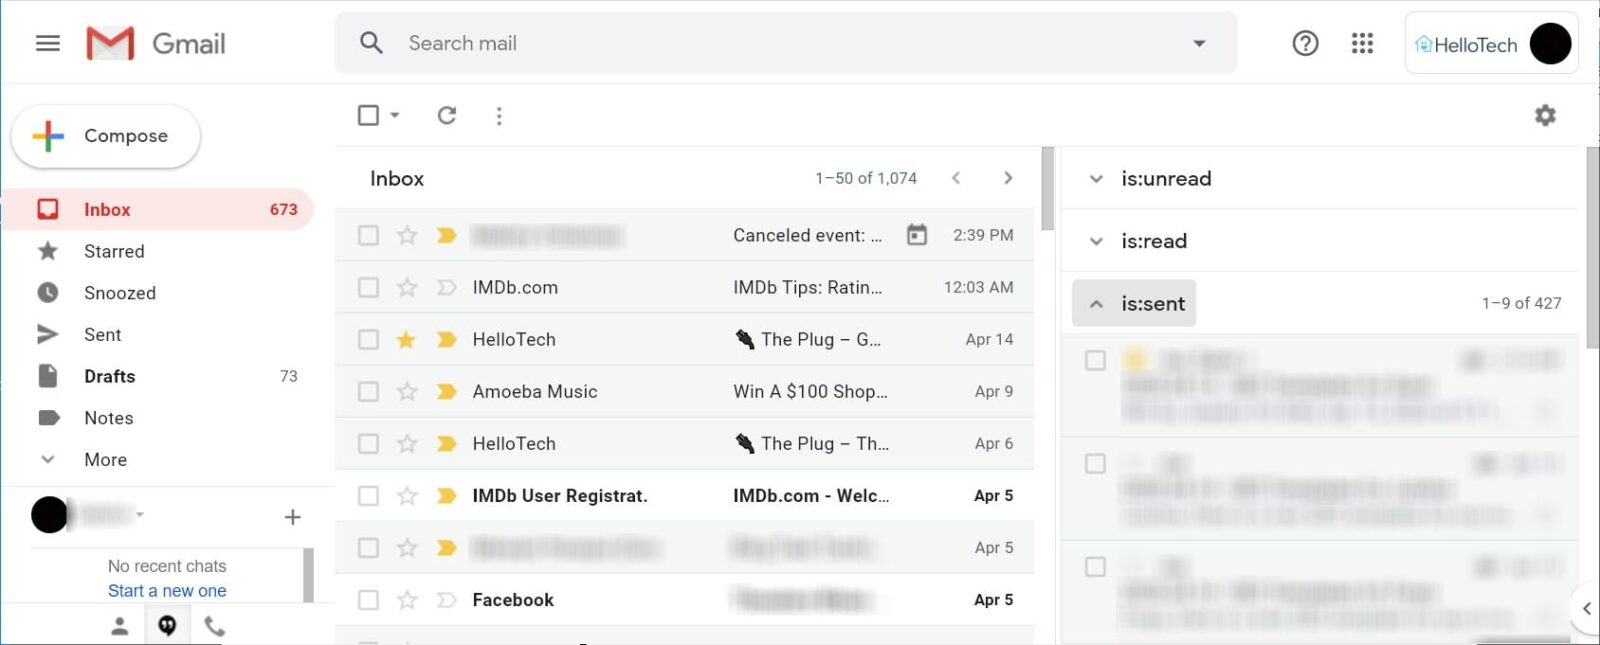
Once you select the Multiple Inboxes setting, you can enter any kind of inbox by typing is:label name into the Search Query field. For example, you can enter is:unread to see a list of your unread emails or is:sent to see a list of emails you have sent.

You can also choose a name to display for your multiple inboxes under Section name. Finally, you can choose how to orient your multiple inboxes and how many emails will appear in each section.
Add Colorful Labels to Find Certain Emails Faster
In the left sidebar of Gmail, you will see your emails sorted into folders like Inbox, Sent, Drafts, and more. But, if you want to organize your Gmail inbox more, you can actually create your own labels to group your emails.
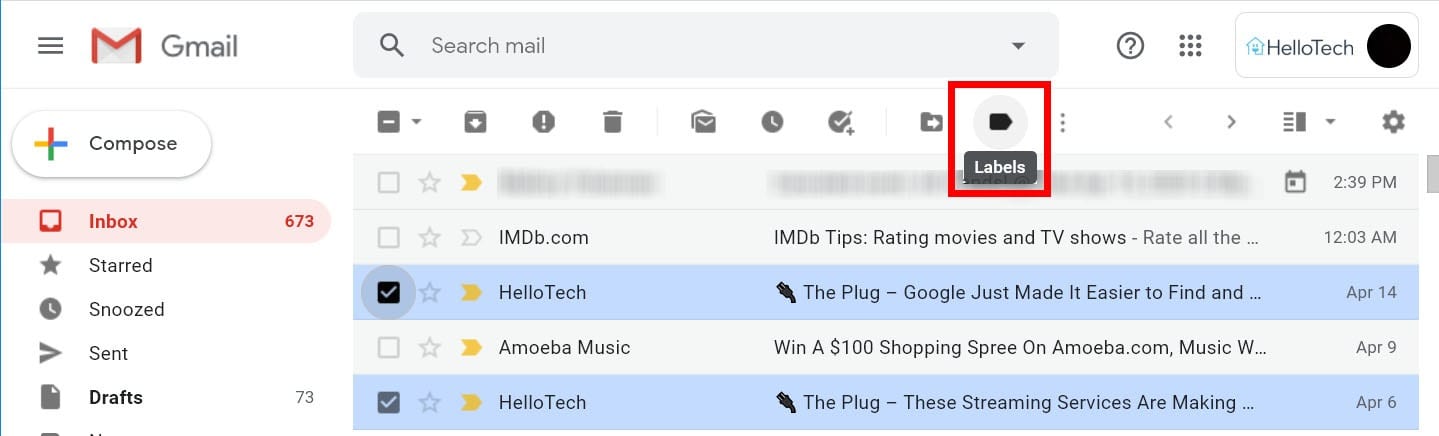
To add a label to your emails, simply select the email(s) and click the Labels button located at the top of your inbox. Then select a label or create a new one. You can also add more than one label for each email.
You can find the labels that you made on the list of folders on the left side of your screen. When you click on one of these label names, you will see all a list of all the emails that have that label.
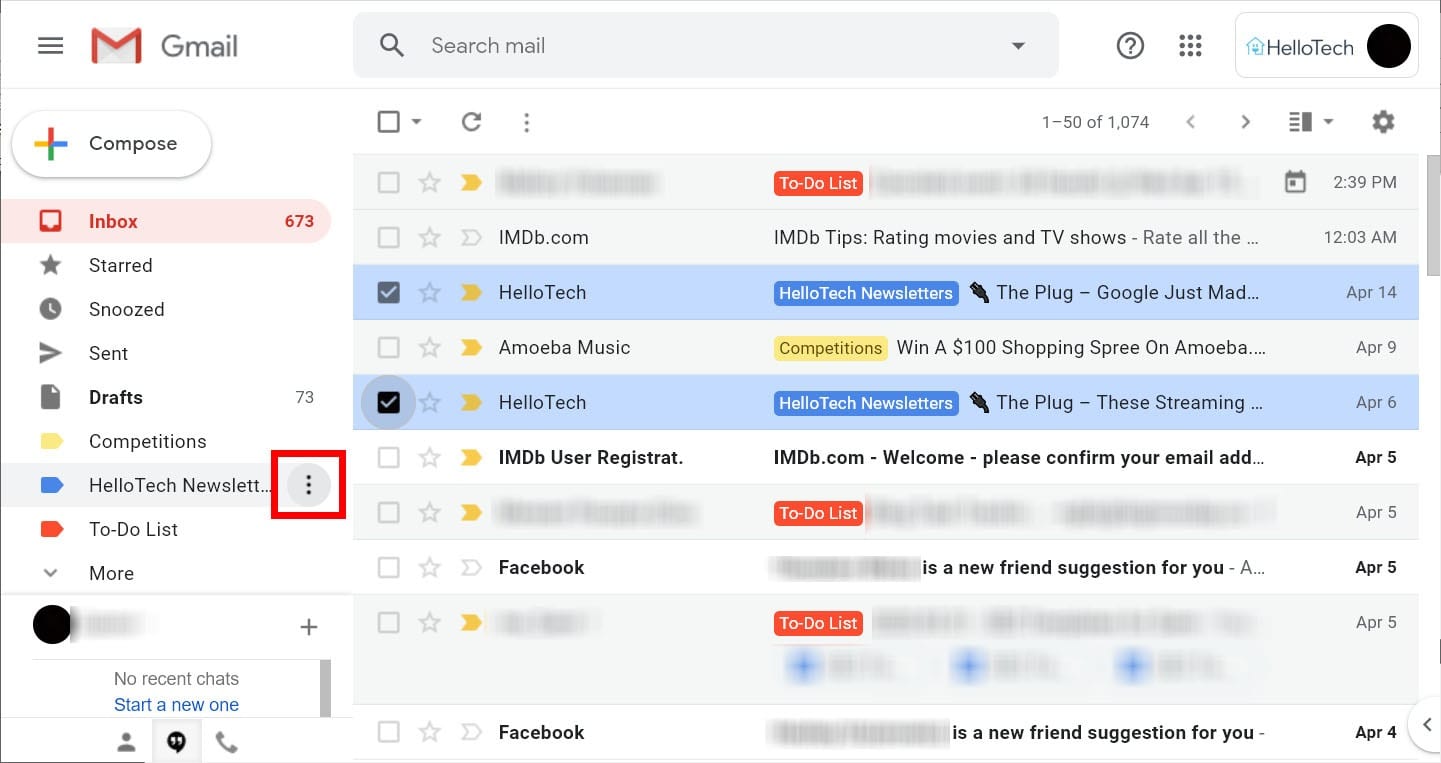
You can also add colors to your labels by hovering over one of the label folders in your left sidebar and clicking the three-dot button that appears. Then hover over Label color at the top of the pop-up window and select a color.
Filter Your Incoming Emails
Gmail has a feature that filters your emails when you receive them. This is a very convenient way to sort your messages, instead of manually deleting or marking them as read once they reach your inbox.
With filters, emails can be automatically labeled and transferred to their respective folders. With this feature enabled, Gmail will organize your inbox for you by filtering emails that should be starred, marked as read, marked as important, forwarded, or deleted as they enter your inbox.
To create rules to filter your emails, you only need to select the emails you want to filter, click the three dots below the search bar, and select Filter messages like these.
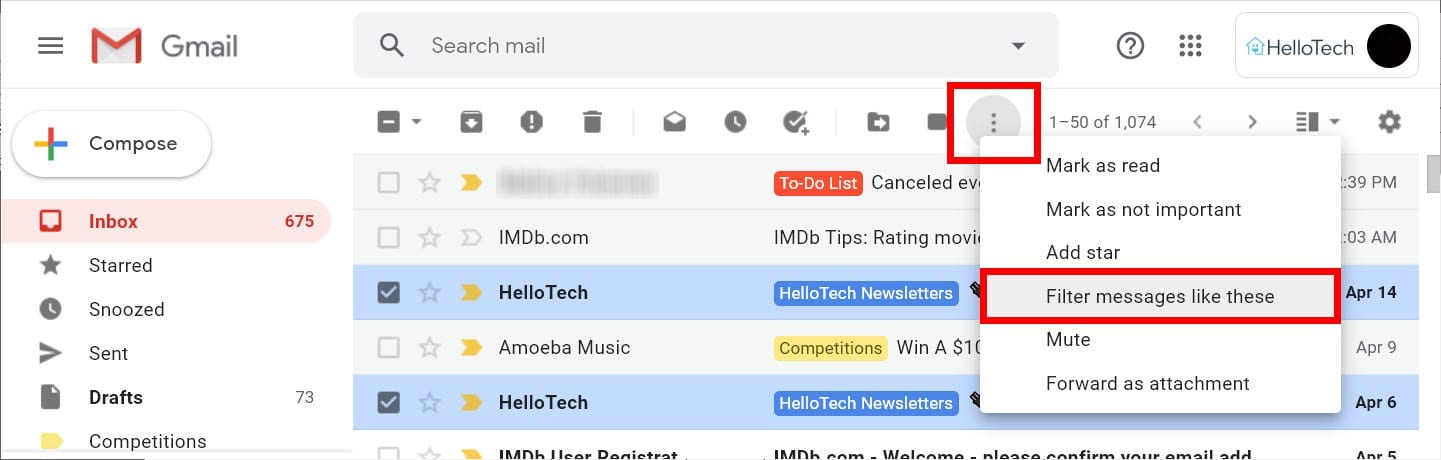
Then enter the other criteria that you want to filter for and click Create Filter. Next, choose what you want Gmail to do with these emails.
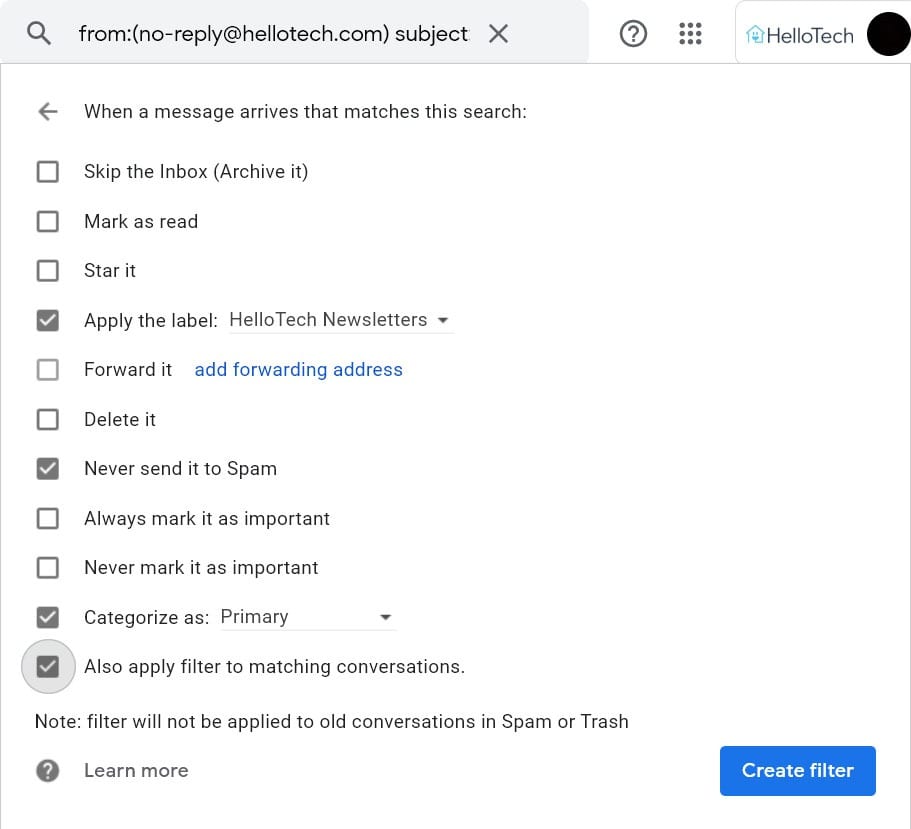
For example, you can automatically mark any incoming emails that have an attachment as important, or you can automatically send any emails from a certain sender straight to your spam folder. Then click Create filter to save your changes.
Automatically Archive Emails After Replying
Another way to clean your inbox is to activate Send & Archive. This feature automatically moves an email thread to the All Mail archive folder after you have responded to it.
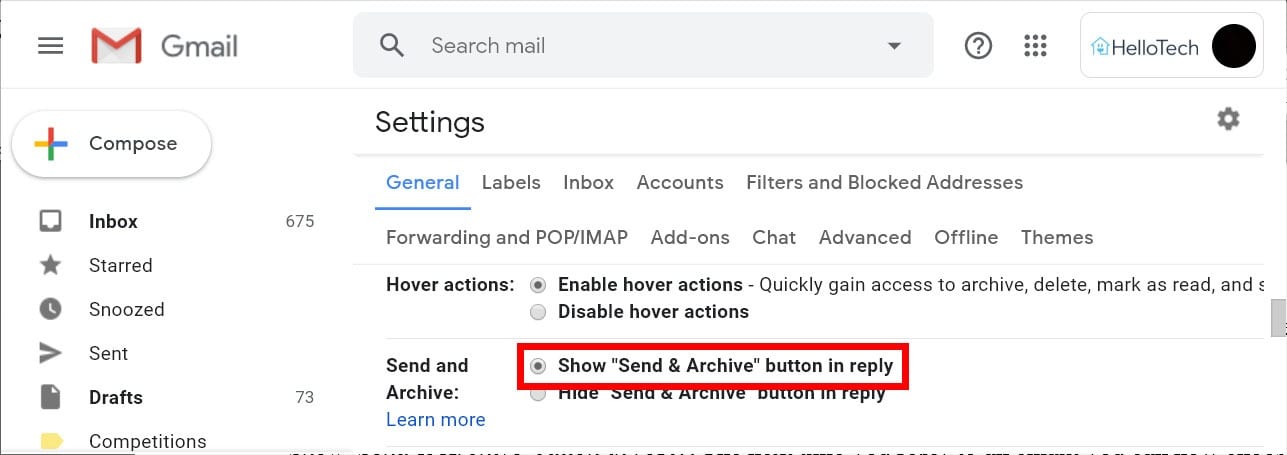
To enable Send & Archive, go to the gear icon and click Settings. Then scroll down and select Show ‘Send & Archive’ button in reply. Finally, scroll down to the bottom of the page and click Save changes.
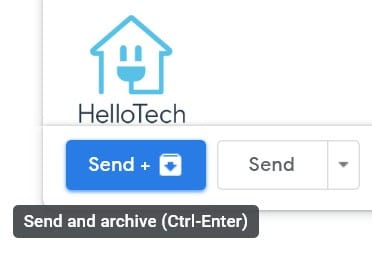
The next time you reply to an email, you will see a button to send and archive next to the regular Send button.
And, if someone replies to that email, the whole conversation will show up in your inbox again.
Use Google Hangouts Instead of Email
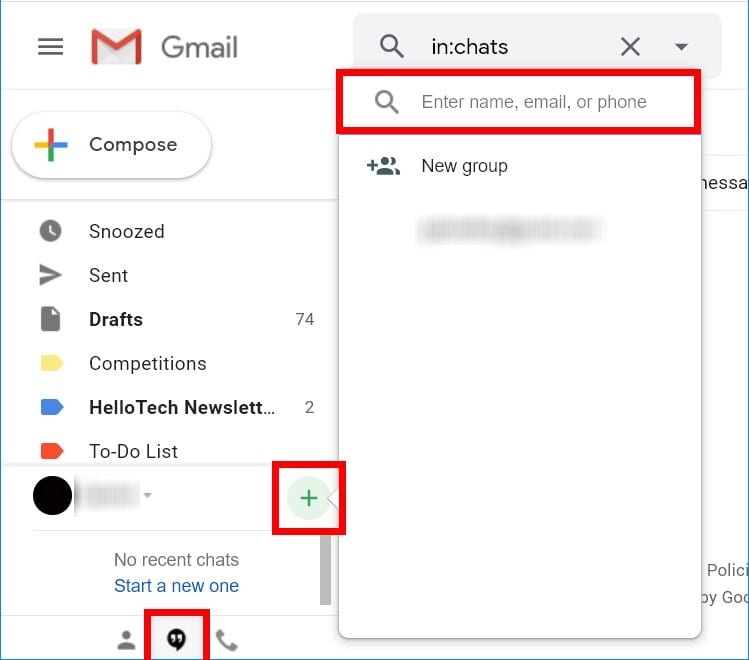
If your inbox is full of short emails, you might want to use the chat feature within Gmail instead. You can send a message with Gmail Hangouts by clicking the speech bubble icon in the bottom-left corner of your screen. Then click the plus sign next to your name and enter the email address of the person you want to start a chat within the search box.
Next, you will have to send that person an invite to chat with you. Once the other person accepts your invitation, you can start a chat with them by clicking on their name above the chat icon.
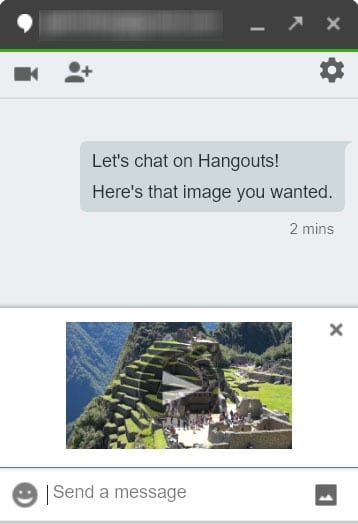
Sending chats can be faster and more efficient than emails. More importantly, you can save some space for more relevant emails in your inbox.
Keep Spam Out of Your Inbox
Even after you’ve assigned labels and filters to your emails, you still might have a lot of spam emails in your inbox. To find out how to keep your Gmail inbox organized, check out our guide on how to stop spam emails and get rid of them forever.

