Port forwarding can help you set up a Minecraft server, access your files and desktop remotely, improve your internet connection speeds, and more. While it might seem complicated, once you understand what port forwarding is and how it works, it can be quite simple. Here’s how to forward ports on your router using a Mac or Windows 10 PC.
What is Port Forwarding?
Port forwarding is a way of making your router use a specific port to communicate with certain devices. By setting a specific port for your devices, you are telling your router to always accept requests for those ports and forward data to a device’s private IP address.
In order to understand port forwarding, it helps to understand a little about how routers work first. Your router’s job is to transmit an internet signal to all your devices over a local area network (LAN). To do this, your router assigns each device in your LAN its own local IP address. For example, your computer will have a private IP address like 192.168.0.2 or 10.0.2.
Then, on top of that, the applications and services on each device are also assigned a port number. For example, an application on your computer will have an IP address with a port number attached like 192.168.0.2:80 or 10.0.0.2:80.
With this unique IP address and port number, your router knows which program or service to send information to. This lets you and others access devices and programs on your LAN over a wide area network (WAN).
How to Port Forward
To forward ports on your router, log into your router and go to the port forwarding section. Next, enter the port numbers and your device’s IP address. Choose a forwarding protocol and save your changes.
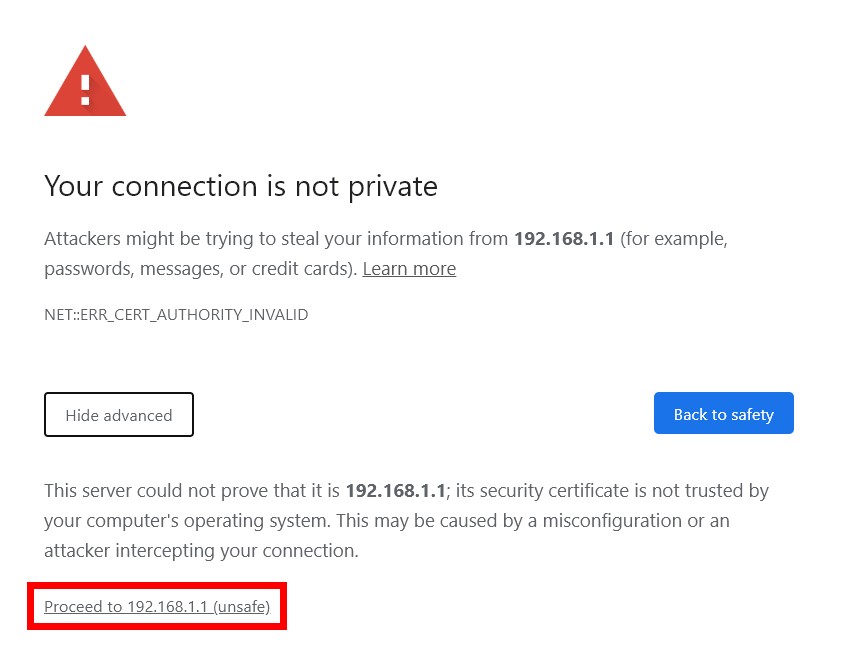
- Open a web browser. You can use Chrome, Firefox, Safari, or any browser you want.
- Then type your router’s IP address into the address bar. If you don’t know this information, check out this guide for how to find your router’s IP address on a Mac or Windows 10 computer. It should be a series of numbers like 192.168.X.X or 10.0.X.X.Also, make sure to take note of your computer’s IP Address because you might need this information later.
- Next, enter your router’s username and password. If you don’t know this information, check out our step-by-step guide on how to find your router’s username and password here.

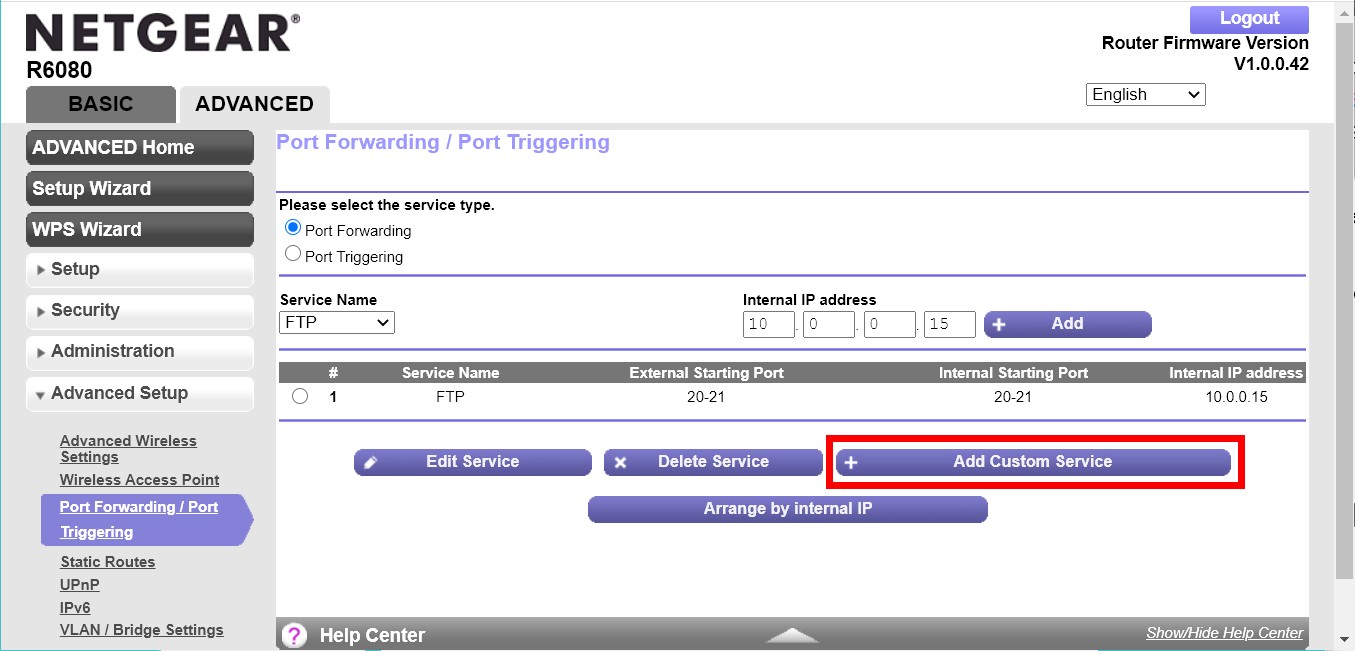
- Then go to the port forwarding settings on your router. The exact steps to get to the correct settings will vary depending on which router you have. In most cases, you will have to go to the Advanced tab and look for NAT, Security, Gaming, Advanced Setup, Firewall, or Virtual Servers.
- Next, create a new port forwarding rule. Some routers require you to click Add New, Add Custom Service, or something similar.
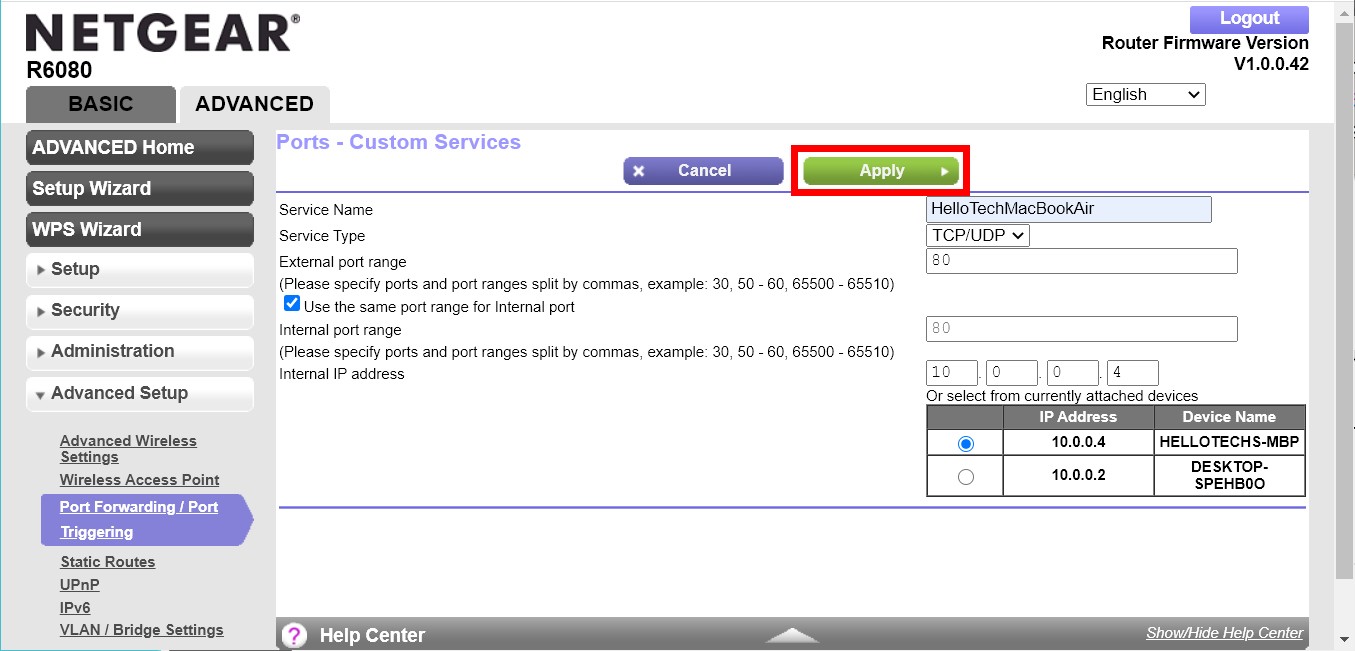
- Then enter a name for the service or application. You can give this any name you want. It is recommended that you use one that lets you identify the rule you’ve created.
- Next, type in the port number you want to use. Most routers let you select a port range separated by hyphens, or multiple ports separated by commas. In most cases, it’s easiest to set the same internal and external port numbers. You can choose a number between 0 to 65,535, but only ports 0 to 1023 are reserved for privileged services and are designated as well-known ports. You can find a full list of ports and their corresponding services here.
- Then select a port forwarding protocol. You will typically see the option to set your service type to TCP, UDP, TCP/UDP, Both, or All. Which one you choose will depend on the type of connection that is recommended to use for the specific application. However, you usually want to select the TCP/UDP option, Both, or All.
- Next, type in your computer’s IP address. Most routers provide fields where you can enter the IP address of your device. There are also routers that let you choose a device instead of typing in the device’s IP address. If you’re port forwarding to your computer, check out these guides for how to find your computer’s IP address on a Windows 10 PC and how to find your IP address on a Mac.
- Finally, save your settings. Most of the time, you will be able to click on buttons that say Save or Apply. There are other routers that require you to click on Enable before you can hit on Save.
If you’re looking for an easier way to access your computer remotely, check out our article on how to remotely control your Mac or Windows 10 computer here.