If you just bought a new iPhone, restoring it will allow you to transfer all your contacts, settings, apps, photos, and more from your old iPhone. You can also restore from a backup in order to fix problems that recently started happening with your iPhone. Depending on how old your last backup is, this should make your iPhone work like normal again. Here’s everything you need to know about how to restore your iPhone from iCloud, a Mac, or Windows PC.
What Data Is Backed Up to iCloud vs Mac or PC:
- iCloud: When you restore an iPhone from iCloud, you’ll only get the data that has been backed up. Apple gives users 5 GB of cloud storage space for free, which probably won’t be enough space to back up all your photos, videos, and other data. If you need more cloud storage space, you can sign up for a paid iCloud+ subscription, or you can take advantage of unlimited iCloud storage for 21 days after you buy a new iPhone.
- Mac or Windows PC: When you restore from a Mac or Windows PC, you’ll get all the data from your iPhone. This includes all your photos, videos, and everything else.
If you are still having problems with your iPhone, HelloTech is here to help. We have thousands of experts across the country who can come to your door and help you set up a new iPhone or troubleshoot any problems with your existing iPhone.
What To Do Before Restoring Your iPhone:
In order to restore an iPhone, you’ll have to factory reset it first. So, it’s important to make sure that you have your data backed up before you restore. You might also need to turn off Find My on your iPhone, and Apple advises you to update to the latest version of iOS before restoring.
Read More: How to back up your iPhone to iCloud, Mac, or Windows PC
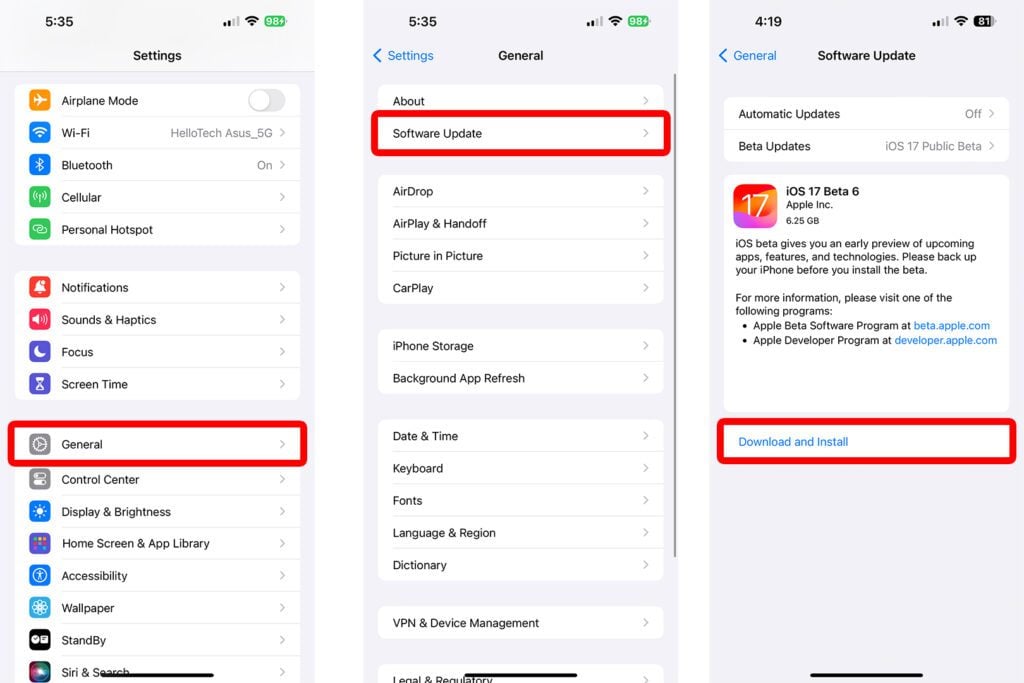
- How to update your iPhone: To update your iPhone go to Settings > General > Software Update > Download and Install. If you don’t see a button to Download and Install, it means your iPhone is already up to date.
Read More: How to update your iPhone and what to do when it won’t update
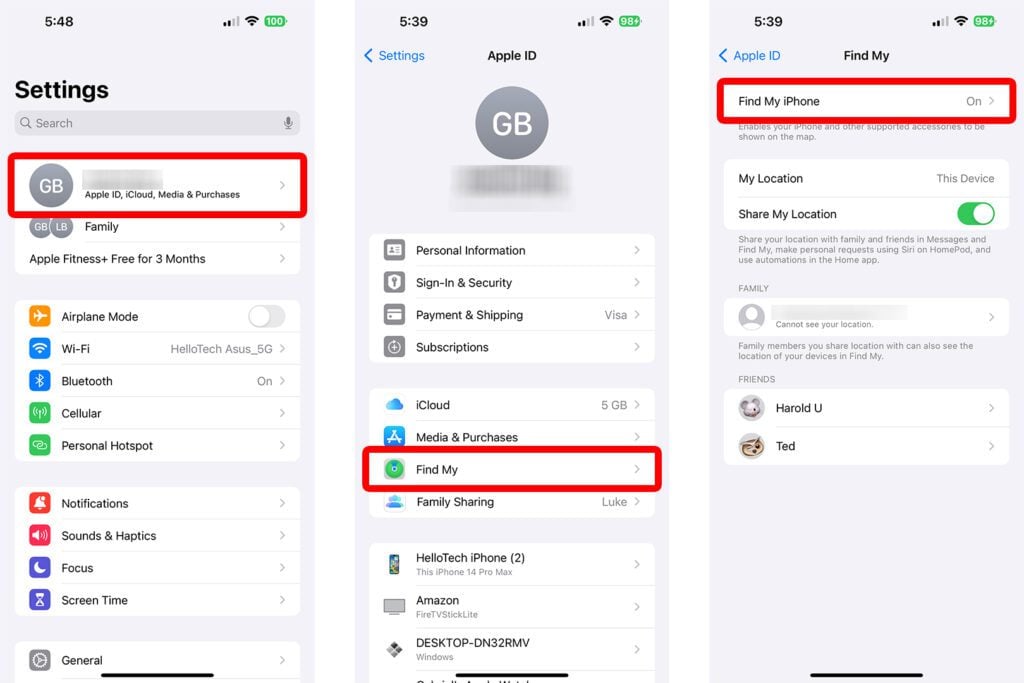
- How to turn off Find My: If you are restoring from a Mac or Windows PC, you’ll need to turn off Find My before you can reset and restore. To do this, go to Settings > [Your Name] > Find My > Find My iPhone. Then turn off the slider next to Find My iPhone and enter your Apple ID password.
How to Check For iCloud Backups
To find out if you have an iCloud backup on your iPhone, go to Settings > [Your Name] > iCloud > Backups. If your iPhone is listed under All Device Backups, it means you have a backup saved to iCloud. Selecting the backup tells you when it was made and what data was saved.
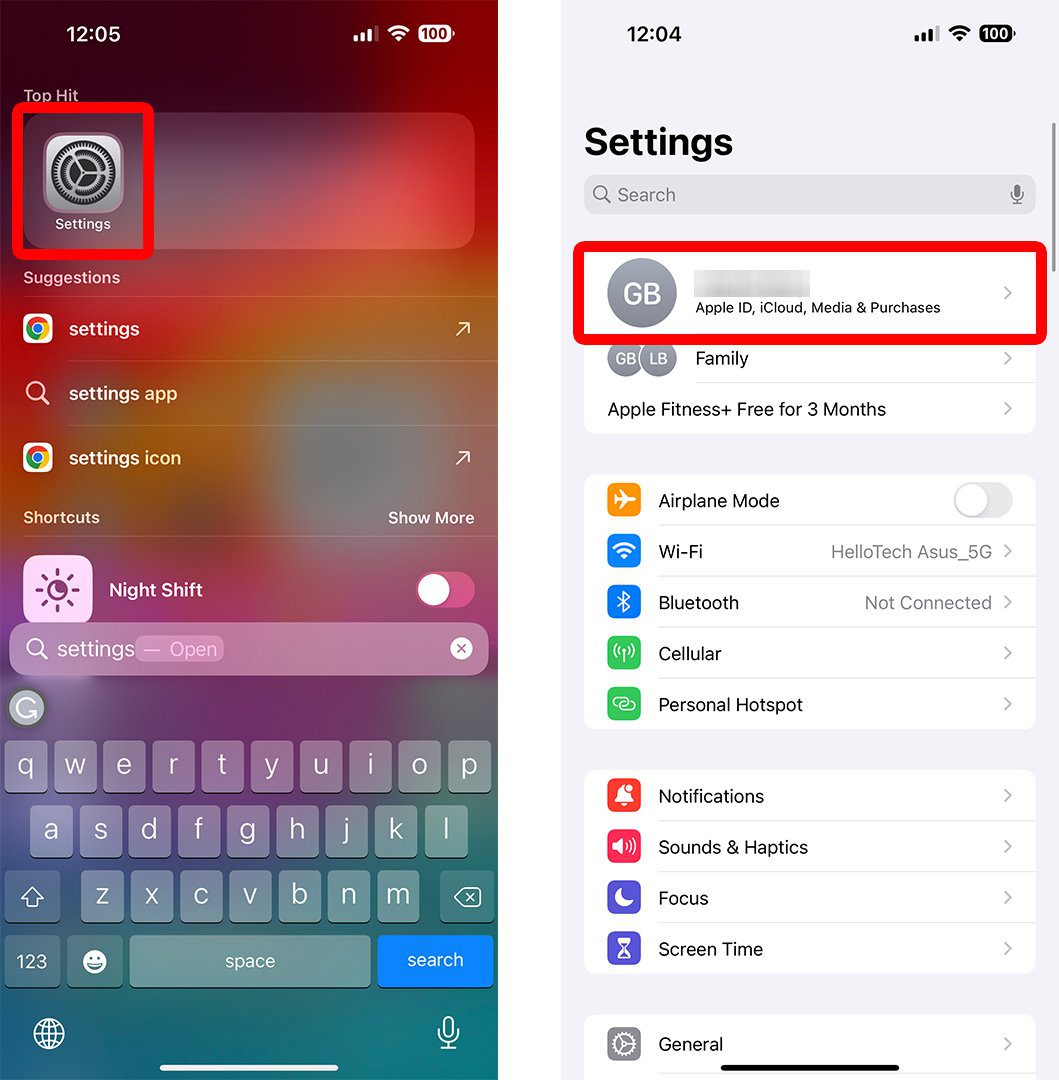
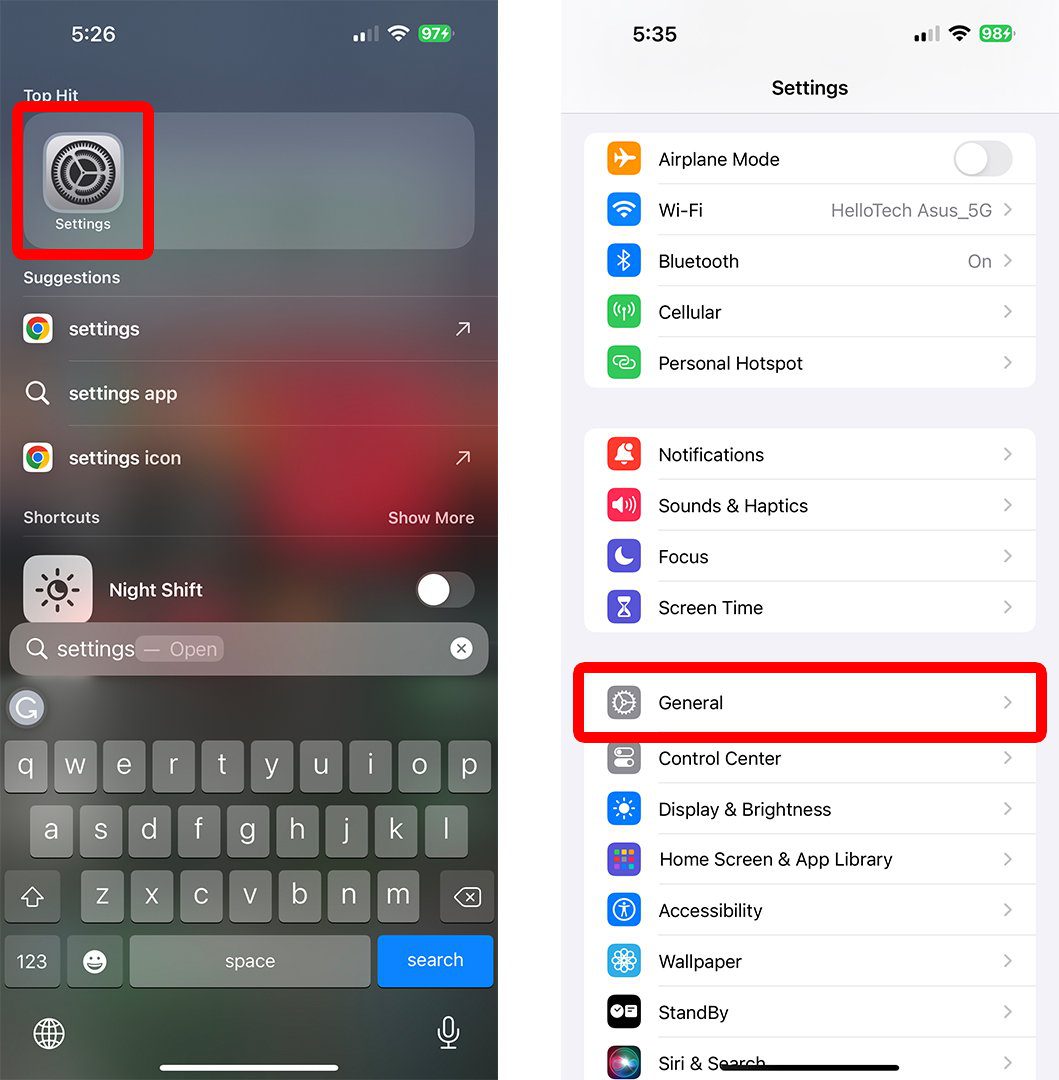
- Open the Settings app on your iPhone. If you can’t find an app on your iPhone, go to the home screen and swipe down from the middle of the screen. Then type Settings into the search bar.
- Then tap your name. You will see this at the top of the screen.
- Next, tap iCloud.
- Then select iCloud Backup.

- Finally, check under All Device Backups. If you see an iPhone listed under your devices, you can tap it to see when the last backup was made and what data was saved.
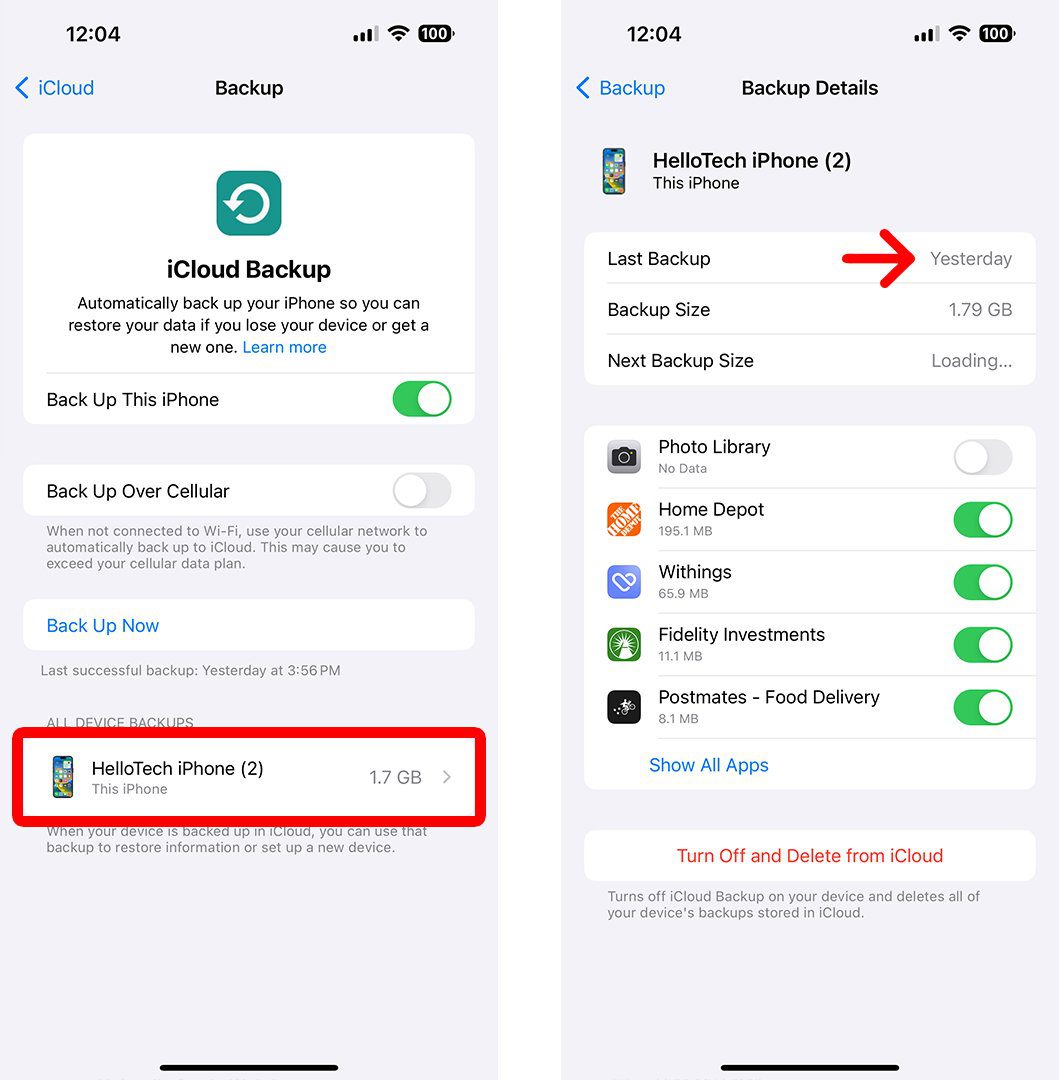
If you don’t see a recent backup, you can always back up your data from here by tapping the Back Up Now button.
How to Restore Your iPhone from iCloud Backup
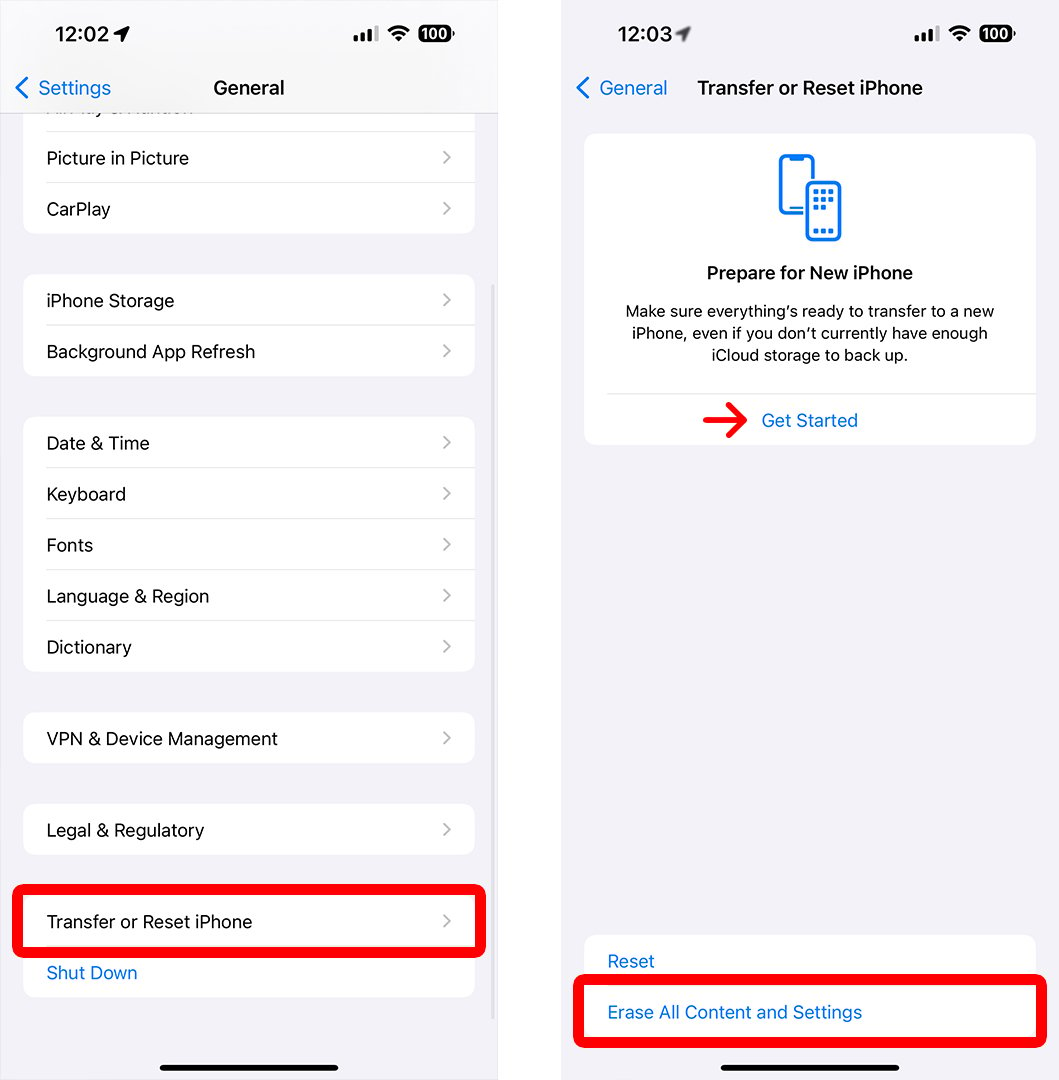
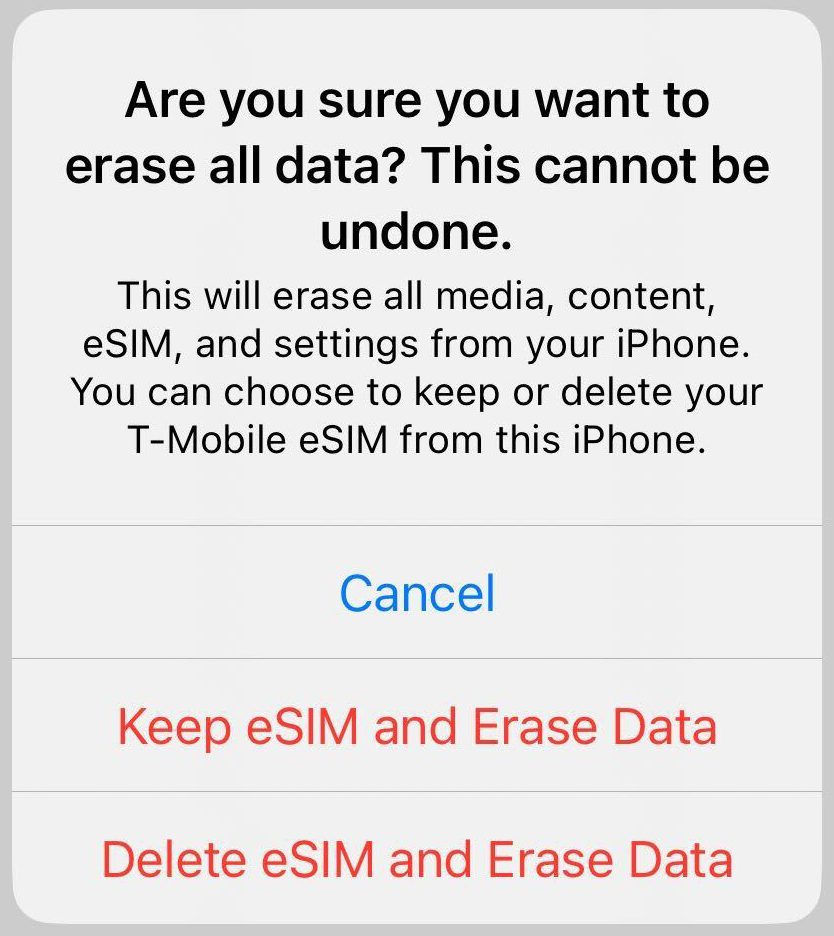
To restore your iPhone from an iCloud backup, go to Settings > General > Transfer or Reset iPhone and tap Erase All Content and Settings. When you see the iPhone setup screen, follow the on-screen instructions until you get to the Apps and Data screen. Finally, select Restore From iCloud Backup.
- Open the Settings app on your iPhone.
- Then tap General.
- Next, scroll down and tap Transfer or Reset iPhone.
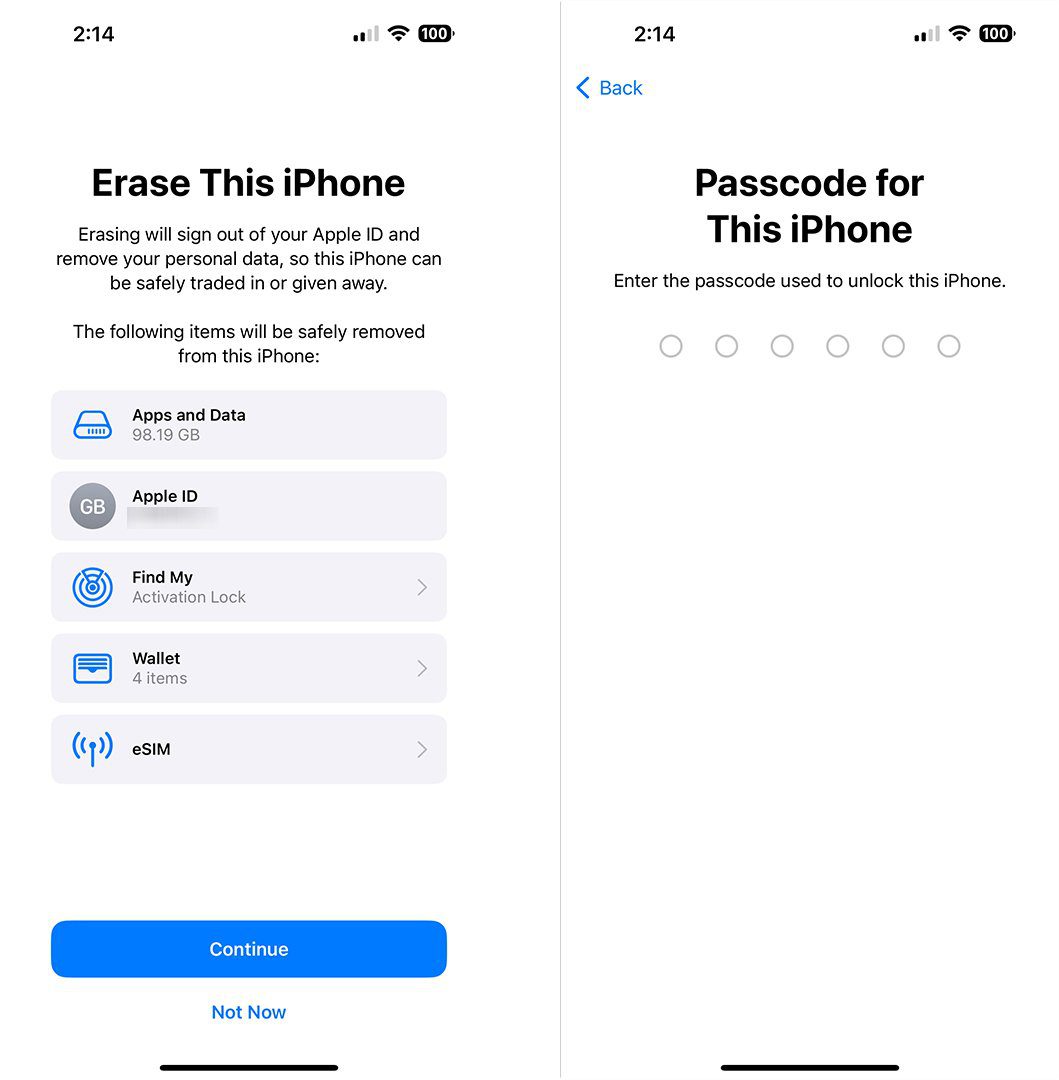
- Then tap Erase All Content and Settings. You will be asked to enter your iPhone passcode and Apple ID password.
- Next, tap Continue and enter your iPhone passcode. This is the same passcode you use to unlock your iPhone.
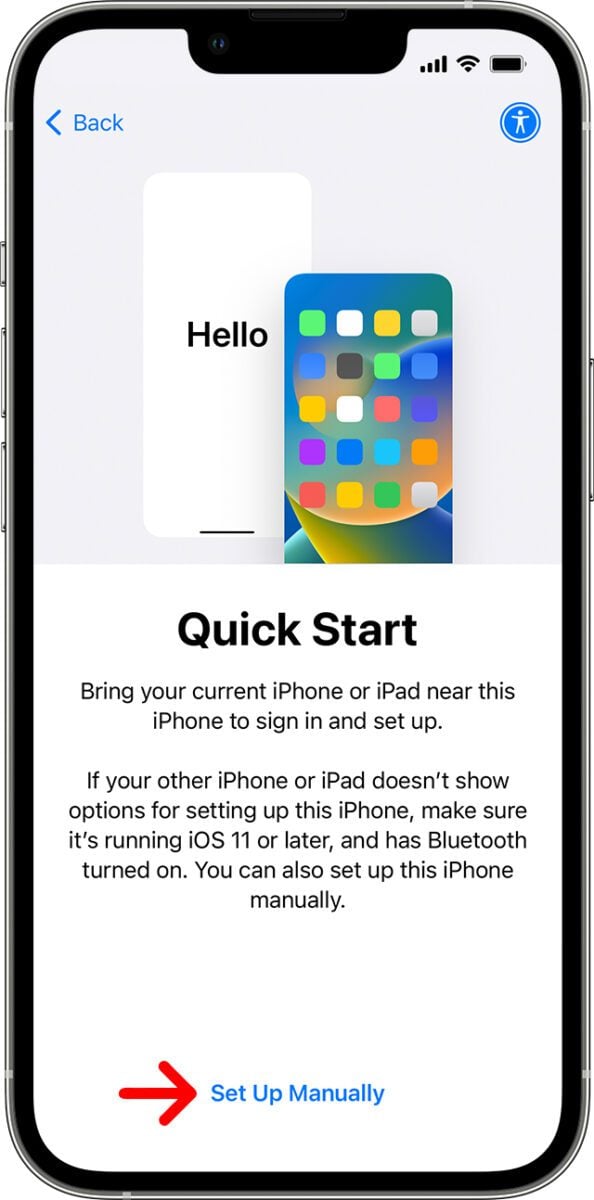
- When your iPhone restarts, follow the on-screen prompts. After you see the “Hello” screen, swipe up and select your language, country, and appearance.
- At the Quick Start screen, tap Set Up Without Another Device. This option lets you restore your data from an iCloud backup. If you are setting up a new iPhone, you can directly transfer your data from your old iPhone. However, this process takes longer, and you won’t be able to use either device during the transfer process.
- Continue to follow the on-screen instructions. You will be asked to choose a WiFi network, enter the WiFi password, set up Face ID, and create an iPhone passcode.
- When you reach the Apps and Data screen, select From iCloud Backup. On this screen, you will see several ways to restore your data. If you have a backup on your Mac or Windows PC, plug your iPhone into your computer and skip to the next section. You can also choose to restore from another iPhone or Android phone. Finally, you can choose not to transfer any apps and data, which will reset your iPhone to factory settings.
- Sign in to iCloud and tap Next. Your Apple ID should be your email address or phone number.

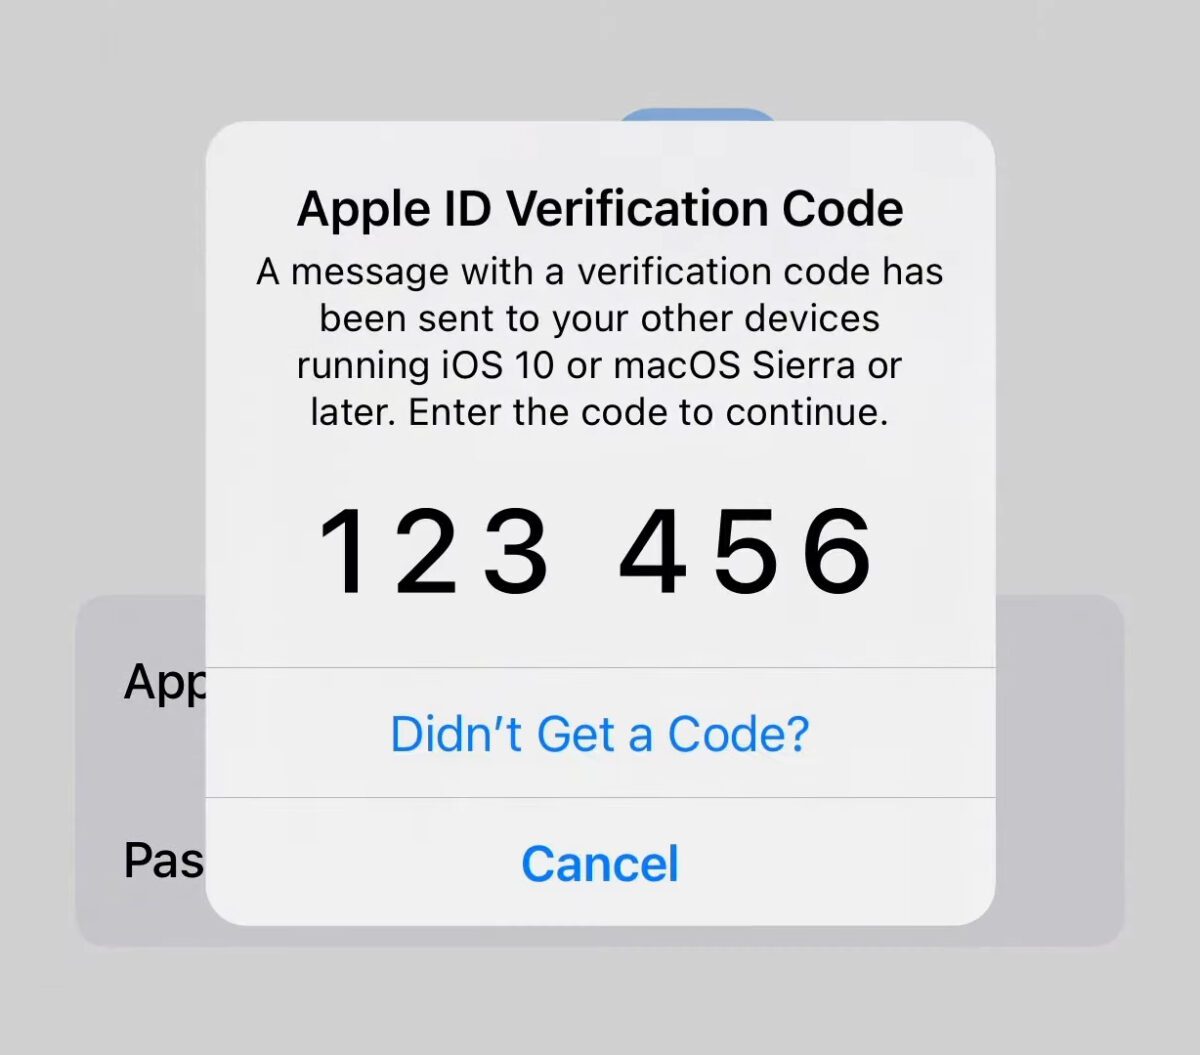
- Verify your identity. Apple will try to verify your identity by sending a code to another Apple device or your email address. Type in the passcode or select Allow on your other Apple device, and then tap Agree when you see the terms and conditions pop up.
- Choose which backup to restore and tap Continue. In the Choose Backup menu, you will see a list of your recent iPhone backups. You can see more backups by tapping Show All Backups.
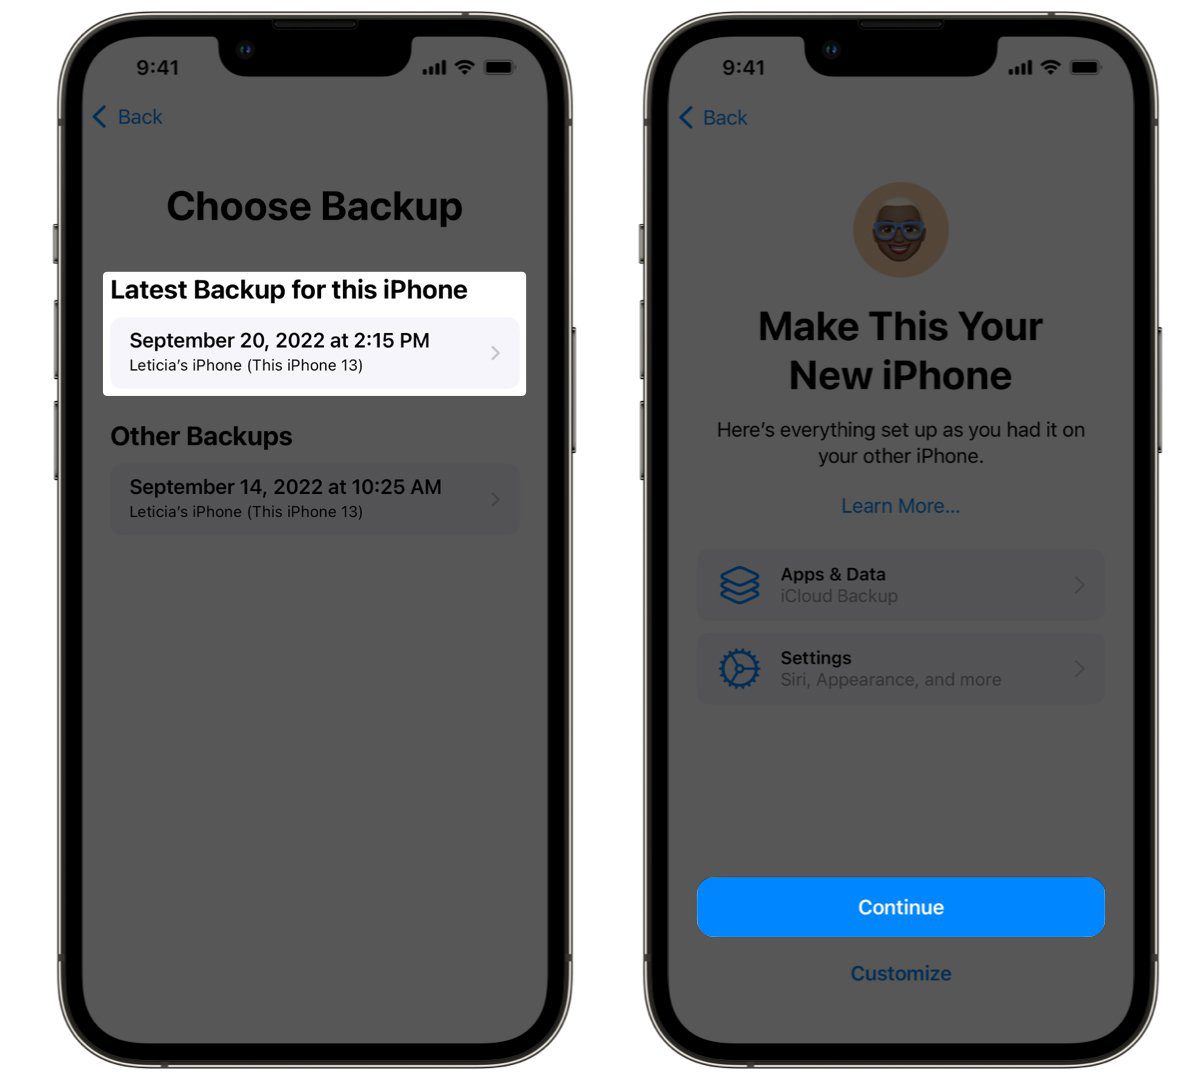
- When the restore is finished, your iPhone will restart, and then you can start using it.
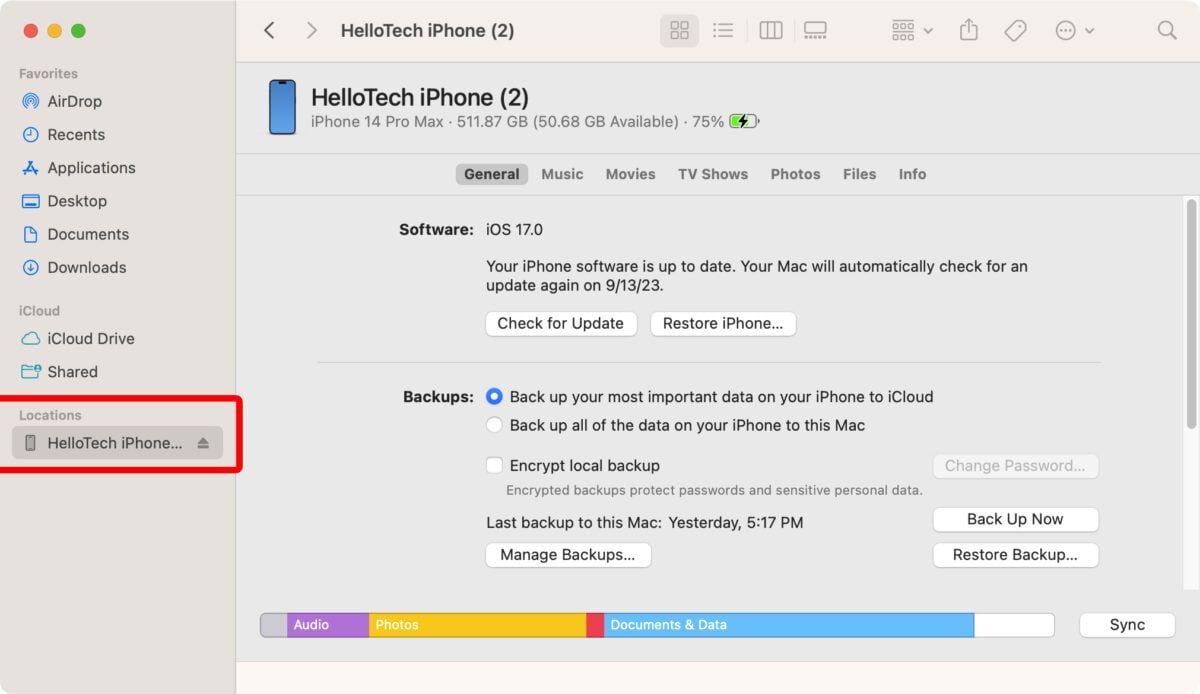
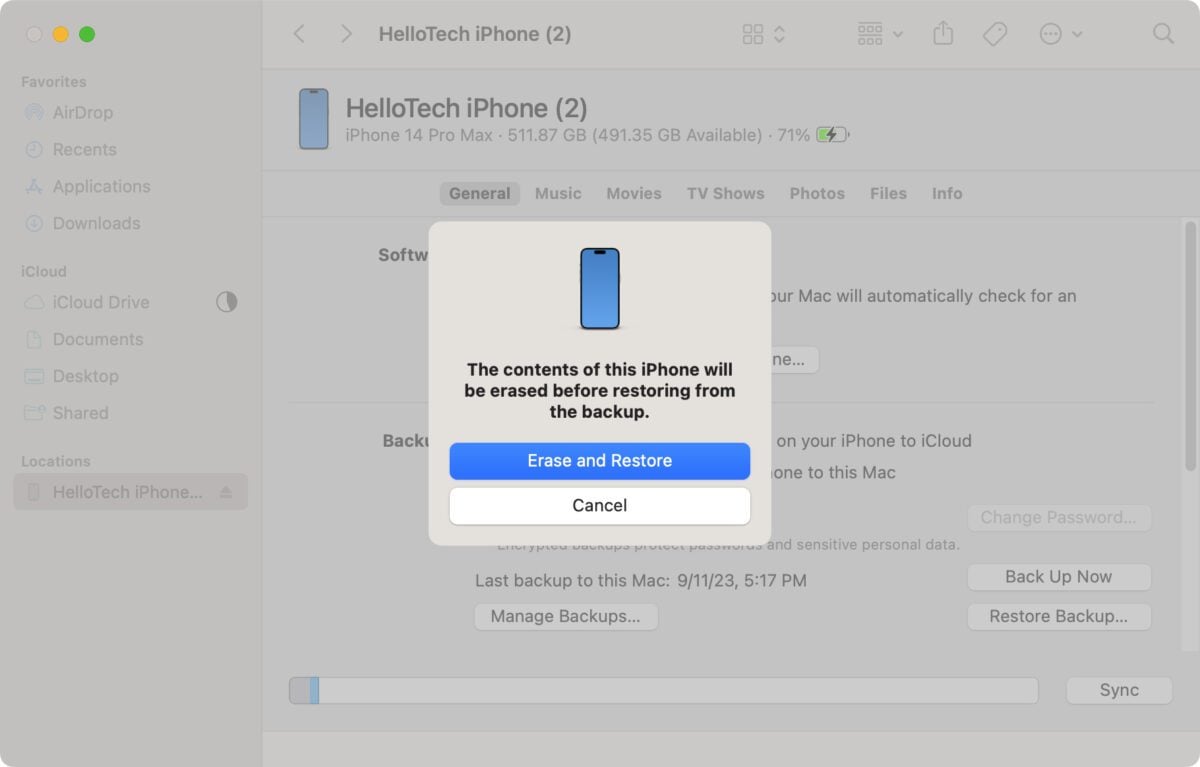
How to Restore iPhone from Finder
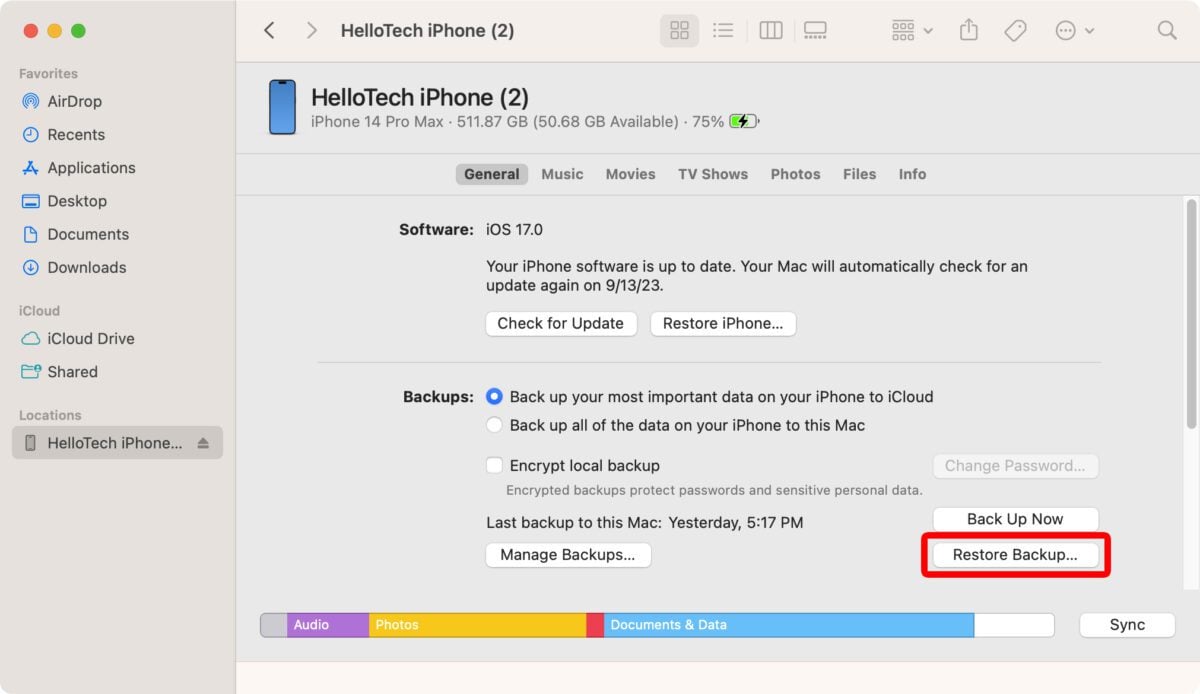
If you’ve upgraded your Mac to macOS Catalina, you can back up and restore your iPhone from Finder. To do this, open a Finder window and select your iPhone from the left sidebar. Then go to the General tab and click Restore Backup. Finally, select a backup, click Restore > Erase and Restore.
Read More: How to update your Mac
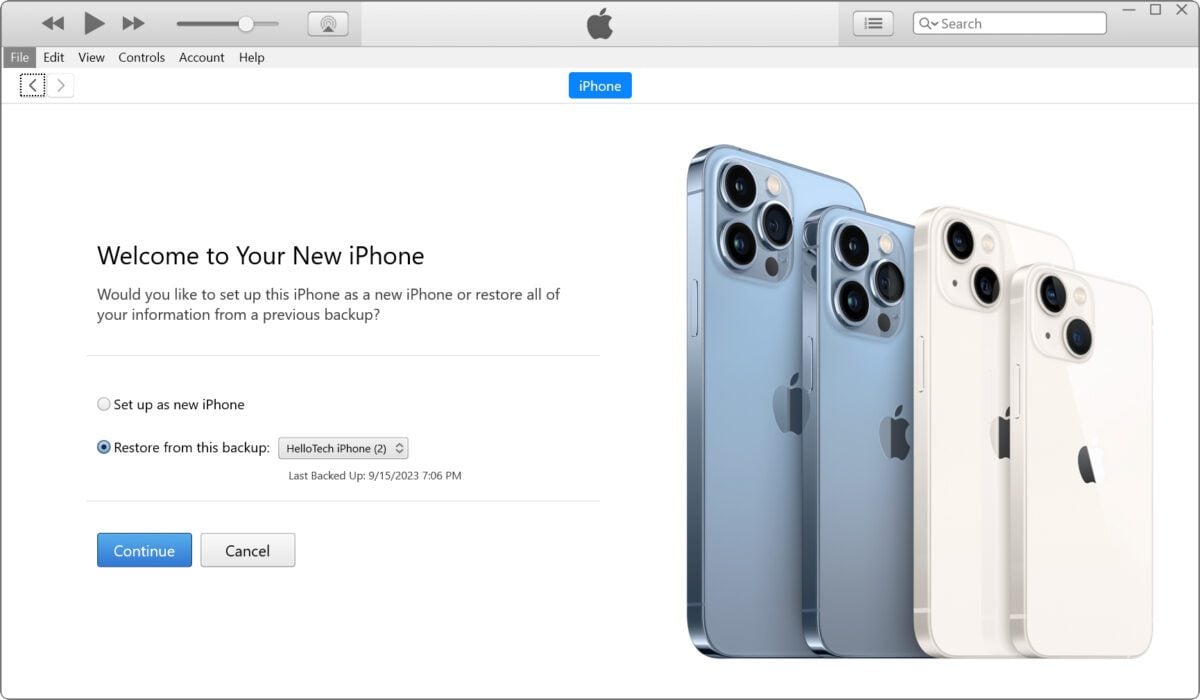
- Plug your iPhone into your computer. If you are setting up a new iPhone for the first time, swipe up from the “Hello” screen and follow the on-screen instructions until you get to the Apps & Data screen. Then choose Restore from Mac or PC.
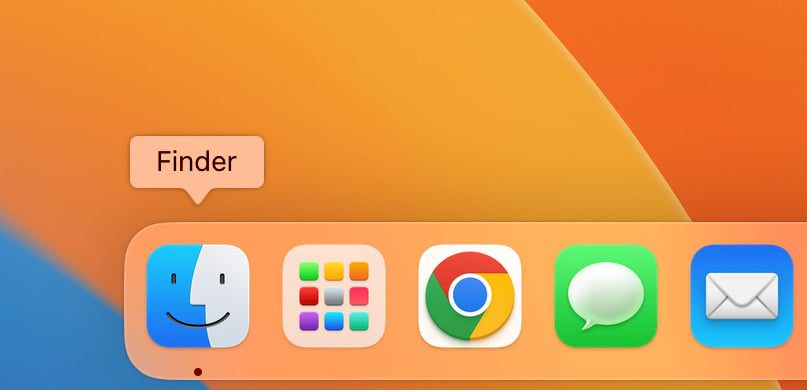
- Then open a Finder window. You can do this by clicking the half-blue, half-gray face icon in your dock.
- Next, select your iPhone in the left sidebar.
- Then click Restore Backup. In iTunes, the Restore Backup button is located in the General tab. If you don’t see this, try expanding your window by clicking the green circle in the top-left corner of the window.
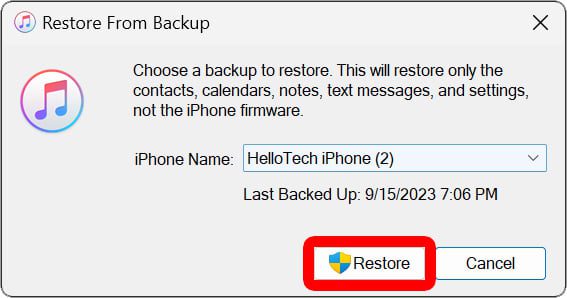
- Choose a backup and click Restore. You can use the drop-down menu in the pop-up window to choose which backup you want to restore.
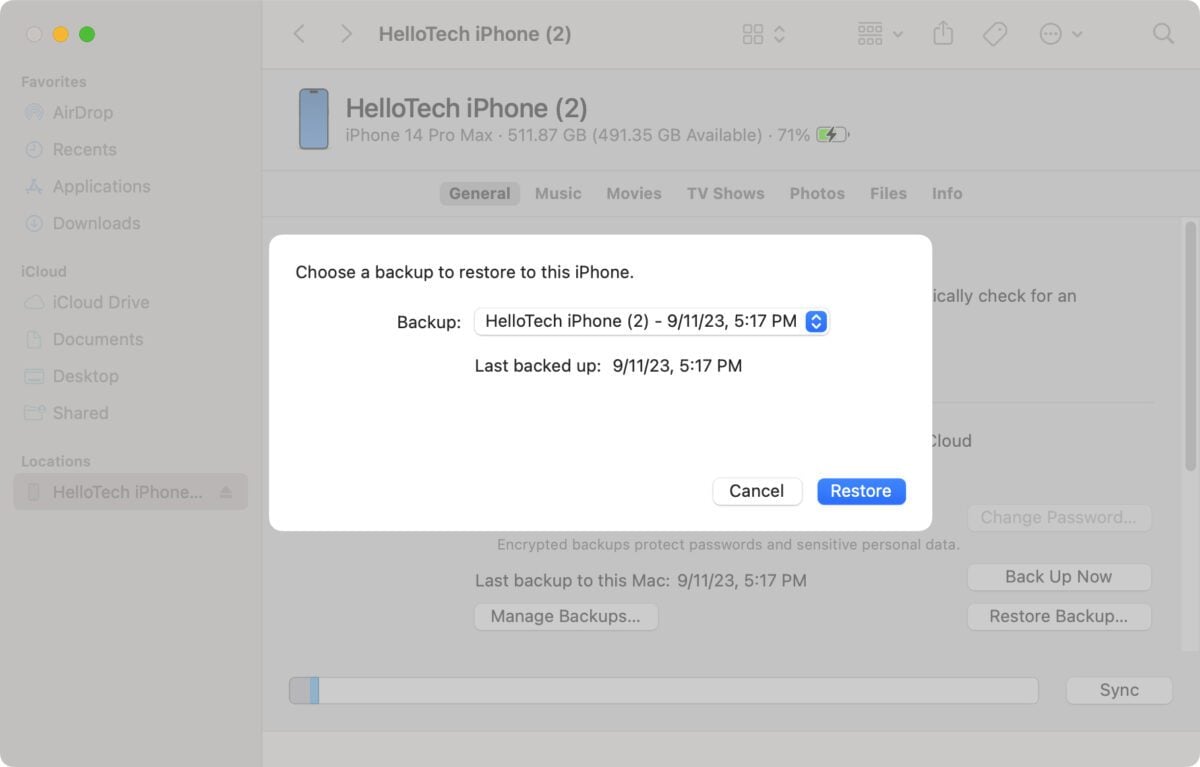
- Then click Erase and Restore.
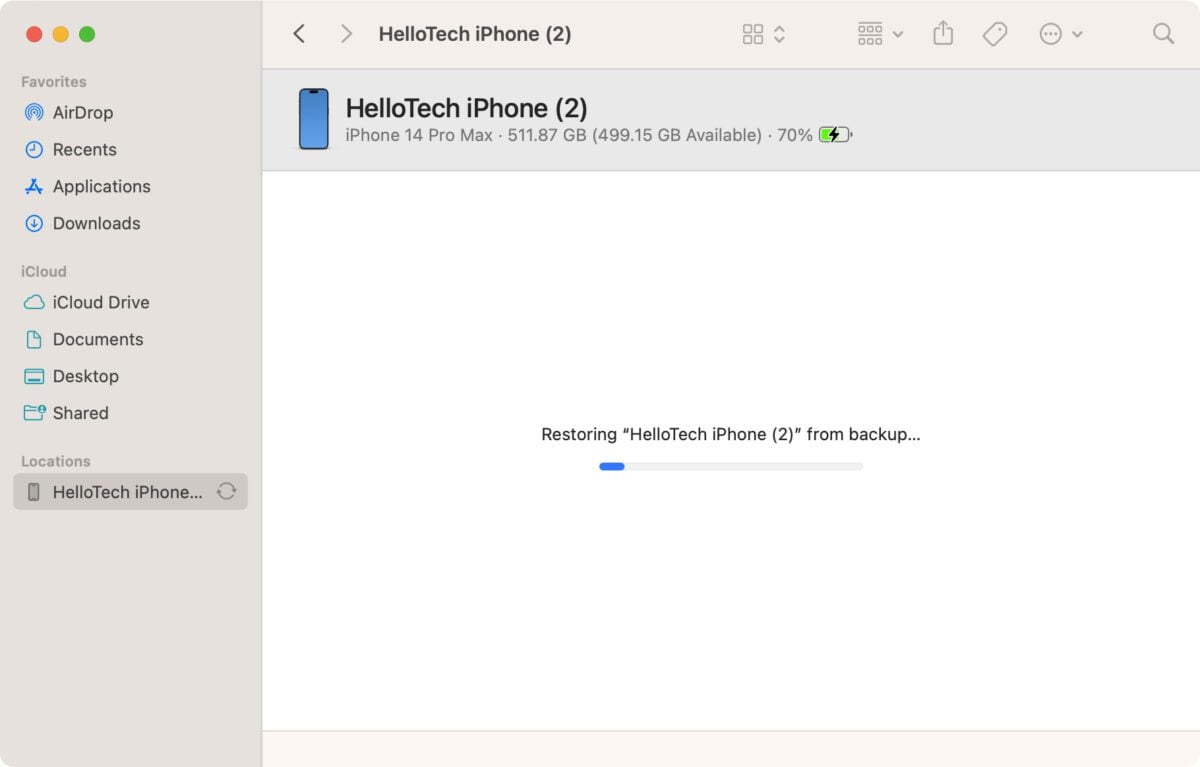
- Wait for your iPhone to restore. Your phone will restart and show a progress bar. Don’t unplug your iPhone until the restore process is complete.
- Finally, follow the on-screen instructions to finish setting up your iPhone. Since the restore process includes resetting your iPhone to factory settings, you will have to sign into iCloud, set up Face ID, and more.
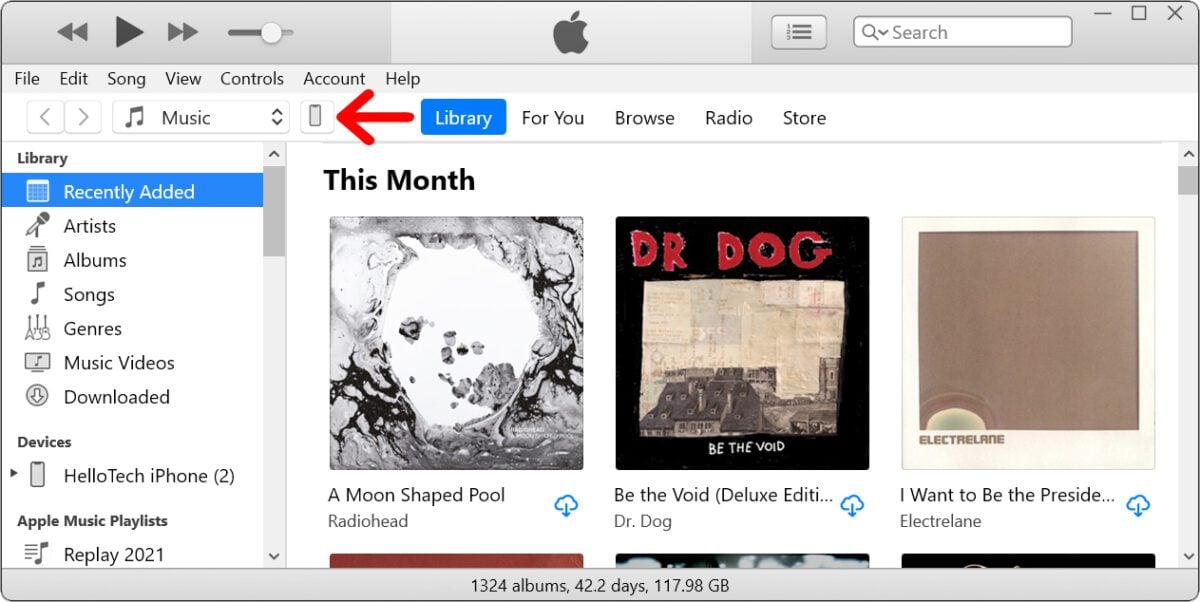
How to Restore iPhone from iTunes
If you have not updated to macOS Catalina, or you’re using a Windows PC, you can restore your iPhone using iTunes. To do this, plug your iPhone into your computer, click on the phone icon left of the Library tab, and click Restore Backup. Finally, wait for your iPhone to restart and restore.
- Plug your iPhone into your computer.
- Then open iTunes on your computer. If you don’t have the app installed on your Windows computer, you can download it from the Microsoft Store here.
- Then select your iPhone. You can find this in the top menu bar, next to the play button. If you don’t see this icon appear, make sure your iPhone is turned on and unlocked. You might see a pop-up appear on your iPhone, asking if you want to “Trust this computer.”
- Then select Restore Backup. You will see information about your last backup just below the Restore Backup button.
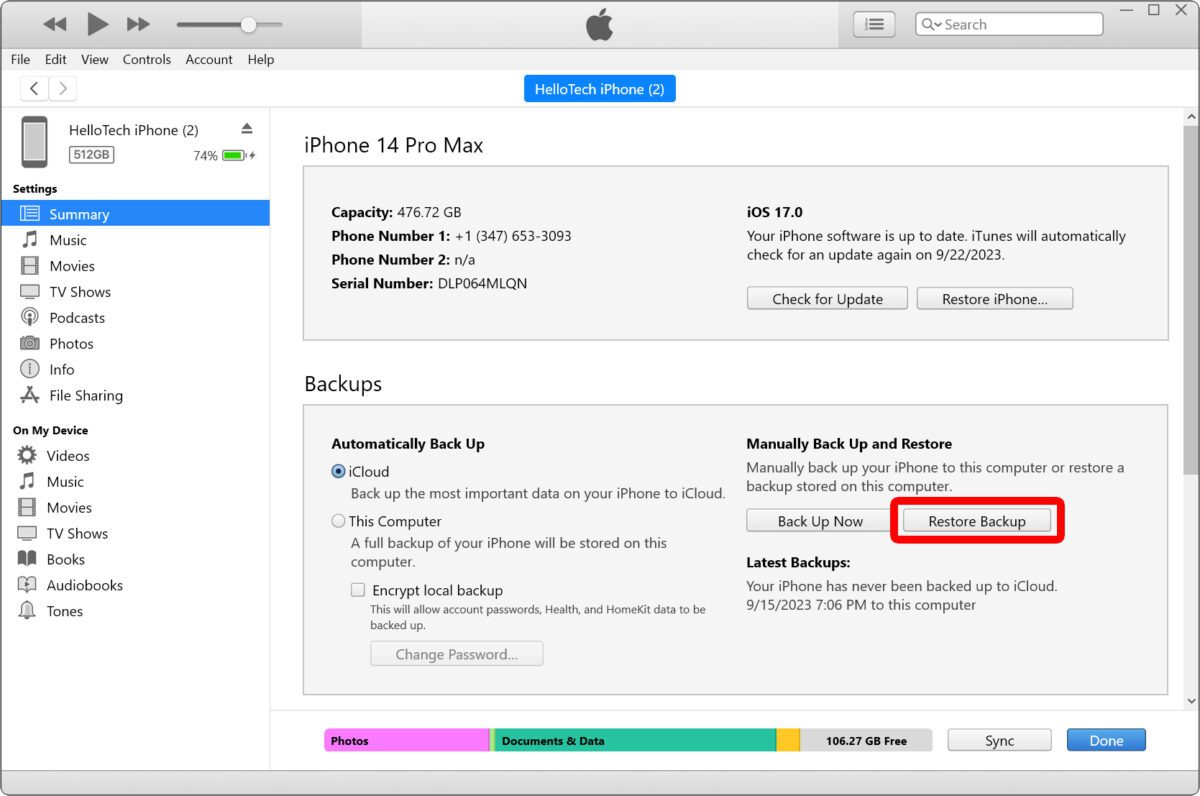
- Finally, choose a backup and click Restore. Use the drop-down menu to choose which backup you want to restore.
After your iPhone restarts, you will have to set up Face ID, sign in with your Apple ID, and choose other settings. When you’re done, swipe up, and you can start using your iPhone. Your home screen and settings will be restored, but you will have to redownload apps by tapping them.
What To Do If Your Apps Aren’t Downloading
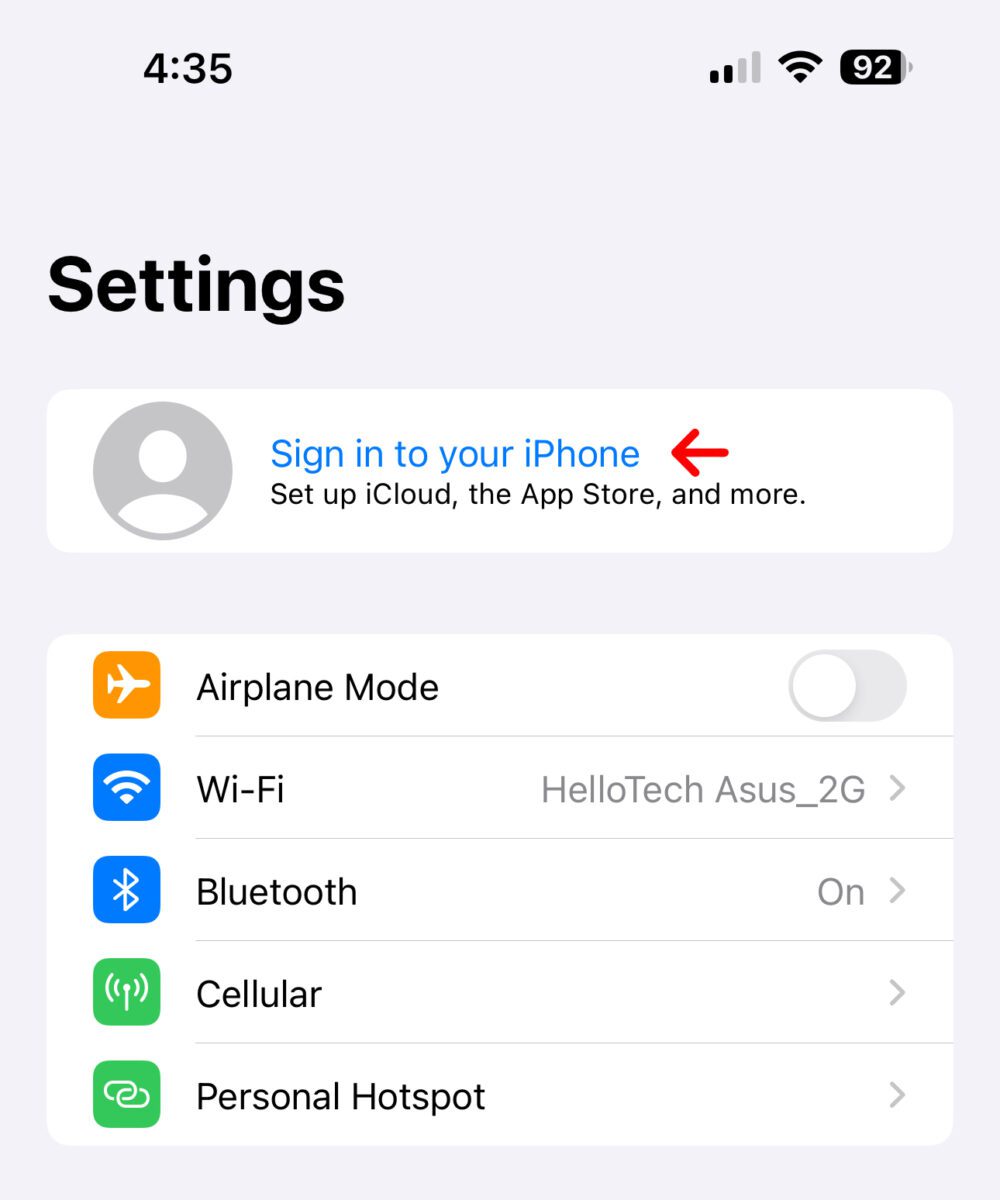
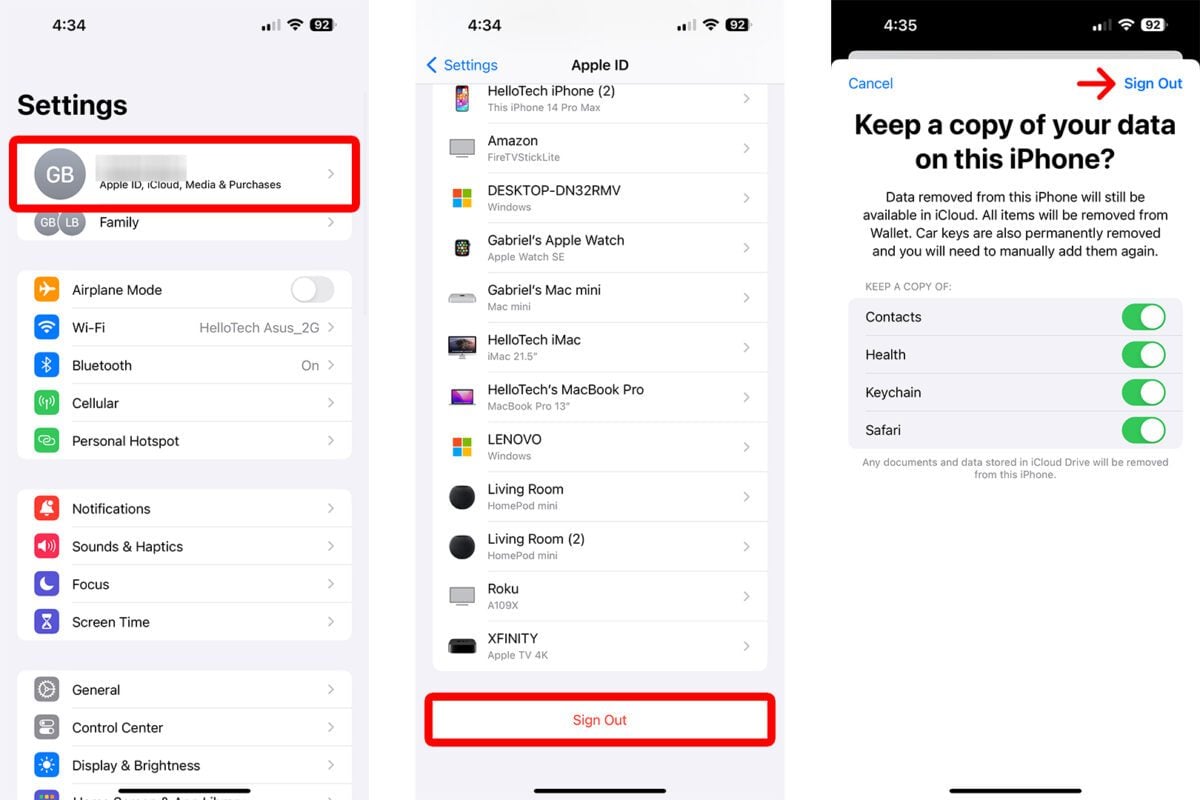
If you can’t download your apps after restoring your iPhone, try signing out of iCloud and signing back in. To do this, go to Settings > [Your Name] and scroll down to select Sign Out. Finally, choose data to keep on your iPhone and tap Sign Out.
Then you can sign back into iCloud by going to Settings and tapping Sign in to your iPhone where your account name used to be. Once you sign back in, you should be able to download any apps.