Every time Apple releases a new iOS update, they introduce new features, bug fixes, security patches, and other optimizations. So, updating your iPhone regularly will actually make it faster and more secure. Here’s how to update your iPhone manually and automatically, and what to do when your iPhone won’t update properly.
How to Update Your iPhone Manually
To update your iPhone manually, open the Settings app and go to General > Software Update > Download and Install. Then enter the passcode that you use to sign in to your iPhone. Finally, tap Agree and wait for your iPhone to update and restart.
Read More: How to back up your iPhone
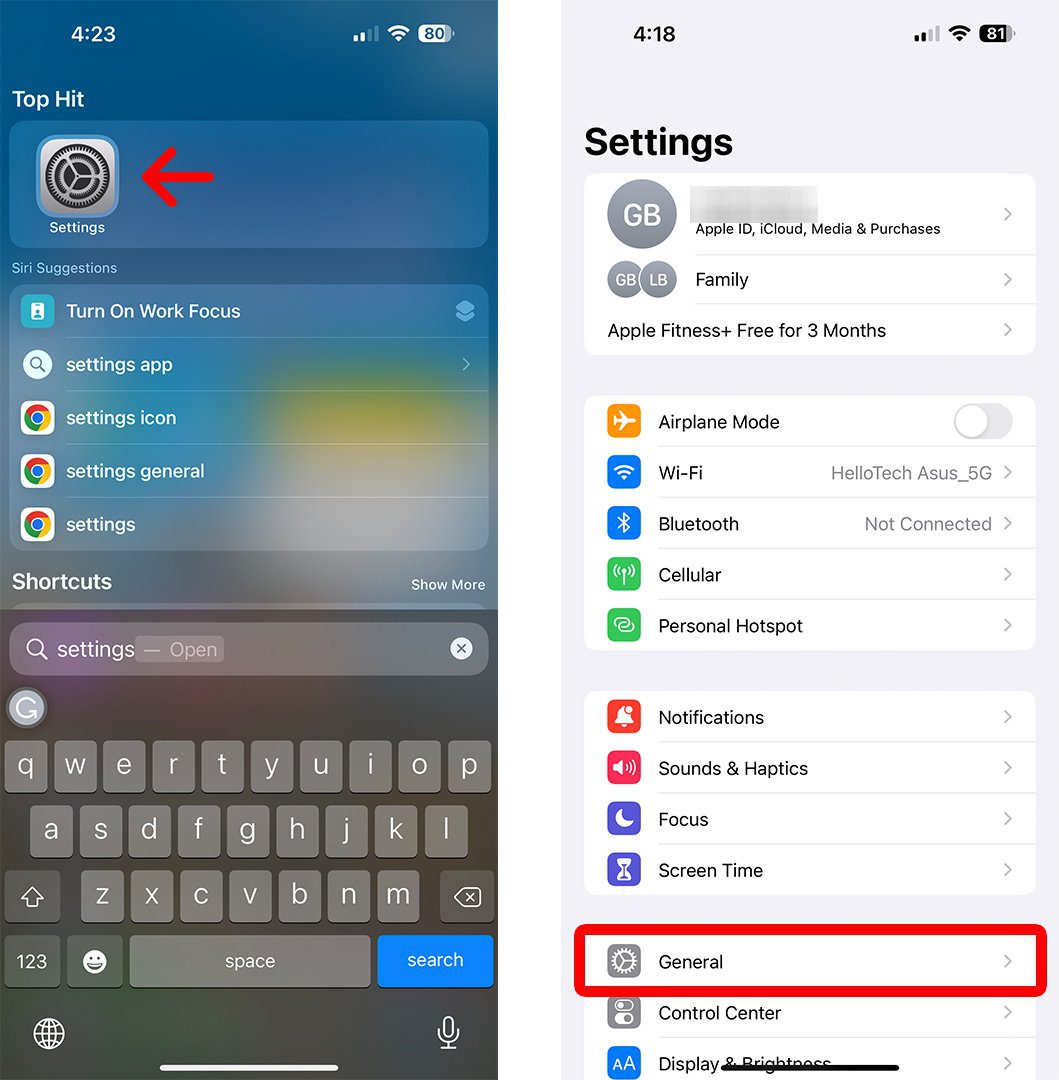
- Open the Settings app on your iPhone. If you can’t find any app on your iPhone, you can always go to the home screen and swipe down from the middle of the screen. Then use the on-screen keyboard to search for Settings.
- Then tap General.
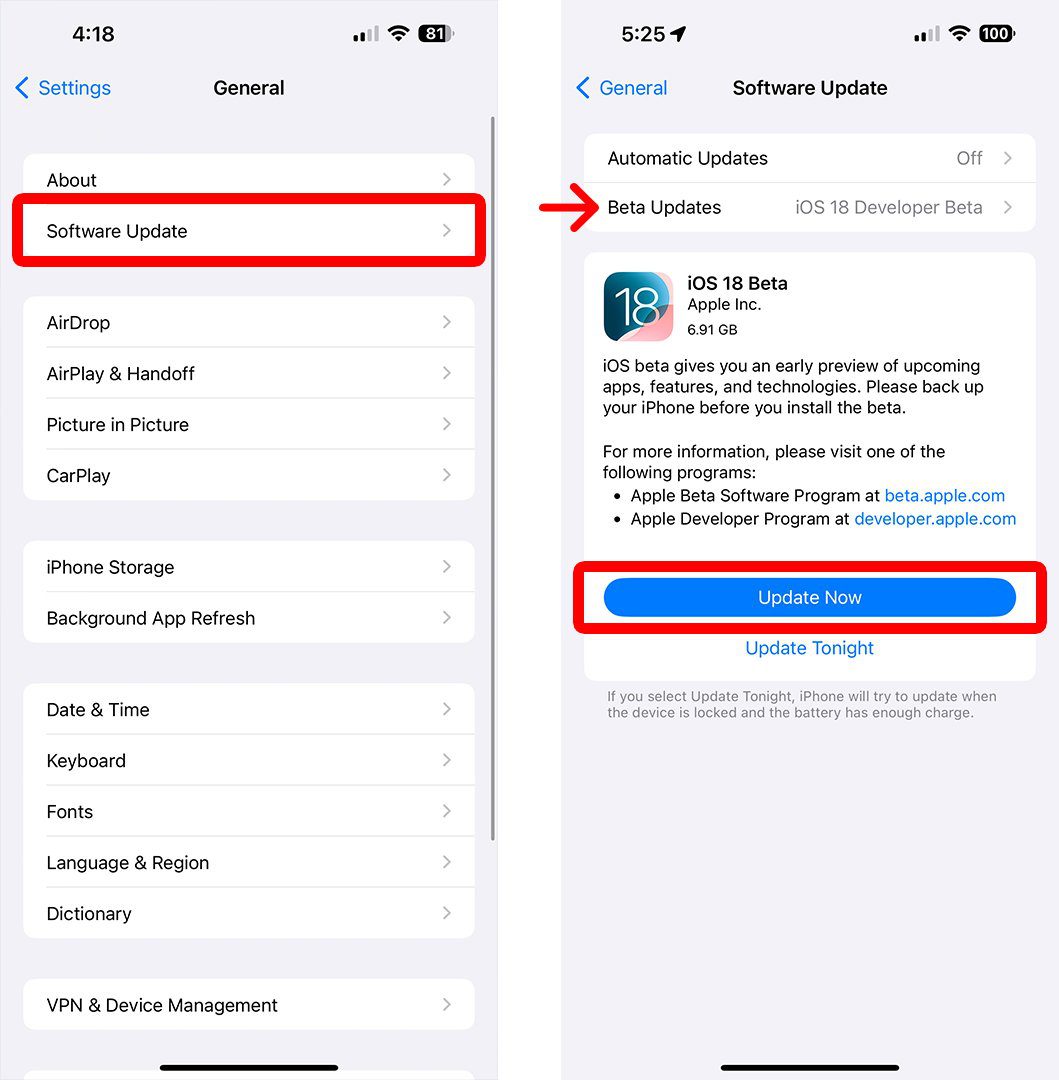
- Next, select Software Update. It could take a few minutes for your iPhone to check for available updates.
- Then, tap Download and Install or Update Now. If you don’t see this option, your iPhone might be up to date. If you have automatic updates enabled, your iPhone might start downloading and installing the update at this stage.
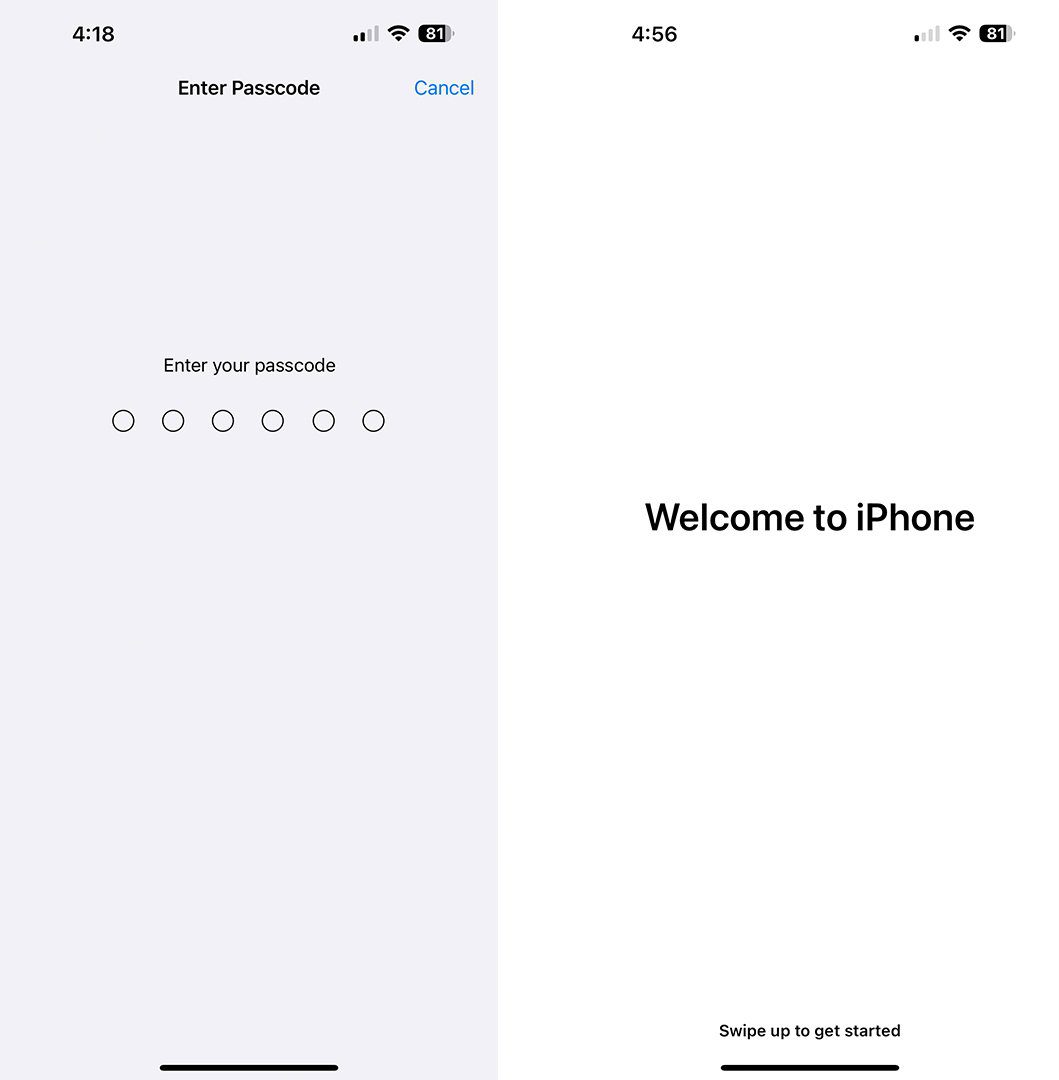
- Next, enter your iPhone passcode. This is the same passcode that you use to open your iPhone when it has been locked.
- Finally, wait for your iPhone to update and restart. Once your iPhone restarts, you will have to enter your iPhone’s passcode again.
Read More: How to update all the apps on your iPhone
If you don’t want to have to manually update your iPhone every time, you can also set up automatic updates. Here’s how:
How To Enable Automatic Updates on Your iPhone
To enable automatic updates on your iPhone, open the Settings app and go to General > Software Update > Automatic Updates. Then tap the toggle switch next to Download iOS Updates and the toggle switch next to Install iOS Updates.
- Open the Settings app.
- Then tap General.
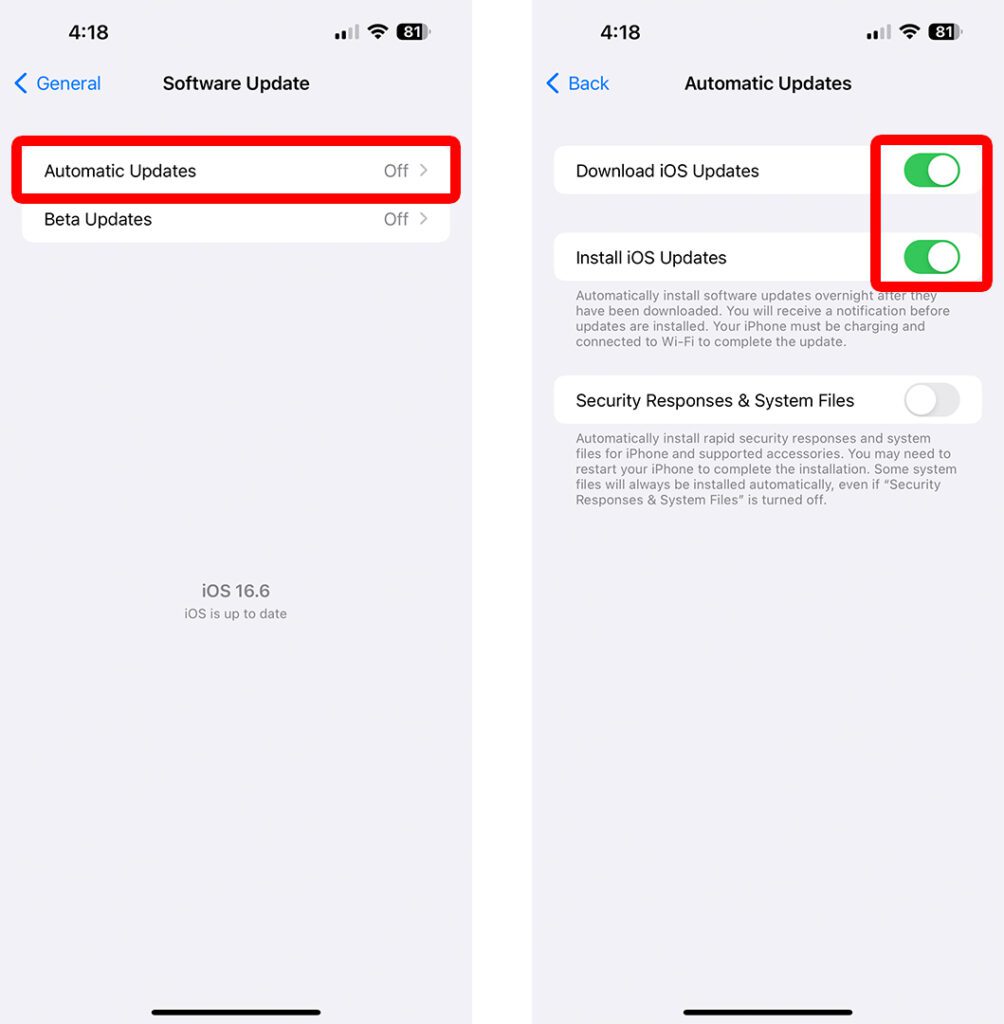
- Next, select Software Update.
- Then tap Automatic Updates.
- Finally, tap the toggle switch next to Download iOS Updates button and then the Install iOS Updates button. This will enable your iPhone to automatically download and install updates overnight when your iPhone is charging.
If your iPhone won’t update through Settings for some reason, you might be able to download and install updates from your Mac computer. Here’s how:
How To Update Your iPhone With a Mac Computer
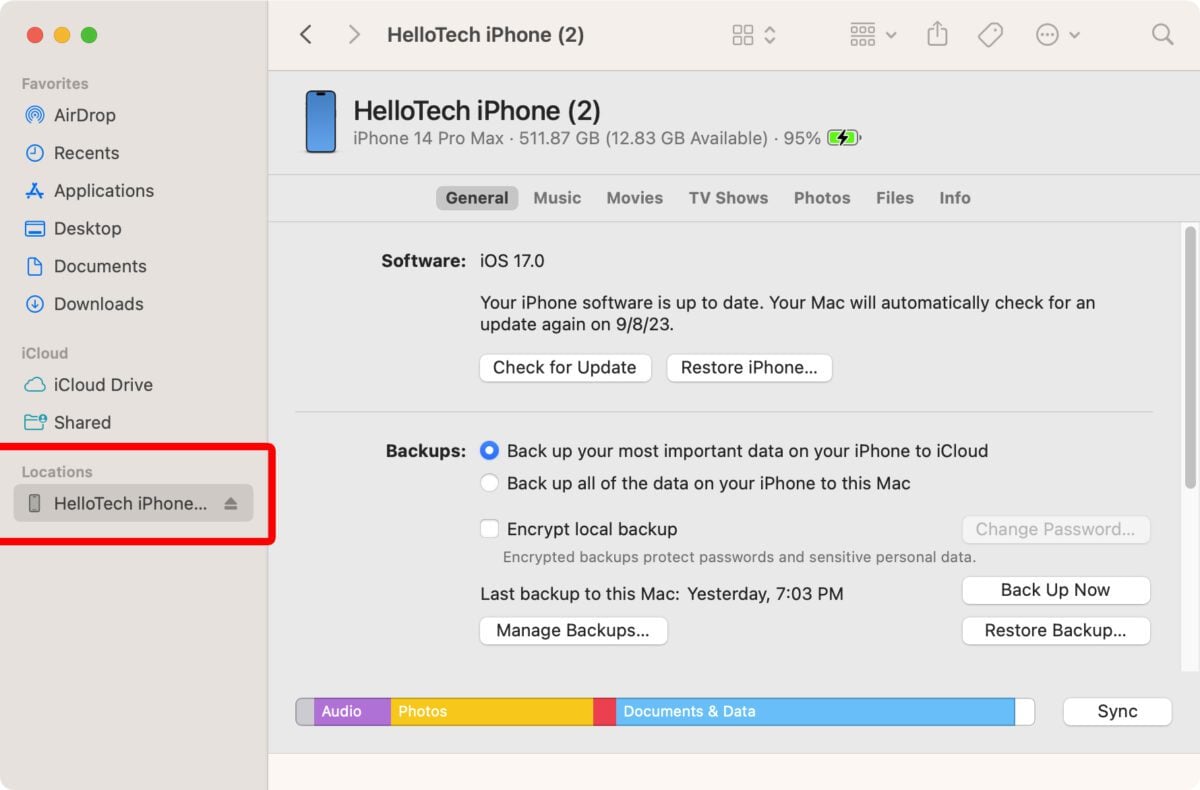
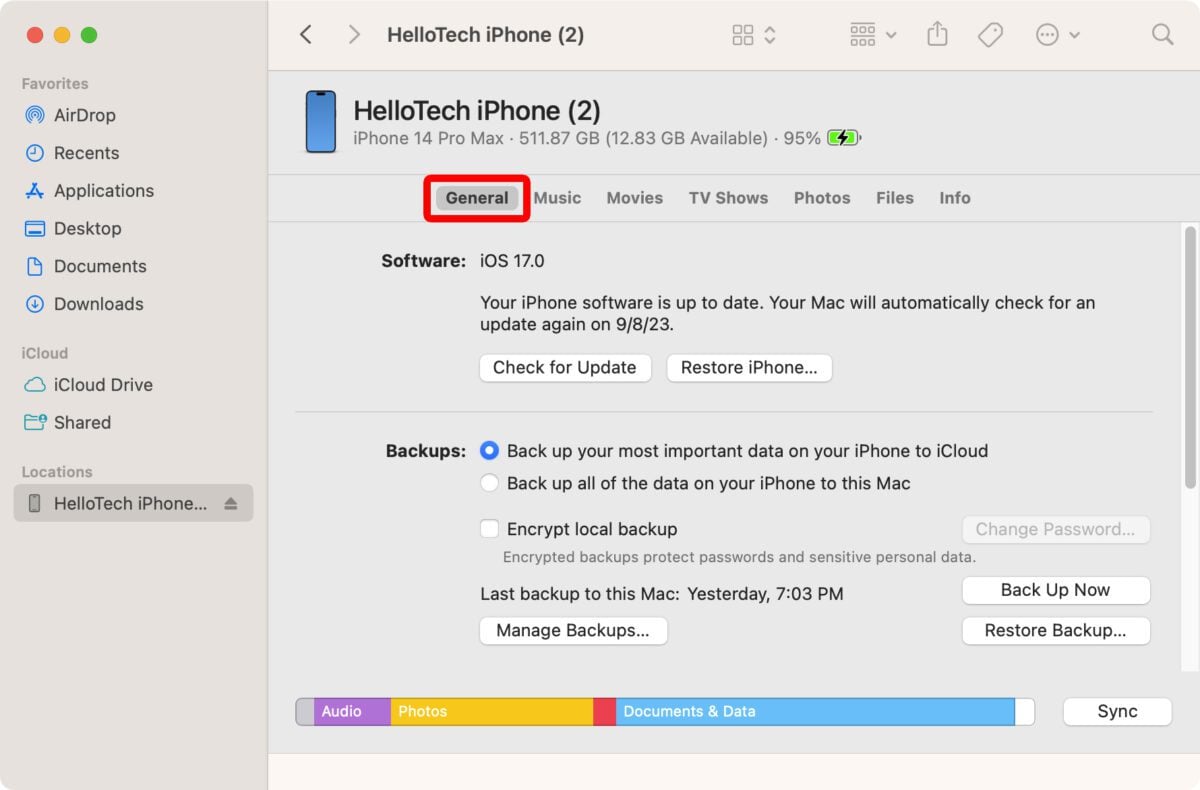
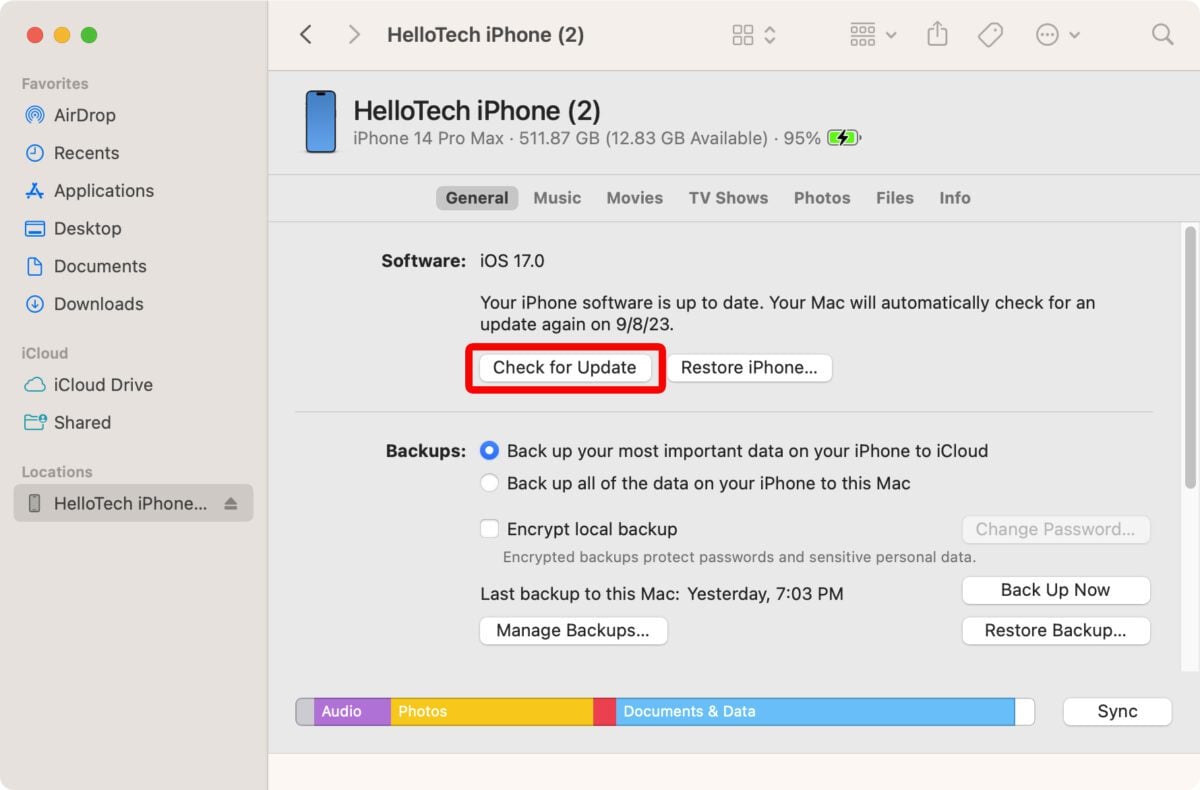
To update your iPhone on a Mac, plug your iPhone into your computer with a USB cable. Then open a Finder window and select your iPhone from the left sidebar. Next, select General > Check for Update > Download and Update.
- Plug your iPhone into your Mac. You can do this with a USB cable.
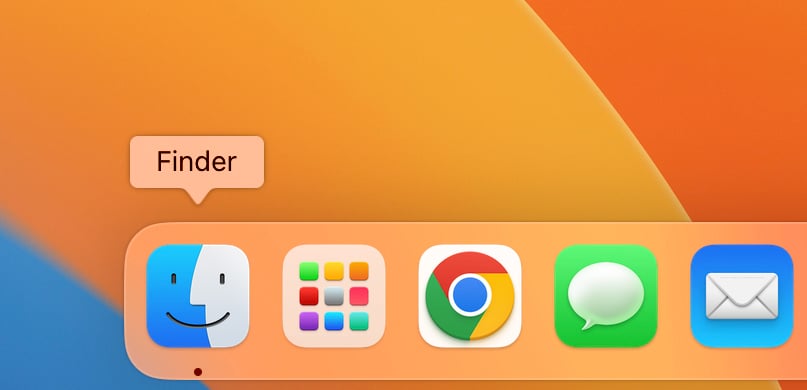
- Then open a Finder window. You can do this by clicking the half-blue, half-gray face icon in your dock. Or you can click any empty space on your desktop and press the Command + N keys on your keyboard at the same time.
- Next, select your iPhone from the left sidebar. Your iPhone should show up under Locations. If you don’t see it, scroll down to the bottom of the left sidebar. If you still don’t see it, click Finder in the menu bar at the top of your screen and select Preferences. Then click the Sidebar tab at the top of the pop-up window and check the box next to CDs, DVDs, and iOS Devices.
- Then select the General tab. You will see this near the top of the Finder window. However, your iPhone should open to this tab by default.
- Next, click Check for Update. This will tell you if there is an available update ready to download.
- Finally, click Download and Update. When asked to verify, click Update. It might take several minutes for the update to finish downloading and installing on your iPhone. Make sure that your iPhone stays connected to your Mac the entire time it is updating.
What To Do When Your iPhone Won’t Update
If your iPhone won’t update, make sure that you have a strong WiFi connection, there is enough free space on your iPhone, and that your battery is sufficiently charged. You can also restore or reset your iPhone and reinstall the update.
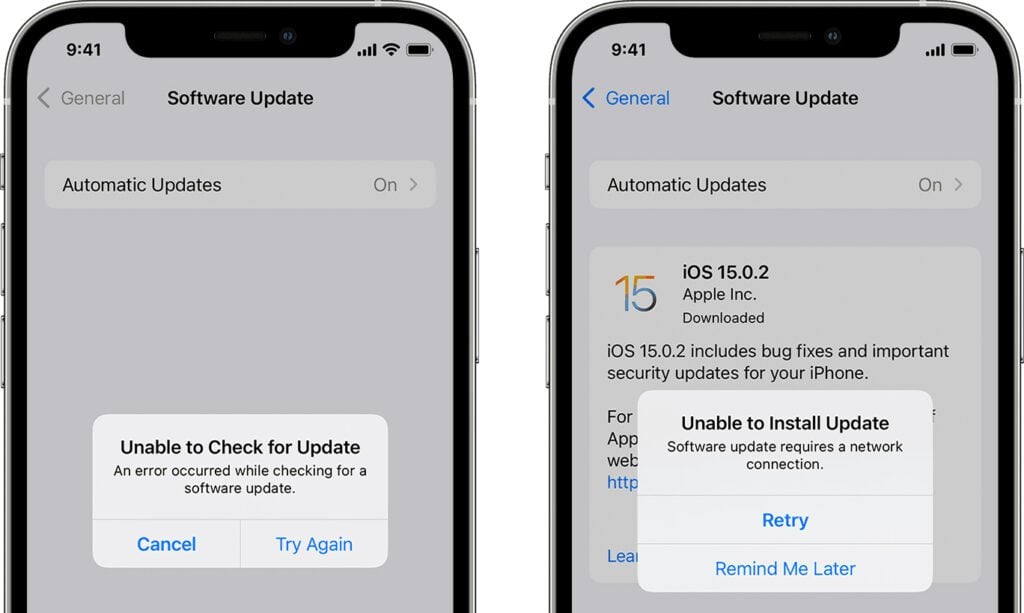
- Your WiFi connection isn’t strong enough. If you get a message that says, “Unable to Check for Update” or “Unable to Verify Update,” your WiFi connection might not be strong enough. You can either try again when you have a better connection, or you can change the WiFi network your iPhone is connected to by going to Settings > Wi-Fi.
Read More: How to test your WiFi speed
- Your iPhone doesn’t have enough free space. You might need several gigabytes of free space to download a software update. For example, the iOS 14 update was almost 3 GB large, and you might need even more space than that if you are updating from an older iOS. To free up space on your iPhone, go to Settings > General > iPhone Storage.
- Your iPhone battery is too low: You will need your battery to be at least 50% charged to update your iPhone properly. If your battery falls below that level, you might have to plug in your iPhone and try updating again.
- Restore your iPhone from a backup: If your iPhone still won’t update, you might want to consider restoring or resetting it. Restoring your iPhone will revert it back to a previous backup. That means you’ll have all the app data, settings, messages, photos, and purchased content, but it will take a while for your data to download.
Read More: How to restore your iPhone
- Reset your iPhone to factory settings. Resetting your iPhone will erase everything on your iPhone and revert it to factory settings. You can still recover your contacts, calendar, notes, and more through iCloud.
Read More: How to reset your iPhone
- Contact a professional: If all else fails, or you don’t want to deal with the hassle, HelloTech can help you fix your iPhone. Our experts can come to your door as soon as today to help you set up a new iPhone or troubleshoot any problems with your iPhone and any other devices.
HelloTech editors choose the products and services we write about. When you buy through our links, we may earn a commission.
